


Face milling
The first milling operation we should set up is, once again, face milling; in this case, we have to remove a layer of 1.5 mm on the top of the stock. We won’t cover this operation here since it is identical to the first one we introduced in Chapter 9; therefore, we may keep using the same tool and the same cutting parameters.
After the first facing, we should find something similar to this:
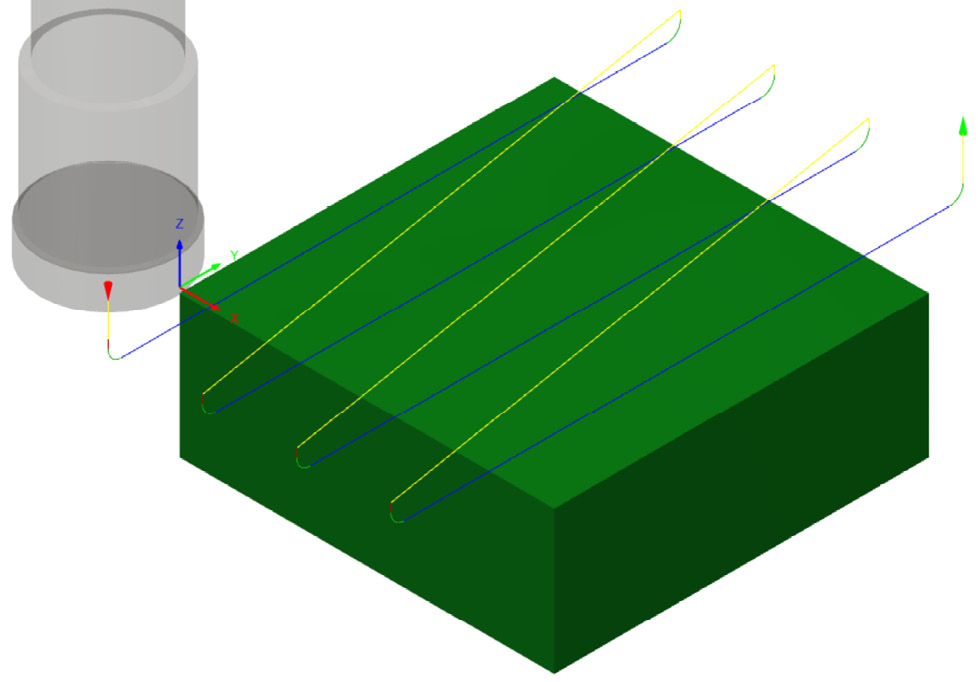
Figure 10.2: Face milling
As we can see, the diagram displays both the cutting tool and the generated toolpath for the first face milling I implemented. We already know every setting from Chapter 9; therefore, I won’t bother you with a recap of what we did last time. However, this time I changed something in the settings. Let’s try to discover what I changed just by looking at the toolpath:
- First of all, we can find an entry point close to the origin of the coordinate system, highlighted by the red cone pointed downward ...


