Search icon CANCEL
Subscription
0
Cart icon
Your Cart (0 item)
Close icon
You have no products in your basket yet
Save more on your purchases! discount-offer-chevron-icon
Savings automatically calculated. No voucher code required.
Arrow left icon
Explore Products
Best Sellers
New Releases
Books
Videos
Audiobooks
Learning Hub
Newsletter Hub
Free Learning
Arrow right icon
timer SALE ENDS IN
0 Days
:
00 Hours
:
00 Minutes
:
00 Seconds
Arrow up icon
GO TO TOP
Creating Development Environments with Vagrant Second Edition

You're reading from   Creating Development Environments with Vagrant Second Edition Leverage the power of Vagrant to create and manage virtual development environments with Puppet, Chef, and VirtualBox

Arrow left icon
Product type Paperback
Published in Mar 2015
Publisher
ISBN-13 9781784397029
Length 156 pages
Edition 2nd Edition
Tools
Concepts
Arrow right icon
Author (1):
Arrow left icon
MICHAEL KEITH PEACOCK MICHAEL KEITH PEACOCK
Author Profile Icon MICHAEL KEITH PEACOCK
MICHAEL KEITH PEACOCK
Arrow right icon
View More author details
Toc

Table of Contents (12) Chapters Close

Preface 1. Getting Started with Vagrant FREE CHAPTER 2. Managing Vagrant Boxes and Projects 3. Provisioning with Puppet 4. Using Ansible 5. Using Chef 6. Provisioning Vagrant Machines with Puppet, Ansible, and Chef 7. Working with Multiple Machines 8. Creating Your Own Box 9. HashiCorp Atlas A. A Sample LEMP Stack Index

Preparing the VirtualBox machine


In order to create the virtual machine with VirtualBox, we need to open the VirtualBox and click on the New button in the upper-left corner of the VirtualBox to start the process:

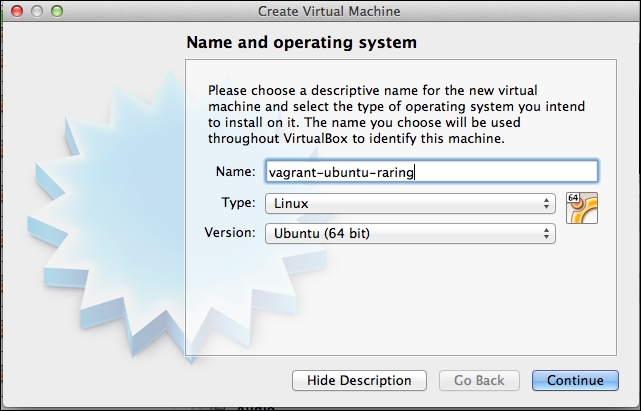
Let's name the machine vagrant-ubuntu-raring. This is the format recommended by Vagrant. Select Linux in the Type dropdown and Version as Ubuntu (64 bit):
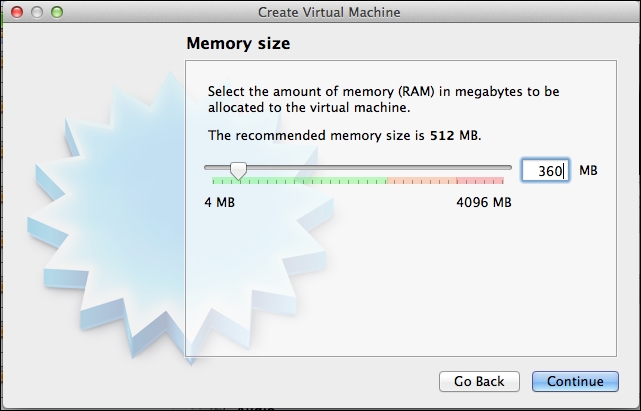
Vagrant recommends setting a memory allocation of 360 MB. This is typically sufficient for a base installation, and users can override this within their Vagrantfile if they need more resources:
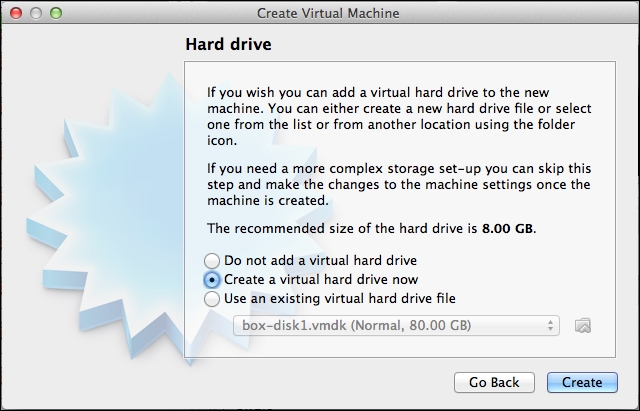
We need our virtual machine to have some storage allocation, so let's select Create a virtual hard drive now:
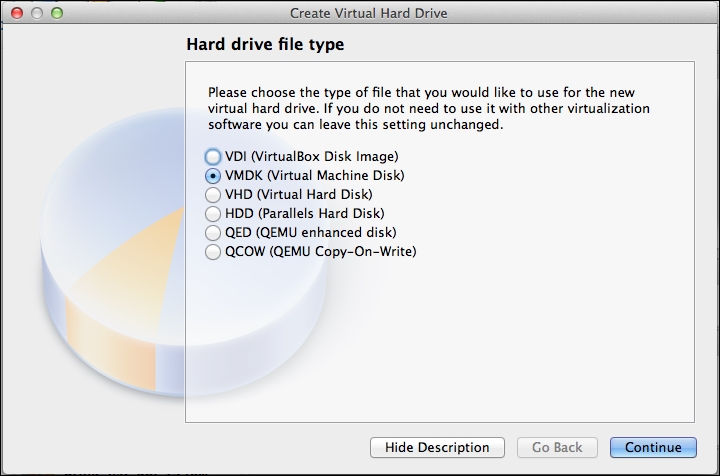
We need to select VMDK (Virtual Machine Disk) as the disk type:
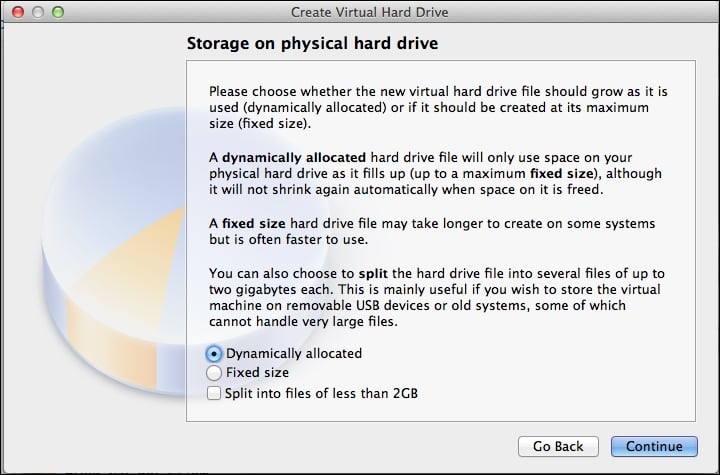
We need to create a drive, which is dynamically allocated:
Let's give the drive a maximum limit of 40.00 GB; the Vagrant documentation suggests that this is typically sufficient for many projects:
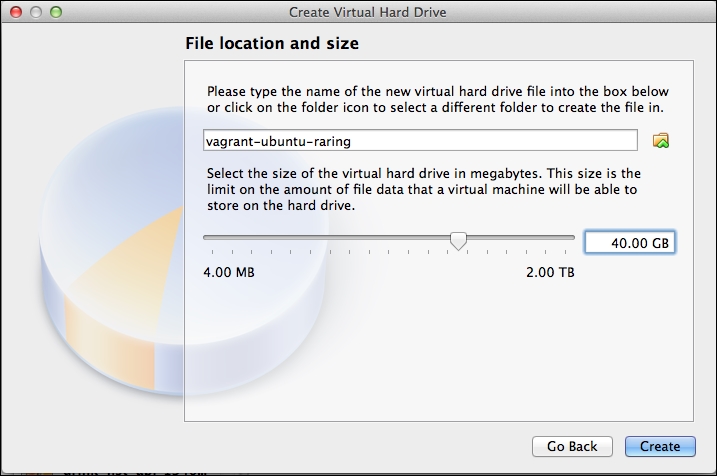
Clicking on Create will then save the virtual machine within VirtualBox. We...

lock icon The rest of the chapter is locked
Register for a free Packt account to unlock a world of extra content!
A free Packt account unlocks extra newsletters, articles, discounted offers, and much more. Start advancing your knowledge today.
Unlock this book and the full library FREE for 7 days
Get unlimited access to 7000+ expert-authored eBooks and videos courses covering every tech area you can think of
Renews at $19.99/month. Cancel anytime
Banner background image