Defining hard-surface objects in Blender
Now, it’s time to jump into Blender and look at some examples. As we stated in the previous section, hard-surface modeling is typically defined by features such as flat surfaces, sharp and straight edges, and multiple loose parts.
We are going to focus on hard-surface modeling, but it is important to understand the differences between the two modeling styles, so let’s go over those features one by one and compare them to organic modeling.
Edges
Figure 1.5 shows a side-by-side comparison of a hard-surface model (left) and an organic model (right):
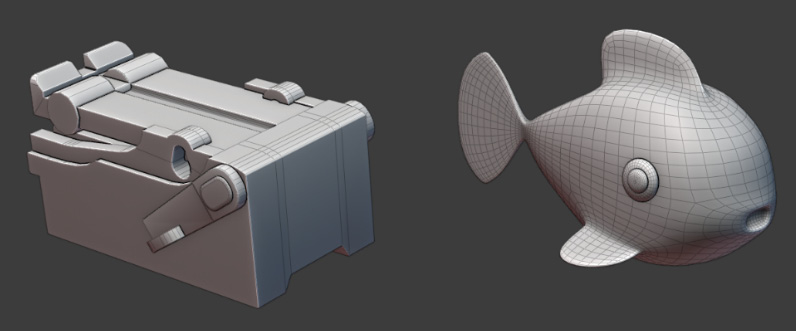
Figure 1.5 – A typical hard-surface model and an organic model
The first thing that identifies a hard-surface object is the sharpness of its edges. We don’t see any sharp edges on the right-hand object. Instead, every edge appears to flow and bend smoothly. Most of the time, edges on hard-surface models will also have thin bevels.
A bevel is a slightly rounded edge that looks as though it has been sanded and smoothed. This adds a touch of realism since there are no perfectly sharp edges in real life. Figure 1.6 shows an object with and without beveled edges:
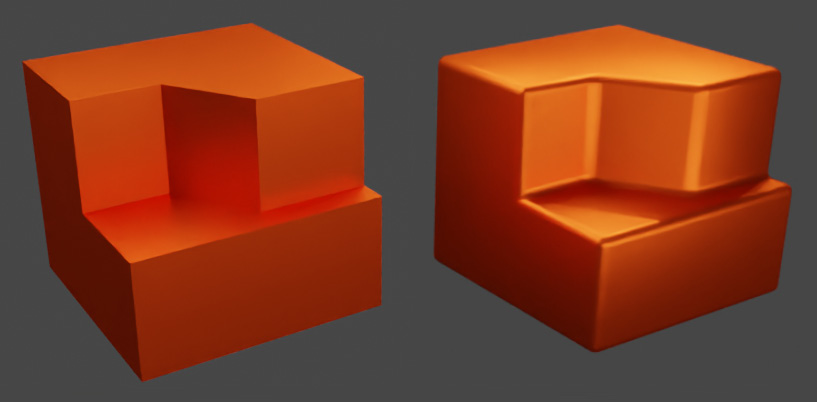
Figure 1.6 – An object with and without beveled edges
Bevels are used to simulate real edges in 3D, and they also affect how light reflects from the edges to allow for realistic rendering. In game development, bevels are often avoided because they cost a lot, meaning that they add a lot of polygons to the model, which makes them harder to render.
Because of their high cost, bevels are often baked as normal maps so that they are visible on the surface, but they aren’t part of the 3D model. Apart from realism, bevels can also be useful in many other ways, as we will see later in our modeling projects.
Surfaces
Unlike organic models, hard-surface models tend to have a lot of flat surfaces. This is different from organic models because most organic surfaces appear soft and curvy. Organic surfaces consist of many smaller faces with slight angular differences between them, which create the lattice-like pattern on the mesh. This lattice pattern is usually a dead giveaway of an organic-style surface.
Of course, this doesn’t mean that we will never see a curvy surface on a hard-surface model. Figure 1.7 shows a tank turret made with two different modeling styles:
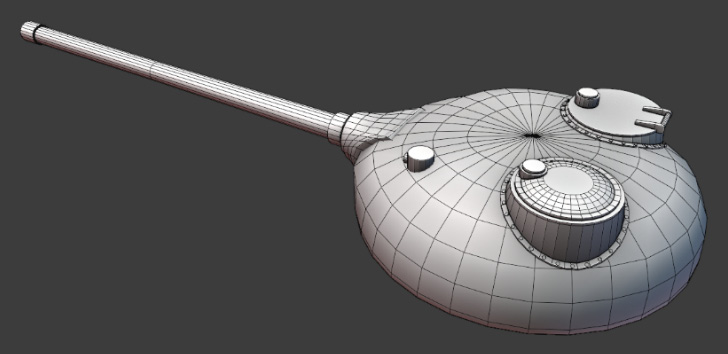
Figure 1.7 – A hard-surface tank turret with a lattice pattern
This tank turret is a good example of a hard-surface object with an organic-like surface. It is most definitely a hard-surface object, but the mesh pattern looks a lot like something you would see on an organic model. Because of this, when modeling the tank turret, we can use tools that we would normally use for organic modeling.
Proportional Editing is an example of a tool that’s typically used in organic-style modeling because of how it changes the surface. It can also be used to model a hard-surface object, such as the tank turret in Figure 1.7. Proportional Editing is a polygon modeling tool that allows us to control how much an action influences polygons or objects around the one we selected. We can use it if we want to create a smooth bump on a surface, as shown here:
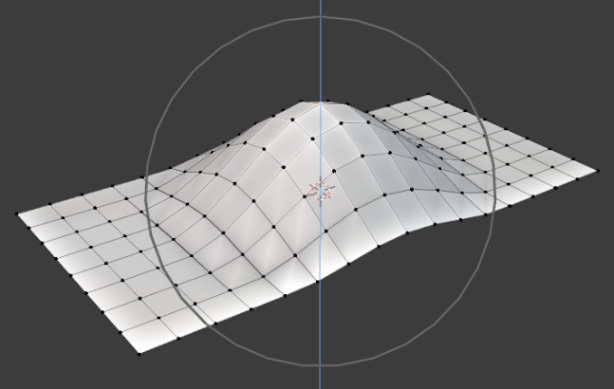
Figure 1.8 – Proportional Editing
When we select a vertex and move it up with Proportional Editing enabled, the other vertices around it will also move, but not as much as the one we selected. They will be influenced proportionally by how close they are to the center of the gray circle, as shown in Figure 1.8. Anything outside the circle will not be influenced. This looks like an organic surface, but let’s see how it can be used on a hard-surface model.
We can use Proportional Editing if we want to deform the tank turret to make it slightly pointier in the front. The tool can be activated by clicking on the Proportional Editing Objects button in the top middle of our screen in our 3D viewport window, as shown here:

Figure 1.9 – Activating Proportional Editing
Then, we can select any vertex in the front of the turret and scale it down on the Y axis, as shown here:
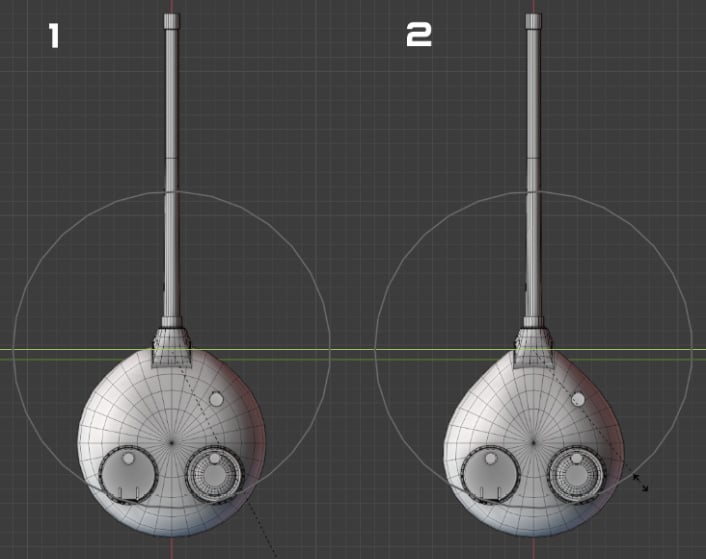
Figure 1.10 – Using Proportional Editing on a tank turret
This will cause other vertices around it to come closer and create a pointier shape. From this example, it is important to remember that while an object does have a hard surface, organic modeling tools can still be useful.
Edge loops
Another feature typical of hard-surface modeling that we haven’t mentioned yet is the non-continuity of the Edge Loops. An Edge Loop is a generally continuous line of edges. In theory, loops should be connected end to end, but even when this is not the case, we can select a line of edges, vertices, or faces in the section where they are continuous.
This can be observed by using the Select Loop tool in Blender. We can select a loop by hovering over an edge and holding Alt while selecting it with the left mouse button. On a typical hard-surface model, most edge loops are going to be short and unconnected.
As shown in Figure 1.11, when we select a random edge loop, most of the time, only a few edges, vertices, or faces will be selected. At the end of the selection, the loop breaks down into different elements because of the sharp edges that are typical of hard-surface modeling:
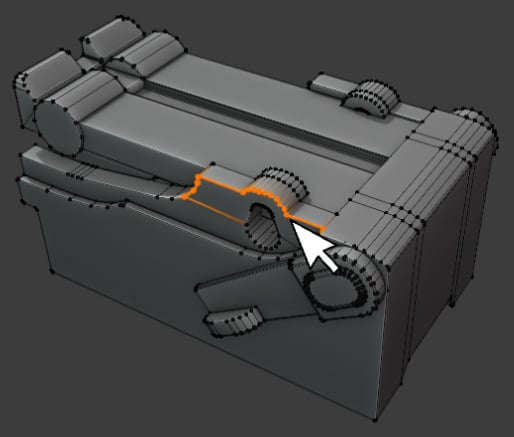
Figure 1.11 – Typical hard-surface edge loop
On an organic model, the Select Loop tool would give us different results, as shown here:
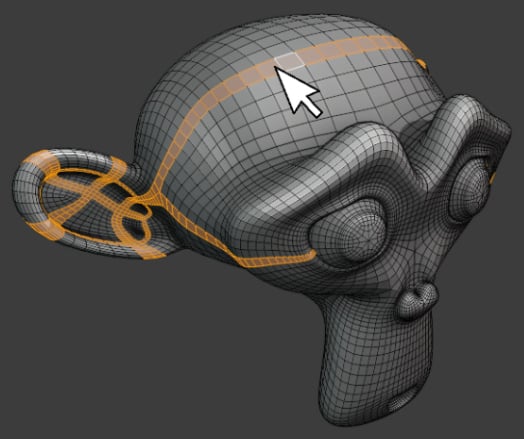
Figure 1.12 – Continuous edge loop
The selection is long and usually continuous, meaning that the selection has no beginning or end. Sometimes, the selection is surprisingly intricate, as you can see on the ear of the subdivided Suzanne.
Loose parts
Another interesting thing that is common to hard-surface objects (and less common on organic ones) is that most of the time, the object will consist of several loose parts. Loose parts are individual items with fully connected geometry. Figure 1.13 shows an exploded view of a hard-surface object with all its loose parts separated:
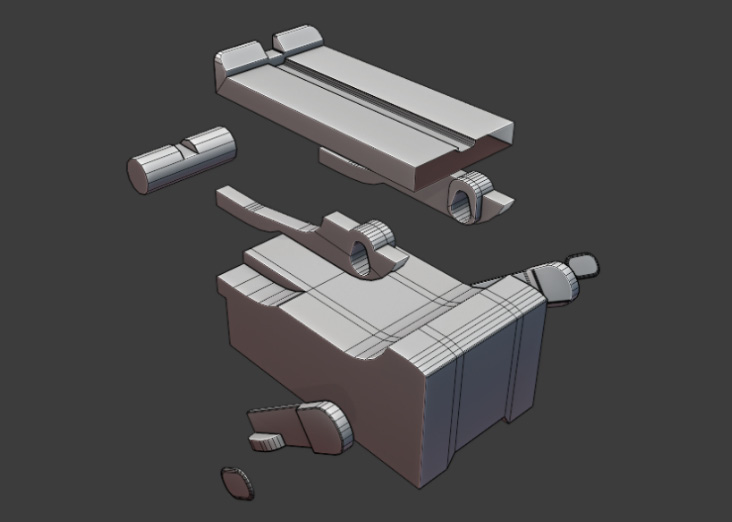
Figure 1.13 – Loose parts
If we select any face on an object and move it, the face will pull a few other connected faces with it. This will deform the mesh, creating an unwanted result, as shown here:
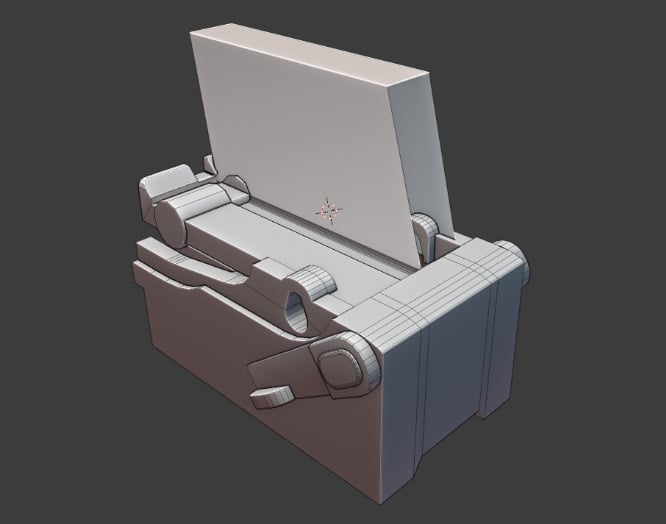
Figure 1.14 – Deformed mesh
To prevent this, we must select all the polygons that are connected so that nothing is deformed when we move the selection. This can be selected instantly by hovering over a vertex, edge, or face and pressing the L key in Edit Mode.
The letter L stands for Linked and commands the selection of all vertices, edges, and faces that are connected to the loose object. Figure 1.15 shows a selected and separated loose part:
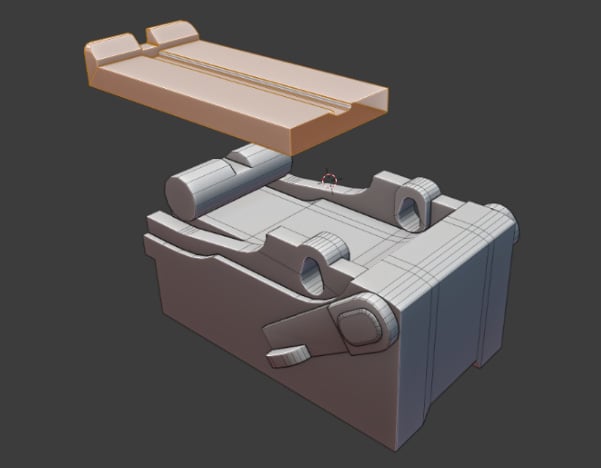
Figure 1.15 – Separating a loose part
With that, we’ve gone over some technical differences between hard-surface and organic modeling, and we have a clearer image of what exactly hard-surface modeling means. Now, let’s learn how to start a hard-surface modeling project by developing a simple workflow template.


