Configuring virtual networks for an Azure Data Lake account using the Azure portal
A storage account can be public which is accessible to everyone, public with access to an IP or range of IPs, or private with access to selected virtual networks. In this recipe, we'll learn how to restrict access to an Azure storage account in a virtual network.
Getting ready
Before you start, perform the following steps:
- Open a web browser and go to the Azure portal at https://portal.azure.com.
- Make sure you have an existing storage account. If not, create one using the Provisioning an Azure storage account using the Azure portal recipe in Chapter 1, Creating and Managing Data in Azure Data Lake.
How to do it…
To restrict access to a virtual network, follow the given steps:
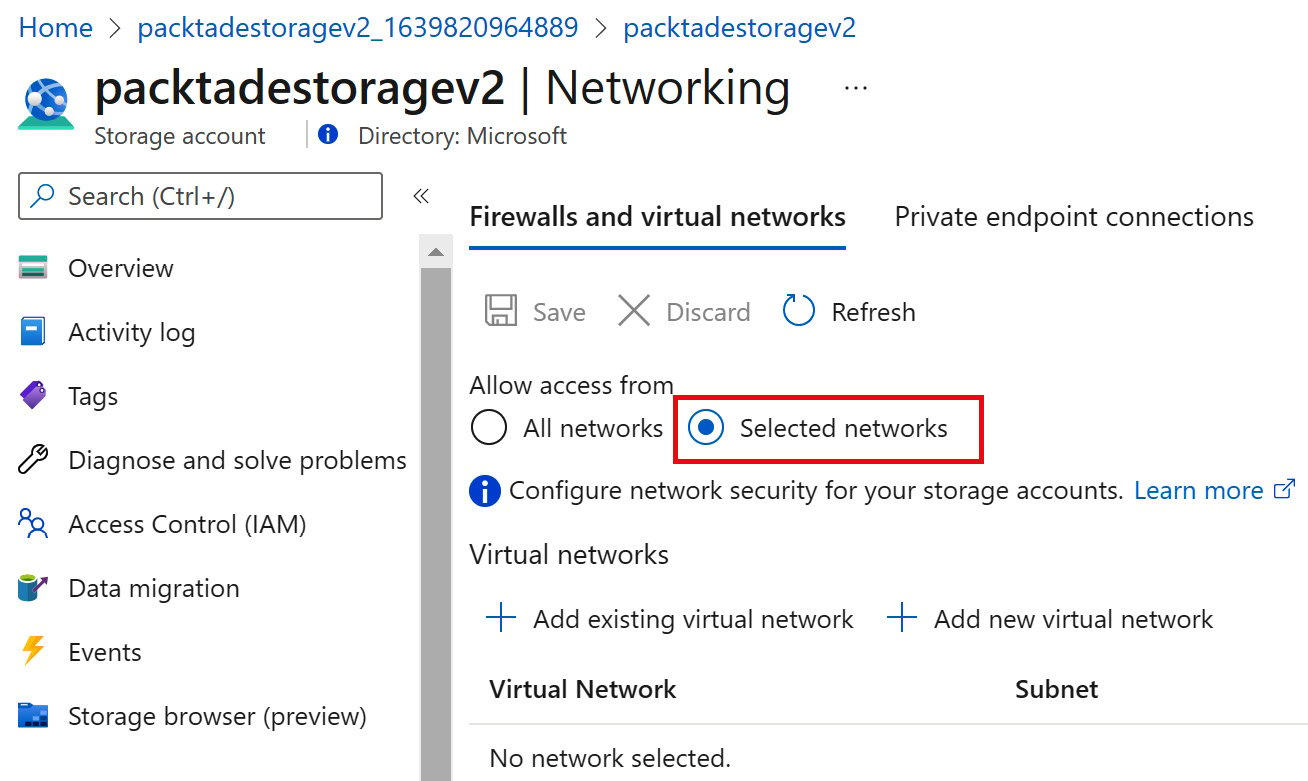
- In the Azure portal, locate and open the storage account. In our case, it's packtadestoragev2. On the storage account page, in the Security + Network section, locate and select Firewalls and virtual networks | Selected networks:

Figure 2.3 – Azure Storage – Selected networks
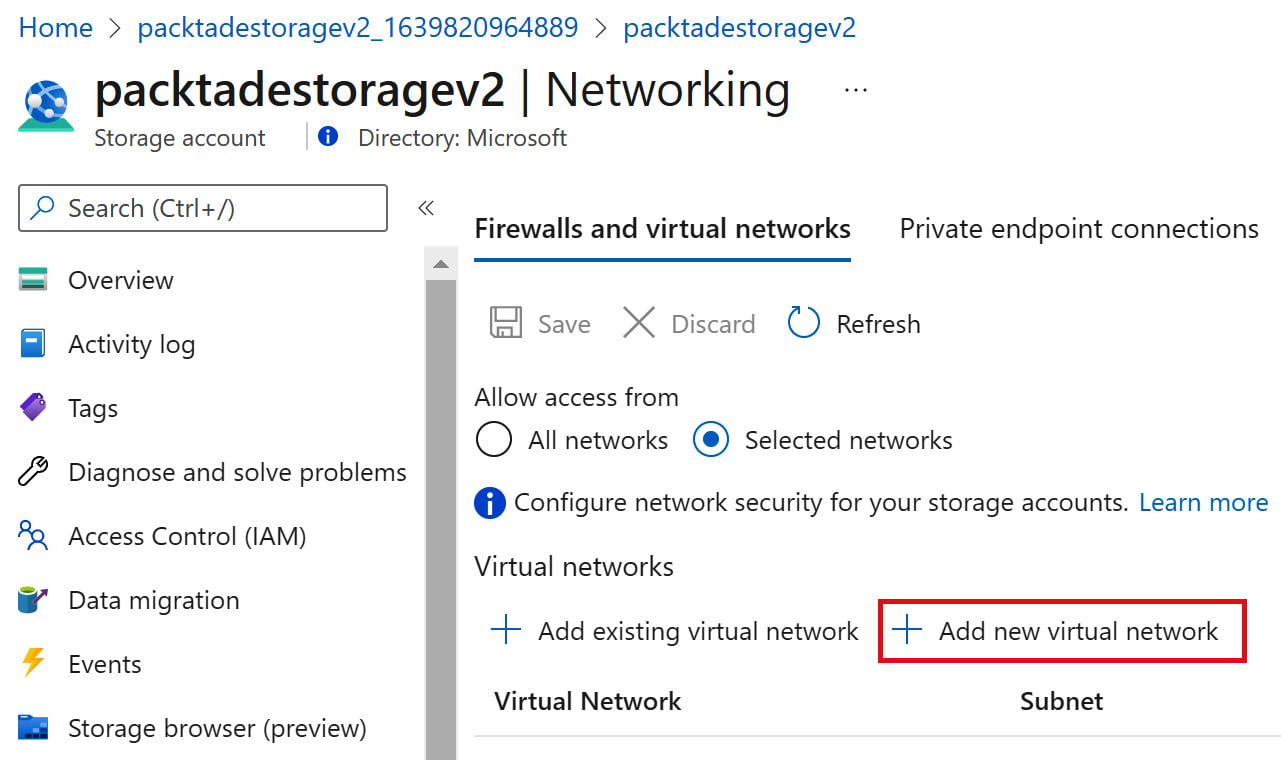
- In the Virtual networks section, select + Add new virtual network:

Figure 2.4 – Adding a virtual network
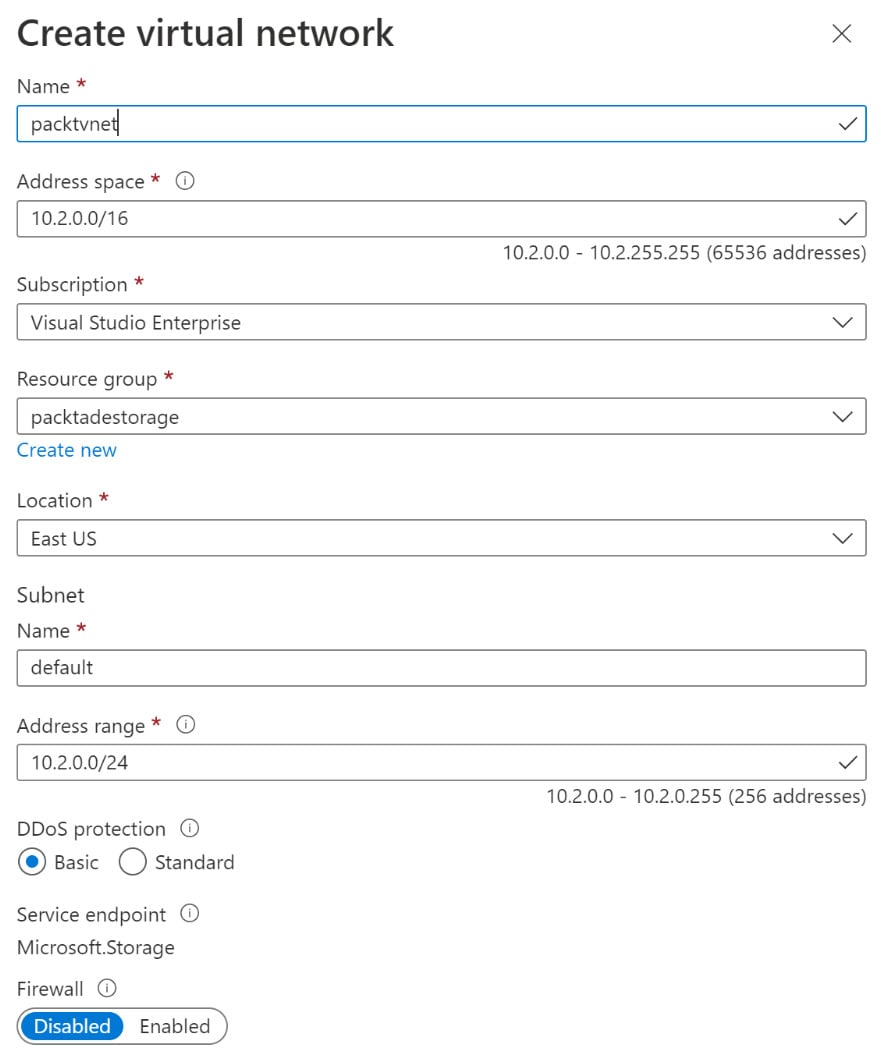
- In the Create virtual network blade, provide the virtual network name, Address space details, and Subnet address range. The remainder of the configuration values are pre-filled, as shown in the following screenshot:

Figure 2.5 – Creating a new virtual network
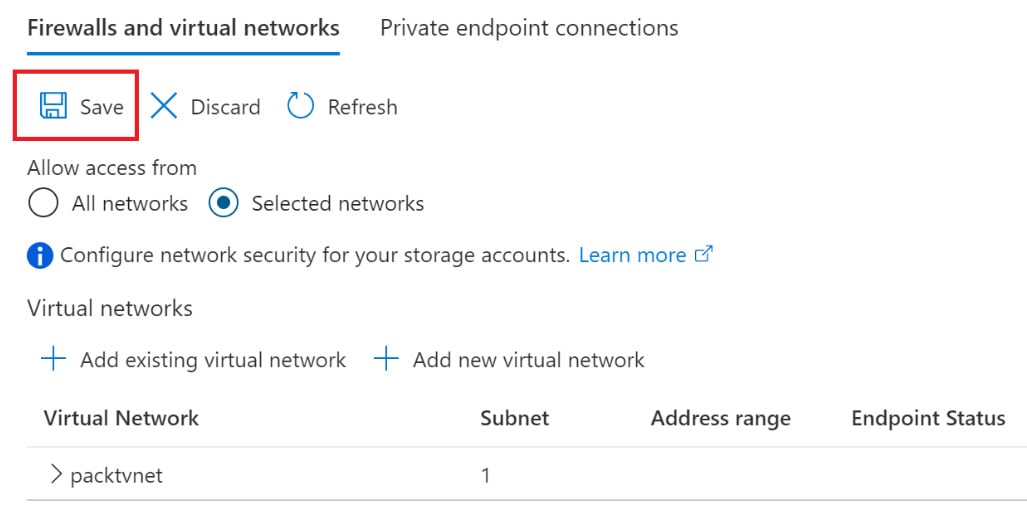
- Click on Create to create the virtual network. This is created and listed in the Virtual Network section, as shown in the following screenshot:

Figure 2.6 – Saving a virtual network configuration
- Click Save to save the configuration changes.
How it works…
We first created an Azure virtual network and then added it to the Azure storage account. Creating the Azure virtual network from the storage account page automatically fills in the resource group, location, and subscription information. The virtual network and the storage account should be in the same location.
The address space specifies the number of IP addresses in a given virtual network.
We also need to define the subnet within the virtual network that the storage account will belong to. We can also create a custom subnet. In our case, for the sake of simplicity, we have used the default subnet.
This allows the storage account to only be accessed by resources that belong to the given virtual network. The storage account is inaccessible to any network other than the specified virtual network.


