Working with Materials
The previous chapter closed by creating a coin object from a non-uniformly scaled cylinder primitive, as shown in Figure 2.1:
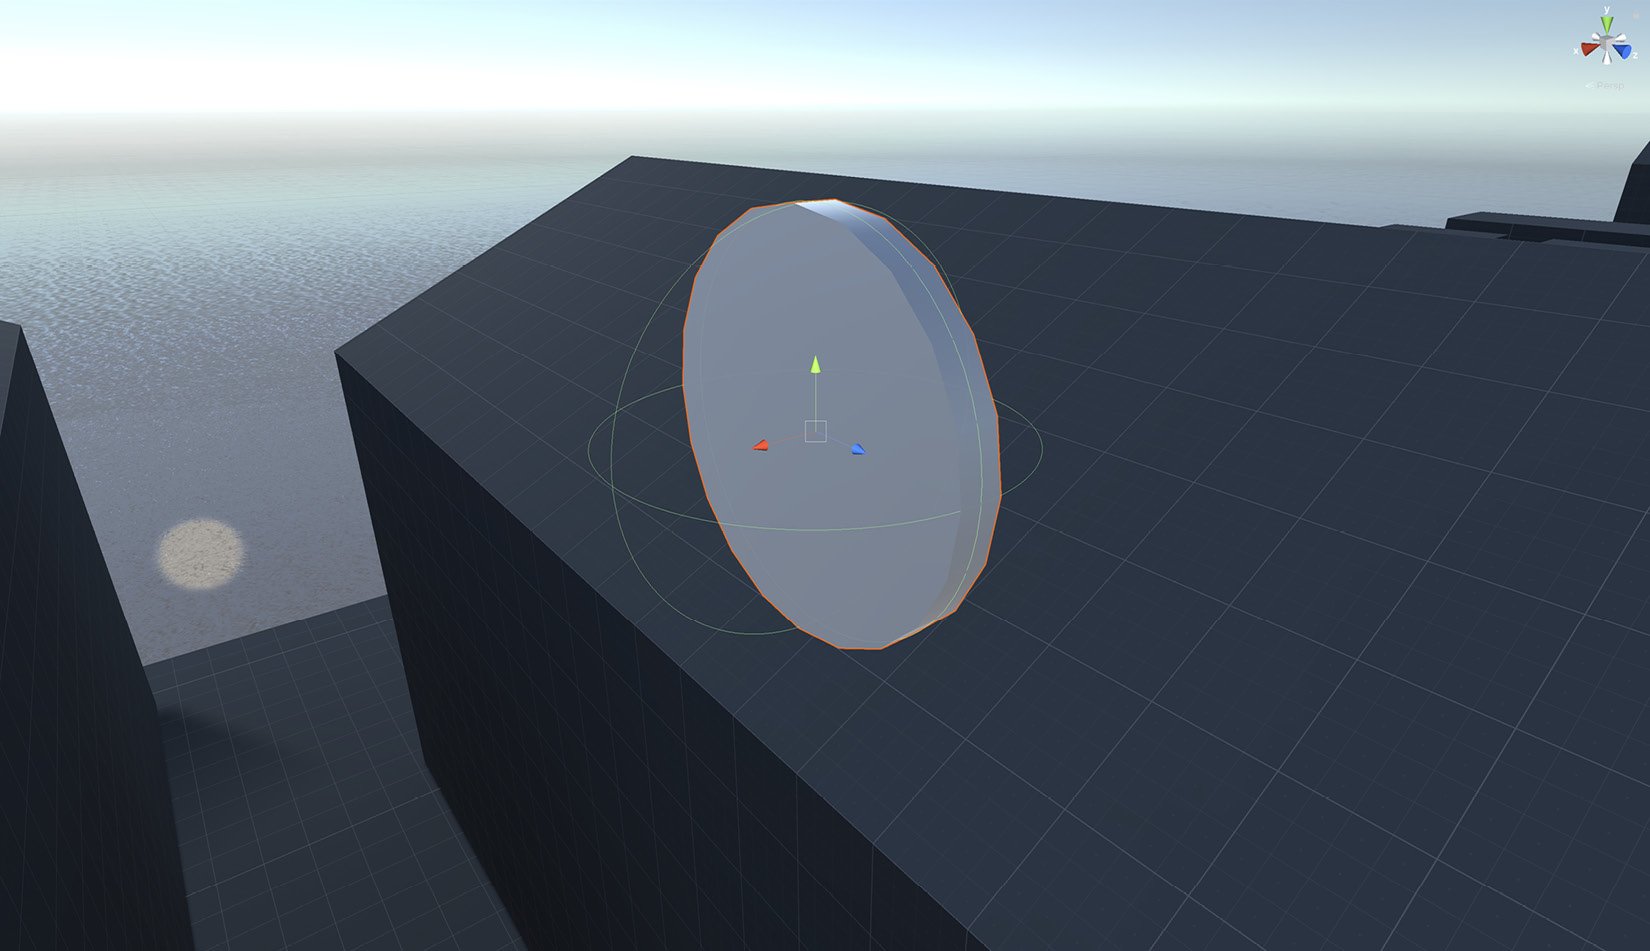
Figure 2.1 – The coin object so far
The coin object, as a concept, represents a basic or fundamental unit in our game logic because the player character should be actively searching the level looking for coins to collect before a timer runs out. The coin has a functional purpose in this game and is not just an aesthetic prop. Therefore, the coin object, as it stands, is lacking in two essential respects. Firstly, it looks dull and gray—it doesn't stand out and grab the player's attention. Secondly, the coin cannot be collected yet. The player can walk into the coin, but nothing appropriate happens in response.
In this section, we'll focus on improving the coin appearance using a Material. A Material defines an algorithm (or instruction set) specifying how the coin should be rendered. A Material doesn't just say what the coin should look like in terms of color; it defines how shiny or smooth a surface is, as opposed to being rough and diffuse. This is important to recognize and is why the terms texture and Material refer to different things. A texture is an image file loaded in memory, which can be wrapped around a 3D object via its UV mapping. In contrast, a Material defines how one or more textures can be combined and applied to an object to shape its appearance. So now we know the difference, let's create a Material to make the coin objects look more realistic.
Creating a coin Material
To create a new Material asset in Unity, do the following:
- Right-click on an empty area in the Project panel.
- From the context menu, choose Create | Material. You can also choose Assets | Create | Material from the application menu:
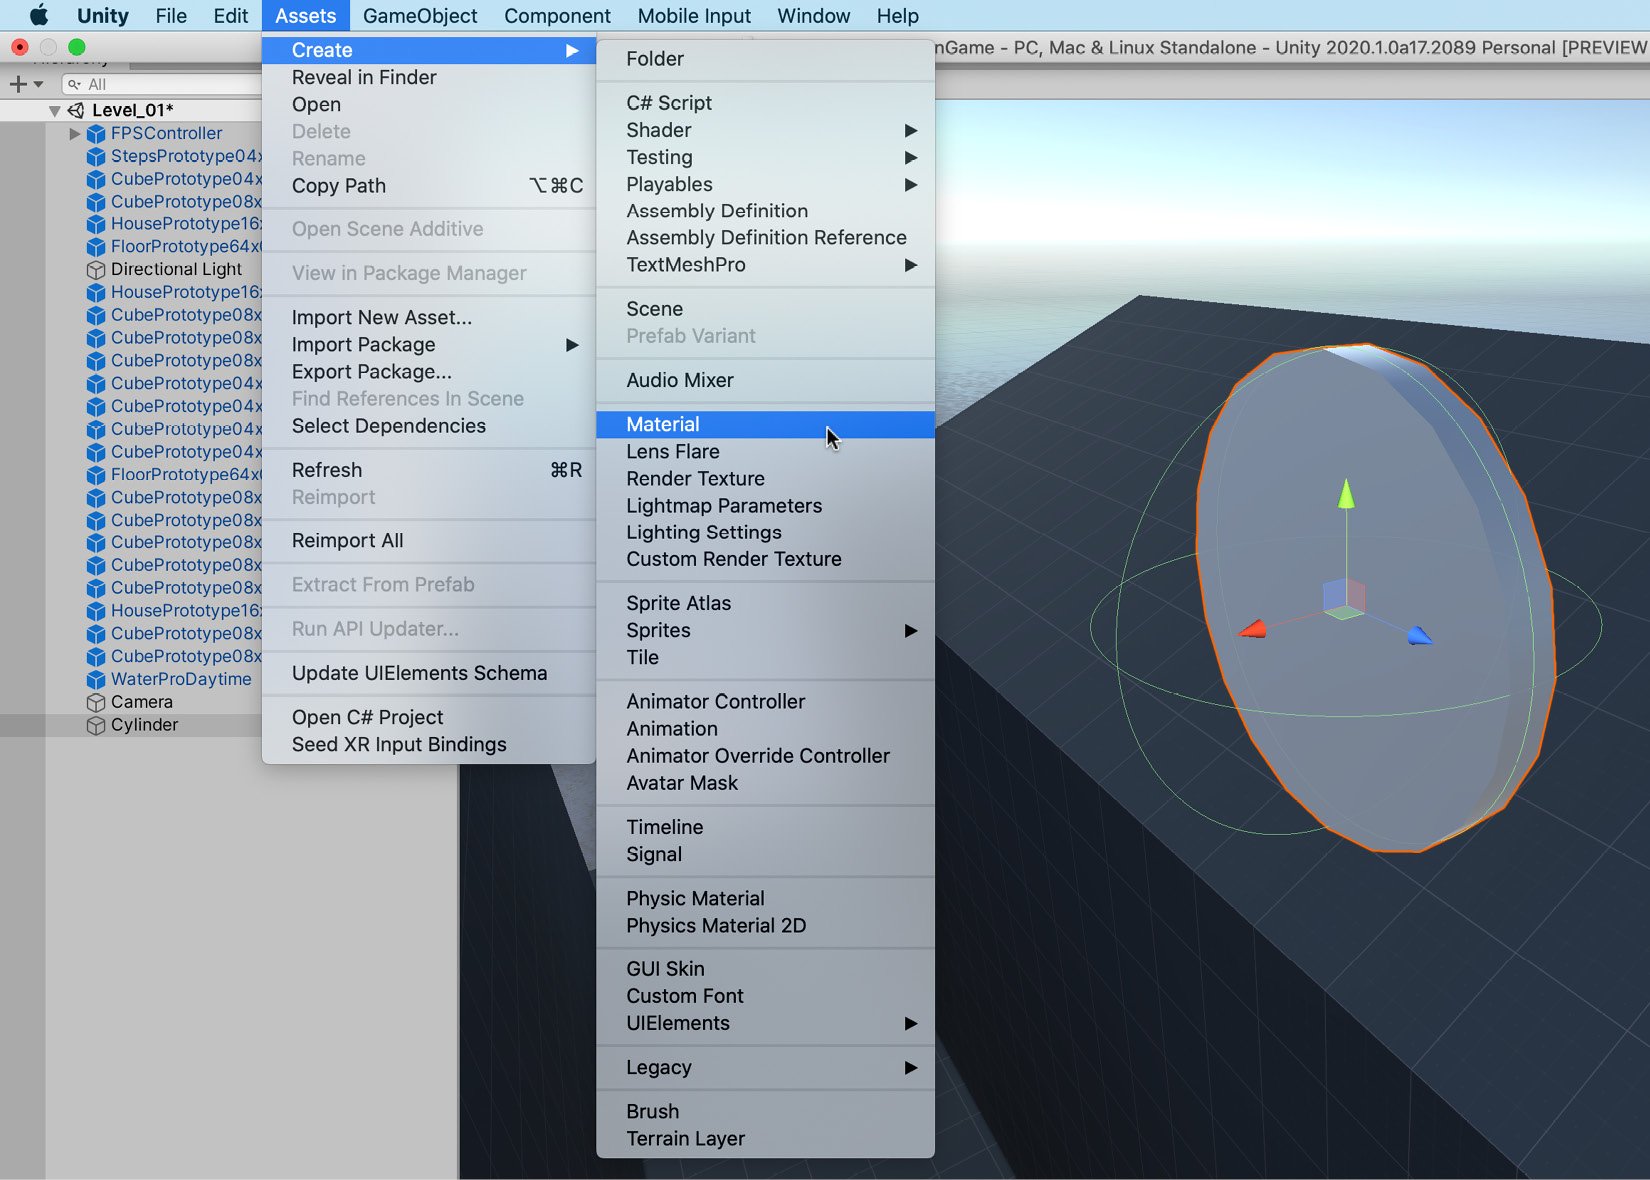
Figure 2.2 – Creating a Material
Important note
A Material is sometimes called a Shader. If needed, you can create custom Materials using a Shader language or you can use a Unity add-on, such as Shader Forge.
After creating a new Material, do the following:
- Assign it an appropriate name from the Project panel. As I'm aiming for a gold look, I've named the Material
GoldCoin. - Create a folder to store the Material (if not already present) by right-clicking in the Assets folder and selecting Create | Folder. Name the folder
Materials. - Move the Material to the newly created
Materialsfolder.
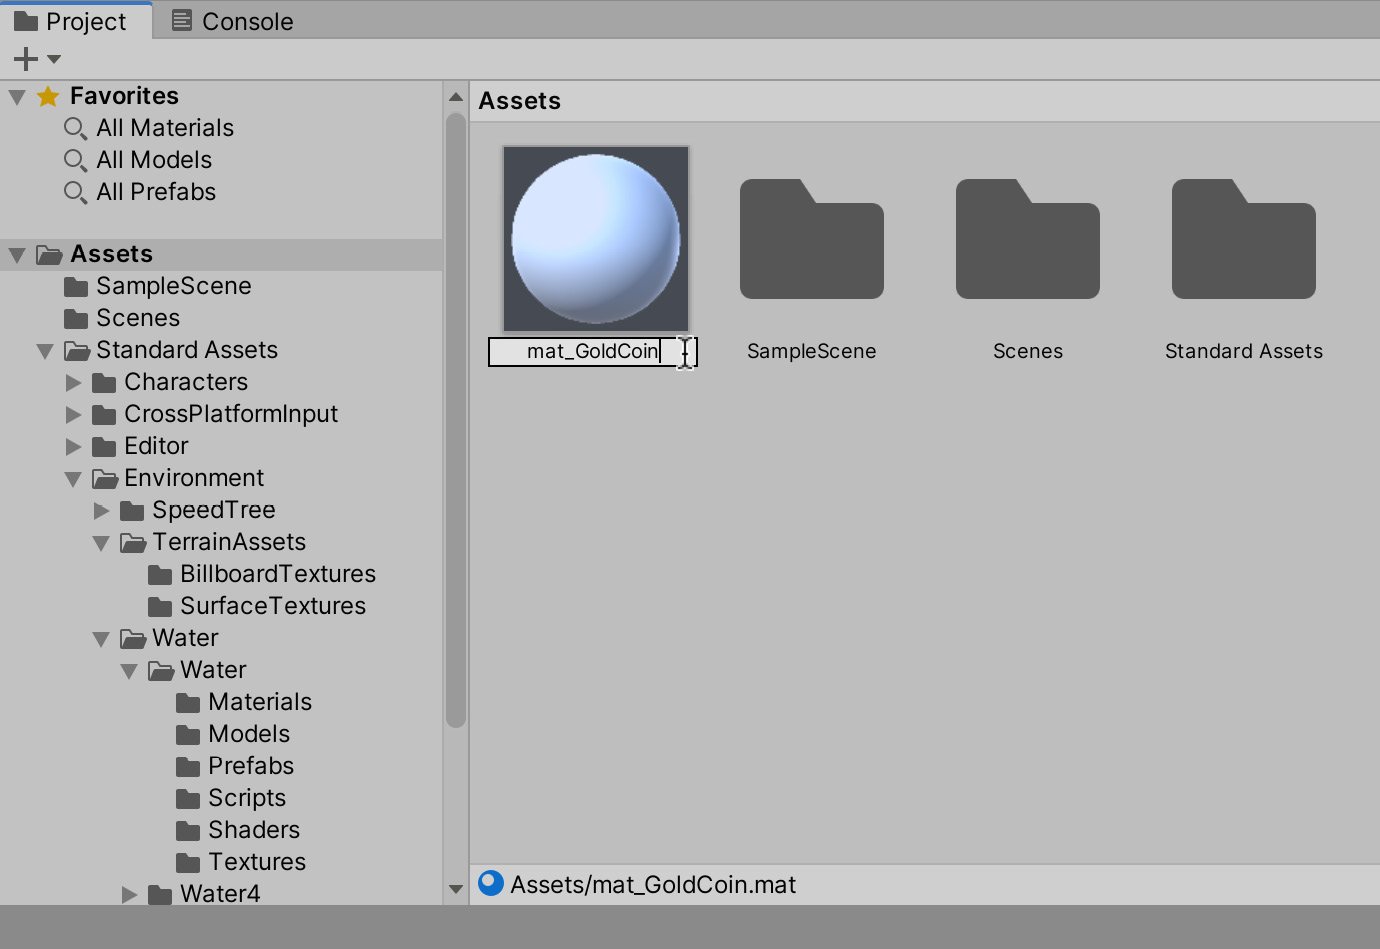
Figure 2.3 – The new Material asset
We now have a generic Material that we can edit to suit our purposes; now, let's edit the Material.
Editing the Material
To edit the Material, first, select the Material asset in the Project panel to display its properties in the Inspector. Several properties will be listed in the Inspector, as well as a preview. The preview shows you how the Material would look, based on its current settings, applied to a 3D object. As you change the Material's settings from the Inspector, the Preview panel updates automatically to reflect your changes, offering instant feedback on how the Material would look:
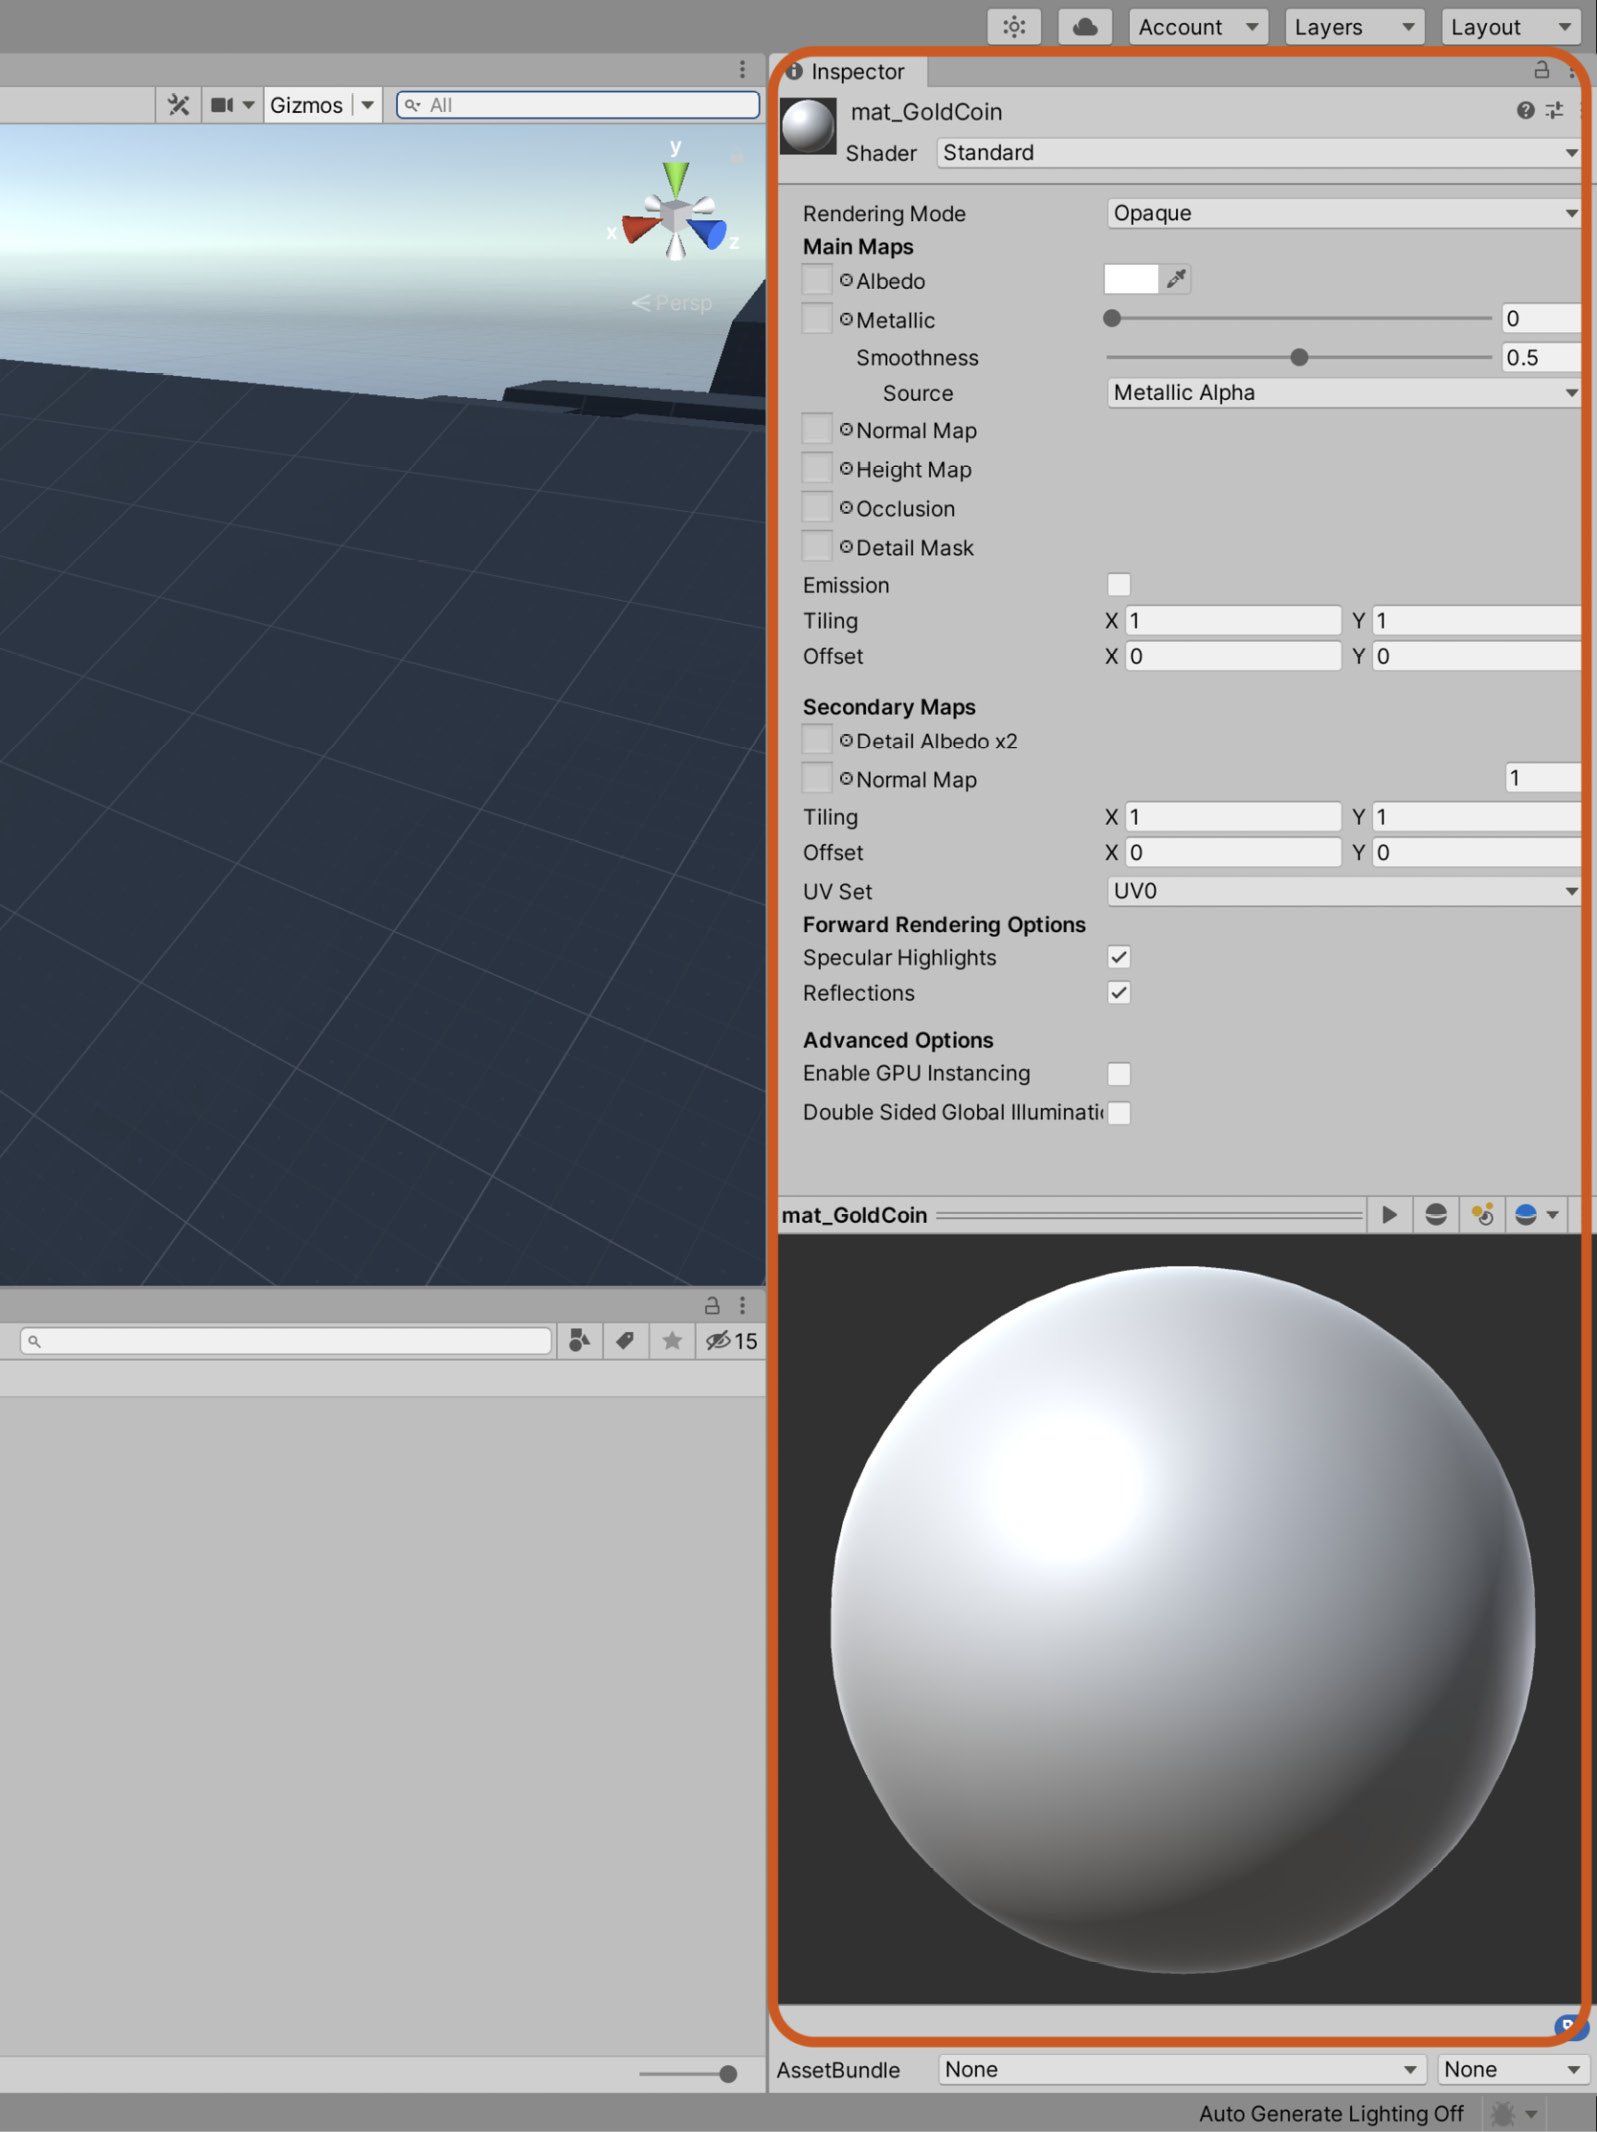
Figure 2.4 – Material properties are changed from the object Inspector
We'll edit these properties to create a gold Material for the coin. When creating any Material, the first setting to choose is the Shader type because this setting affects all other parameters available to you. The Shader type determines which algorithm will be used to shade your object. There are many different choices, but most Material types can be approximated using either Standard or Standard (Specular setup). For the gold coin, we can leave Shader as Standard:
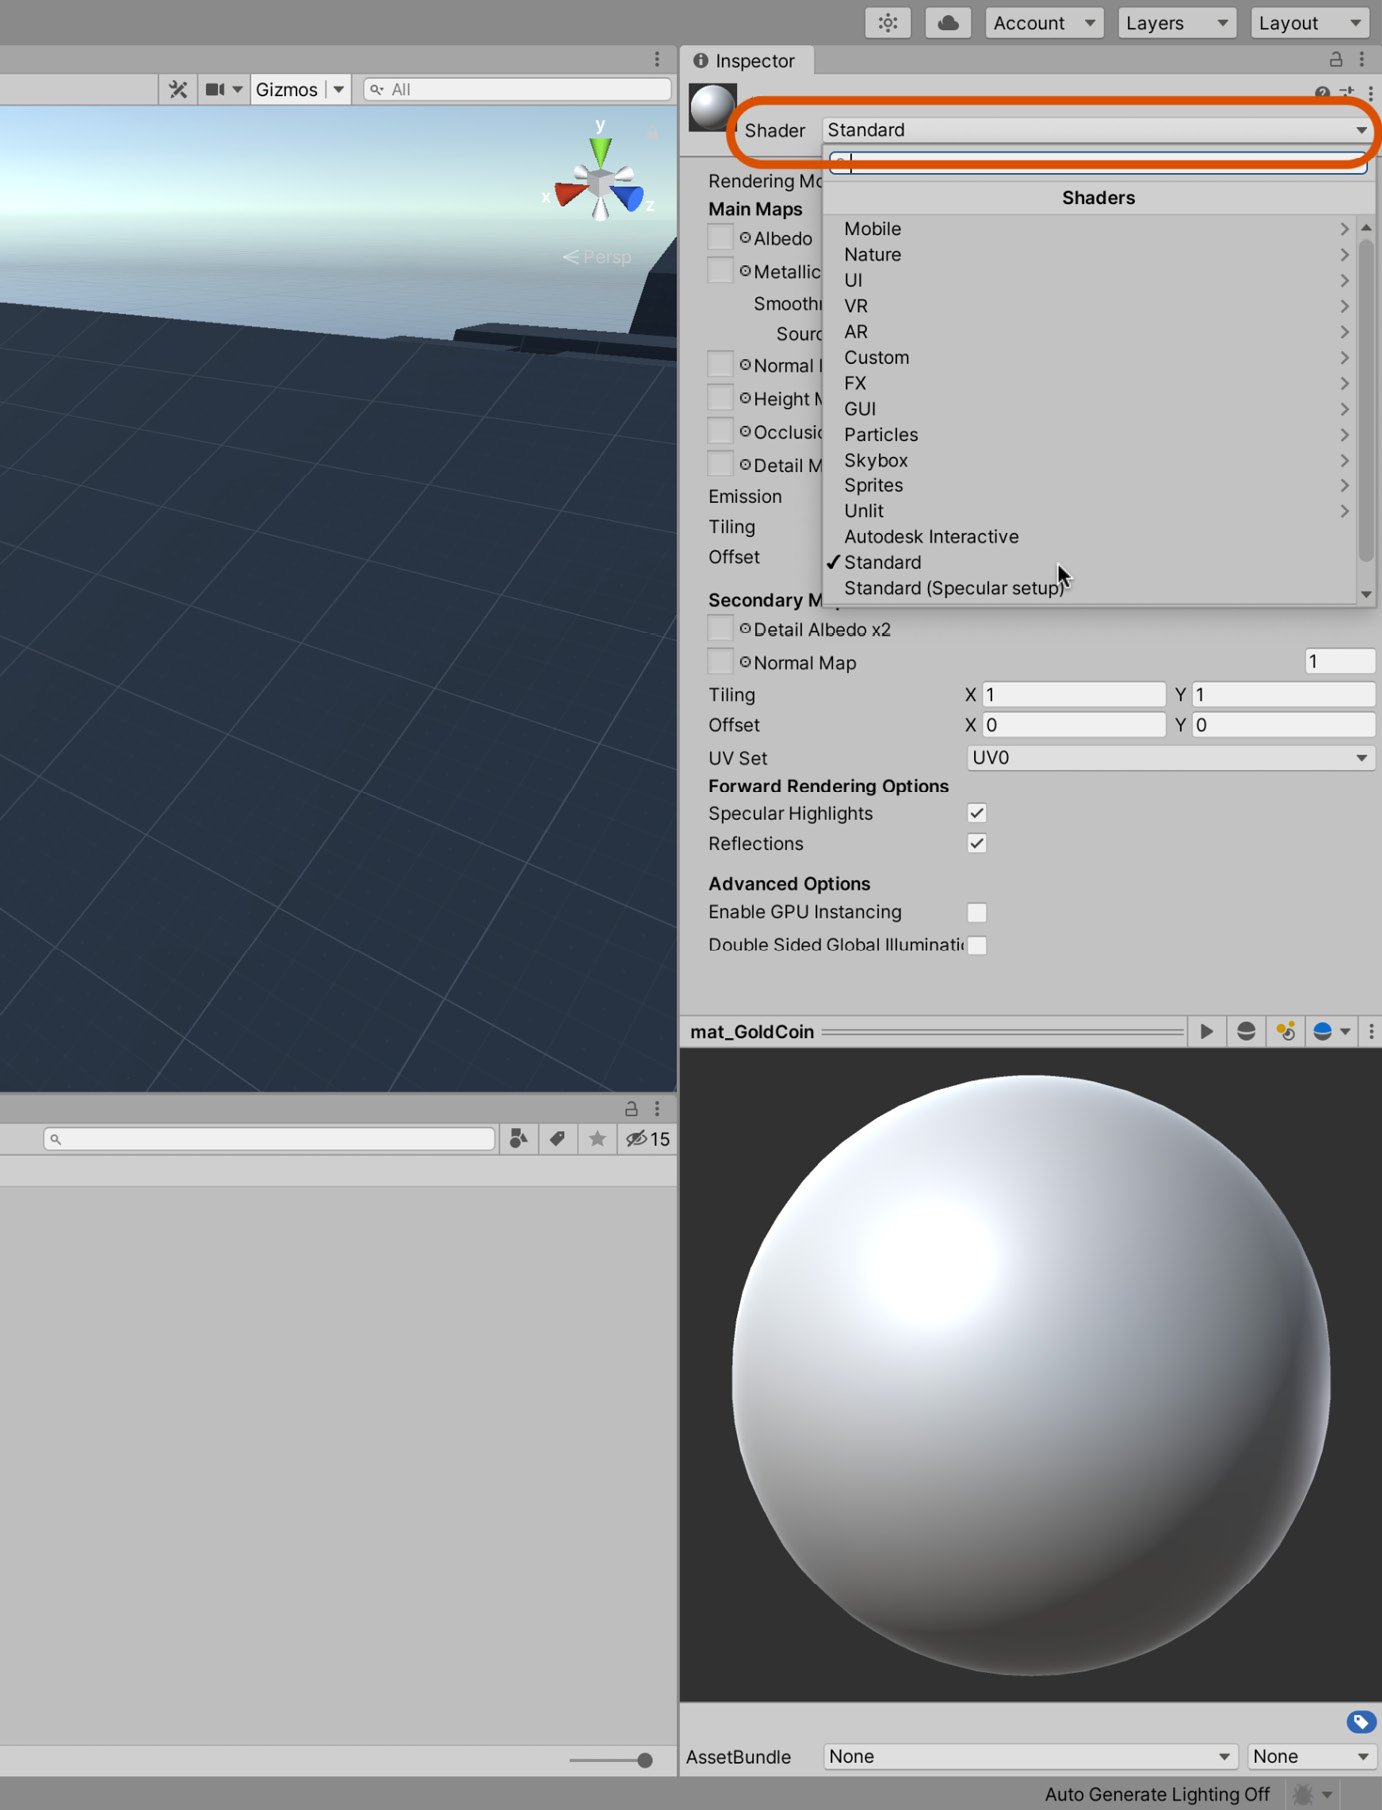
Figure 2.5 – Setting the Material Shader type
Right now, the Preview panel displays the Material as a dull gray, which is far from what we need. To define a gold color, we must specify the Albedo color. To do this, take the following steps:
- Click on the Albedo color slot to display a color picker.
- From the color picker dialog, select a gold color. The Material preview updates in response to reflect the changes:
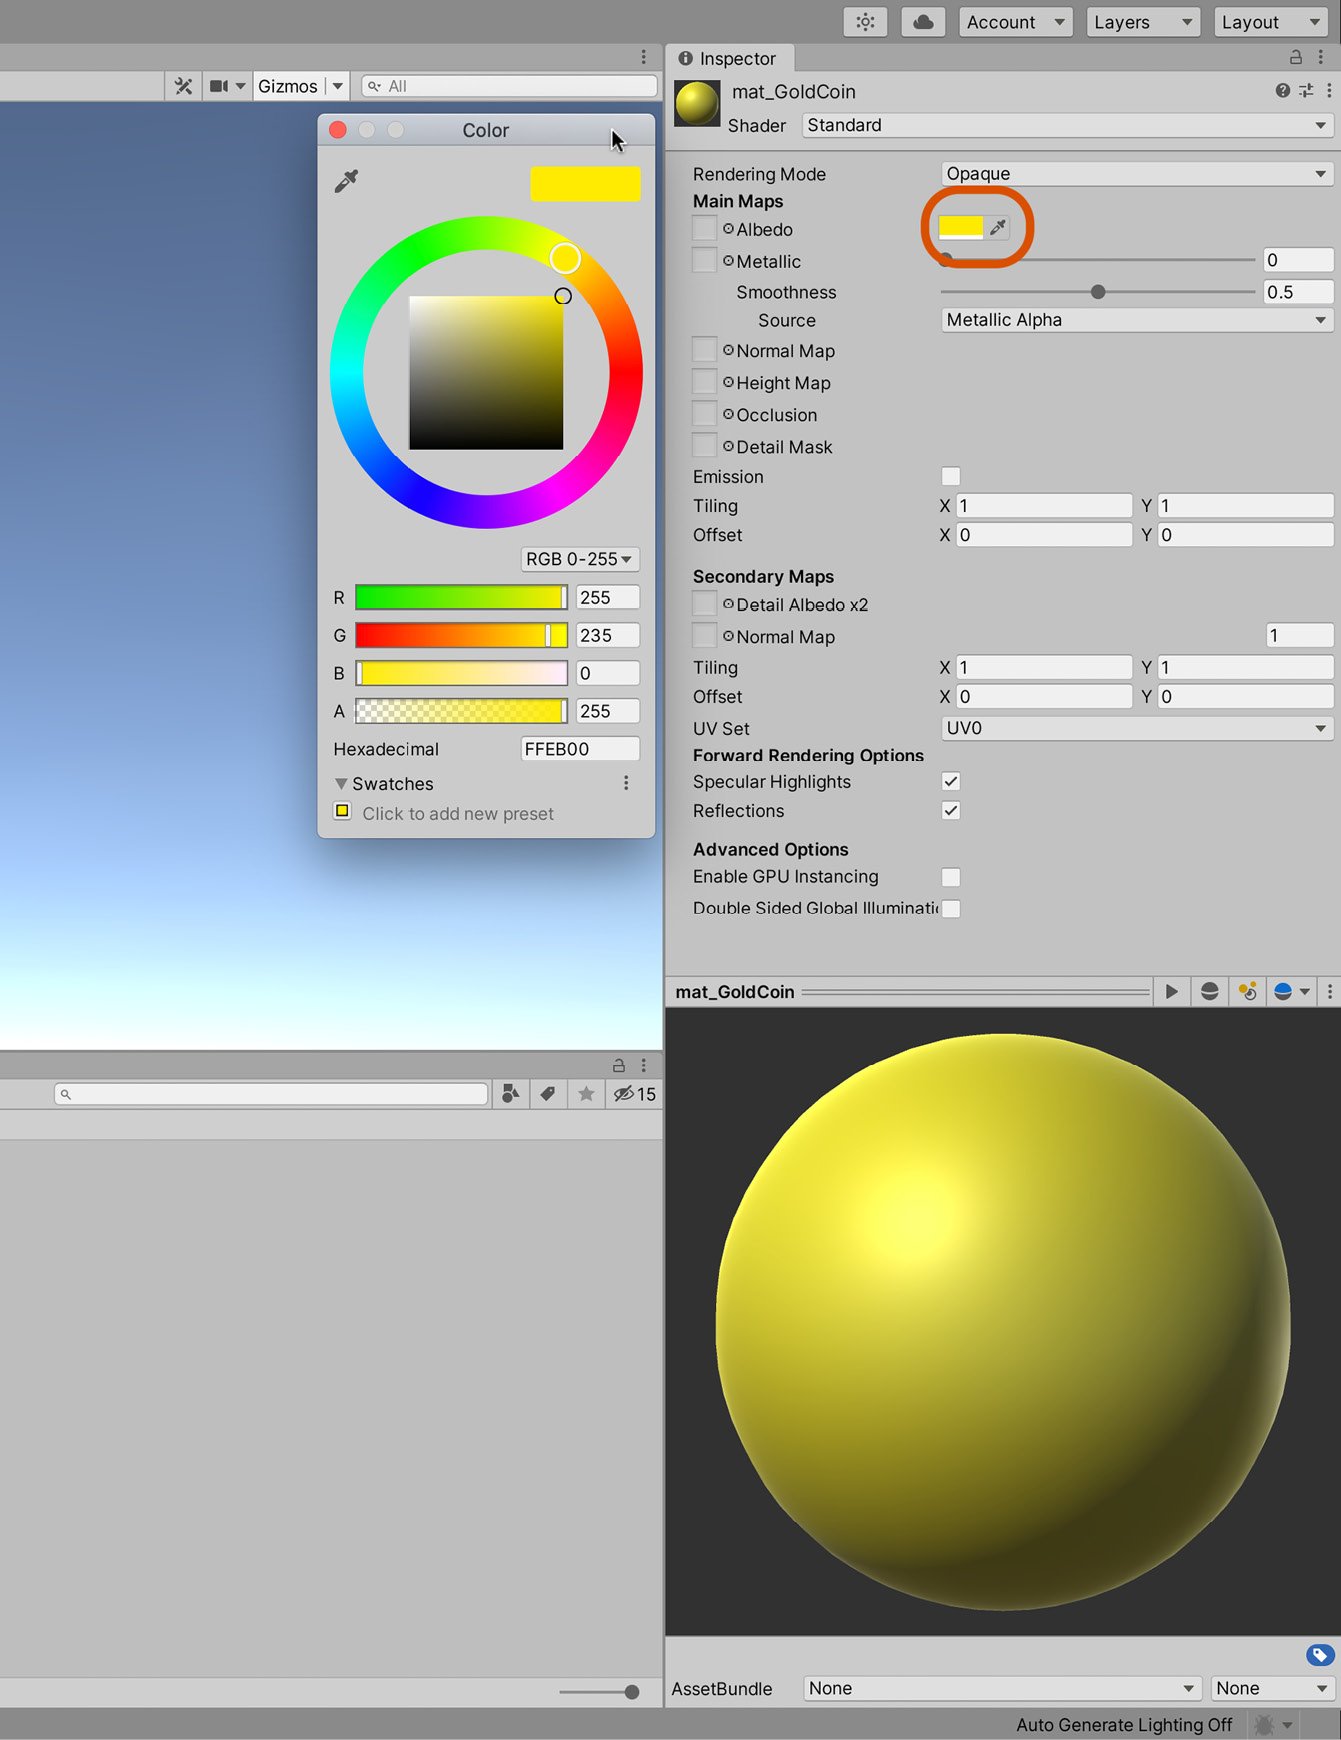
Figure 2.6 – Selecting a gold color for the Albedo channel
The coin Material is looking better than it did but is still not quite right as it is supposed to represent a metallic surface, which tends to be shiny and reflective. To add this quality to our Material, click and drag the Metallic slider in the Inspector to the right-hand side, setting its value to 1. This value indicates that the Material represents a fully metal surface as opposed to a diffuse surface such as cloth or hair. Again, the Preview panel will update to reflect the change:
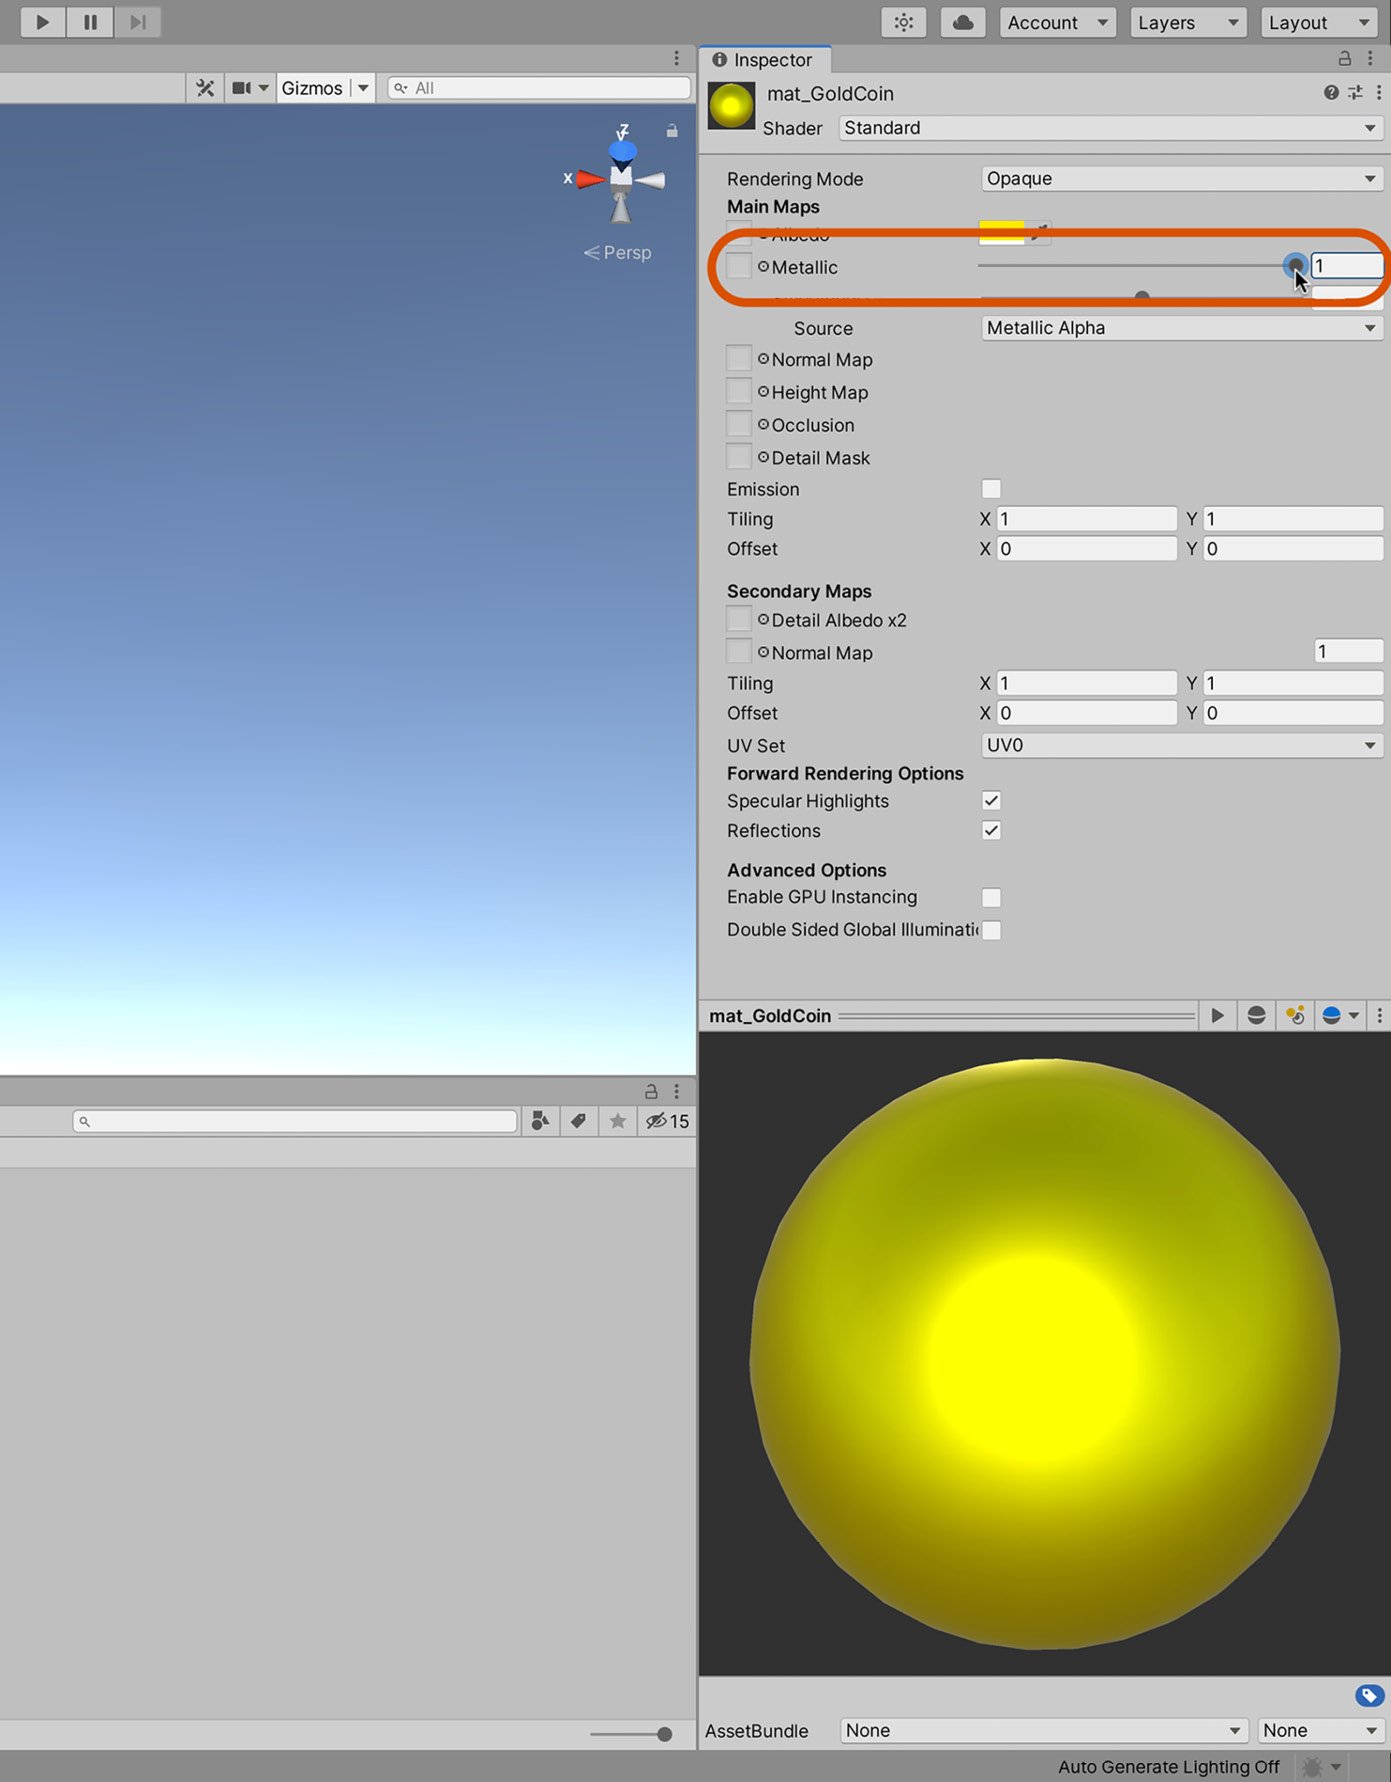
Figure 2.7 – Creating a metallic Material
When you're happy with what is shown in the preview, it's time to assign the Material to the coin object.
Assigning the Material
We now have a gold Material created, and it's looking good in the Preview panel. If needed, you can change the kind of object used for a preview. By default, Unity assigns the created Material to a sphere, but other primitive objects are allowed, including cubes, cylinders, and toruses. You can change the object by clicking on the geometry button directly above the Preview panel to cycle through them. Viewing different objects will help you preview Materials under different conditions:
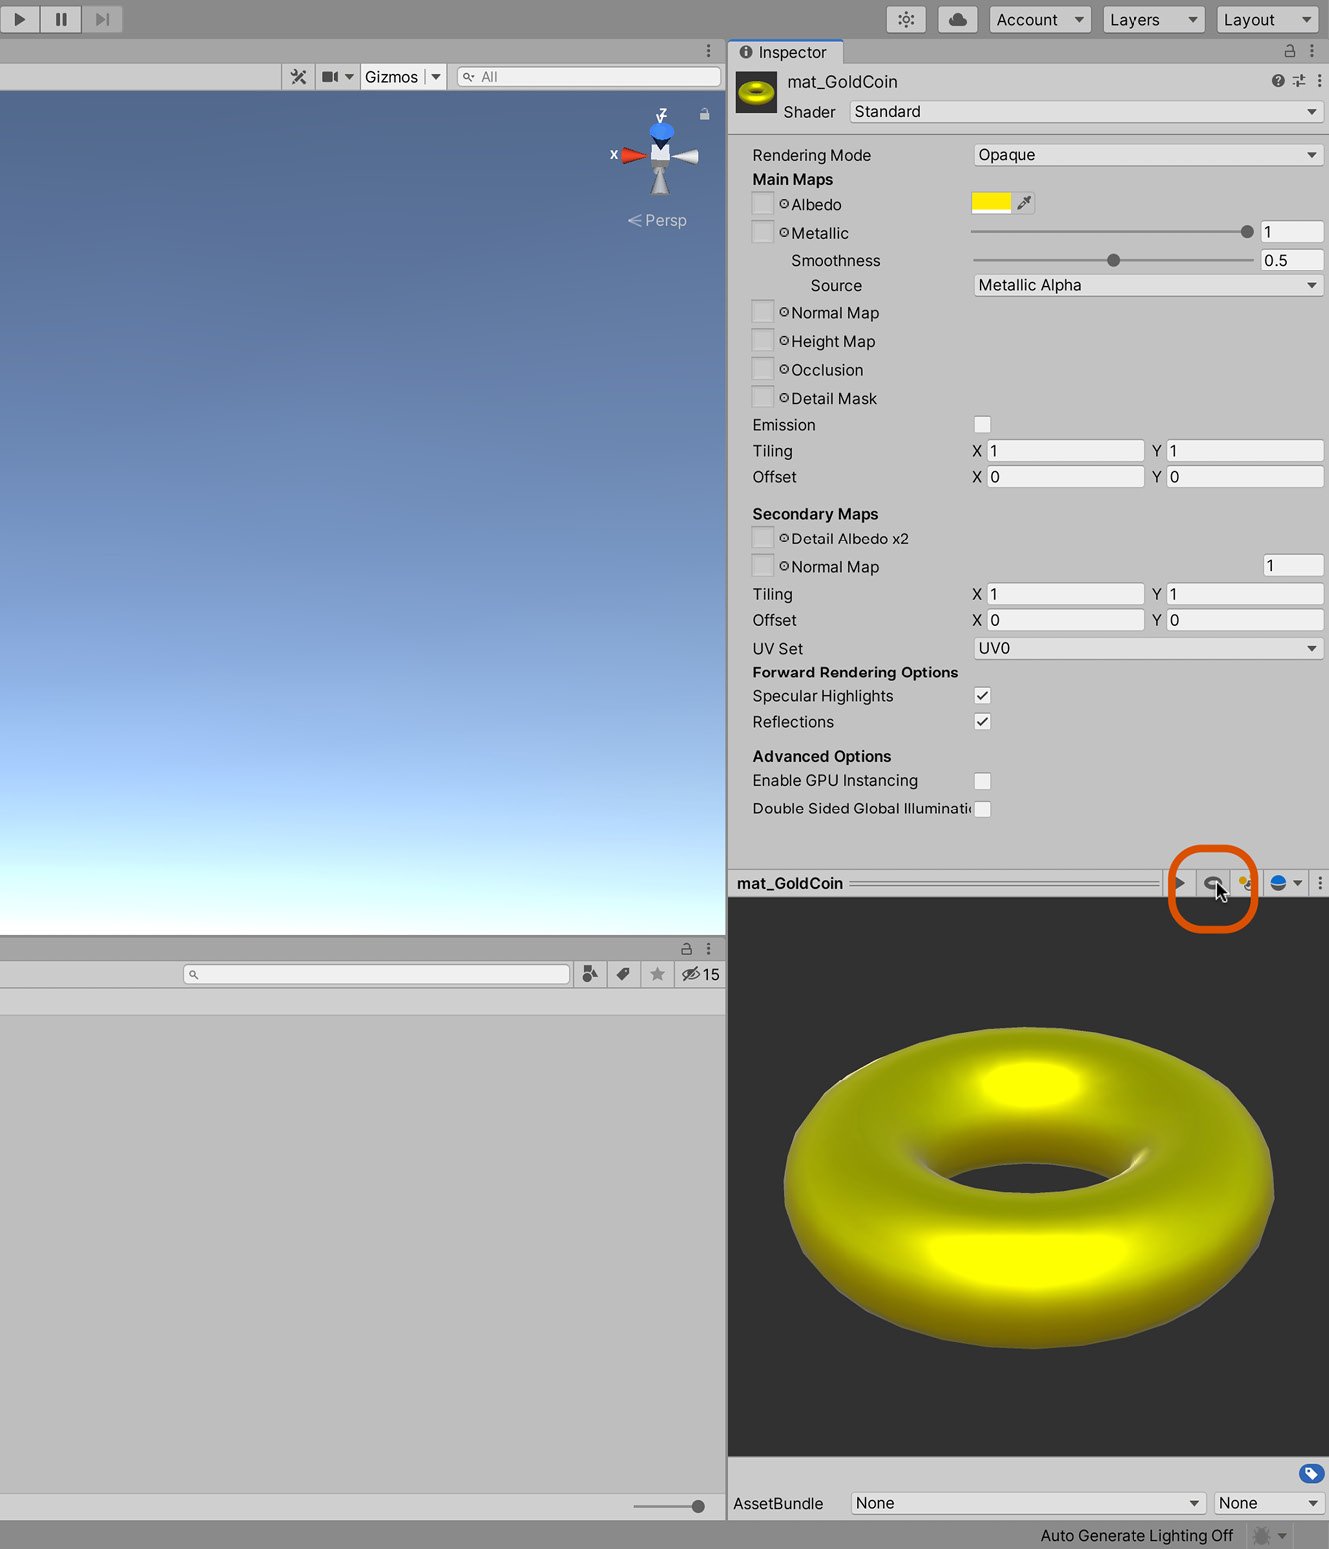
Figure 2.8 – Previewing a Material on an object
When your Material is ready, you can assign it directly to meshes in your scene by dragging and dropping from the Project panel to the object (either in the Scene view or Hierarchy panel). Let's assign the coin Material to the coin. Click and drag the Material from the Project panel to the coin object in the scene. On dropping the Material, the coin will change appearance to reflect the change of Material:
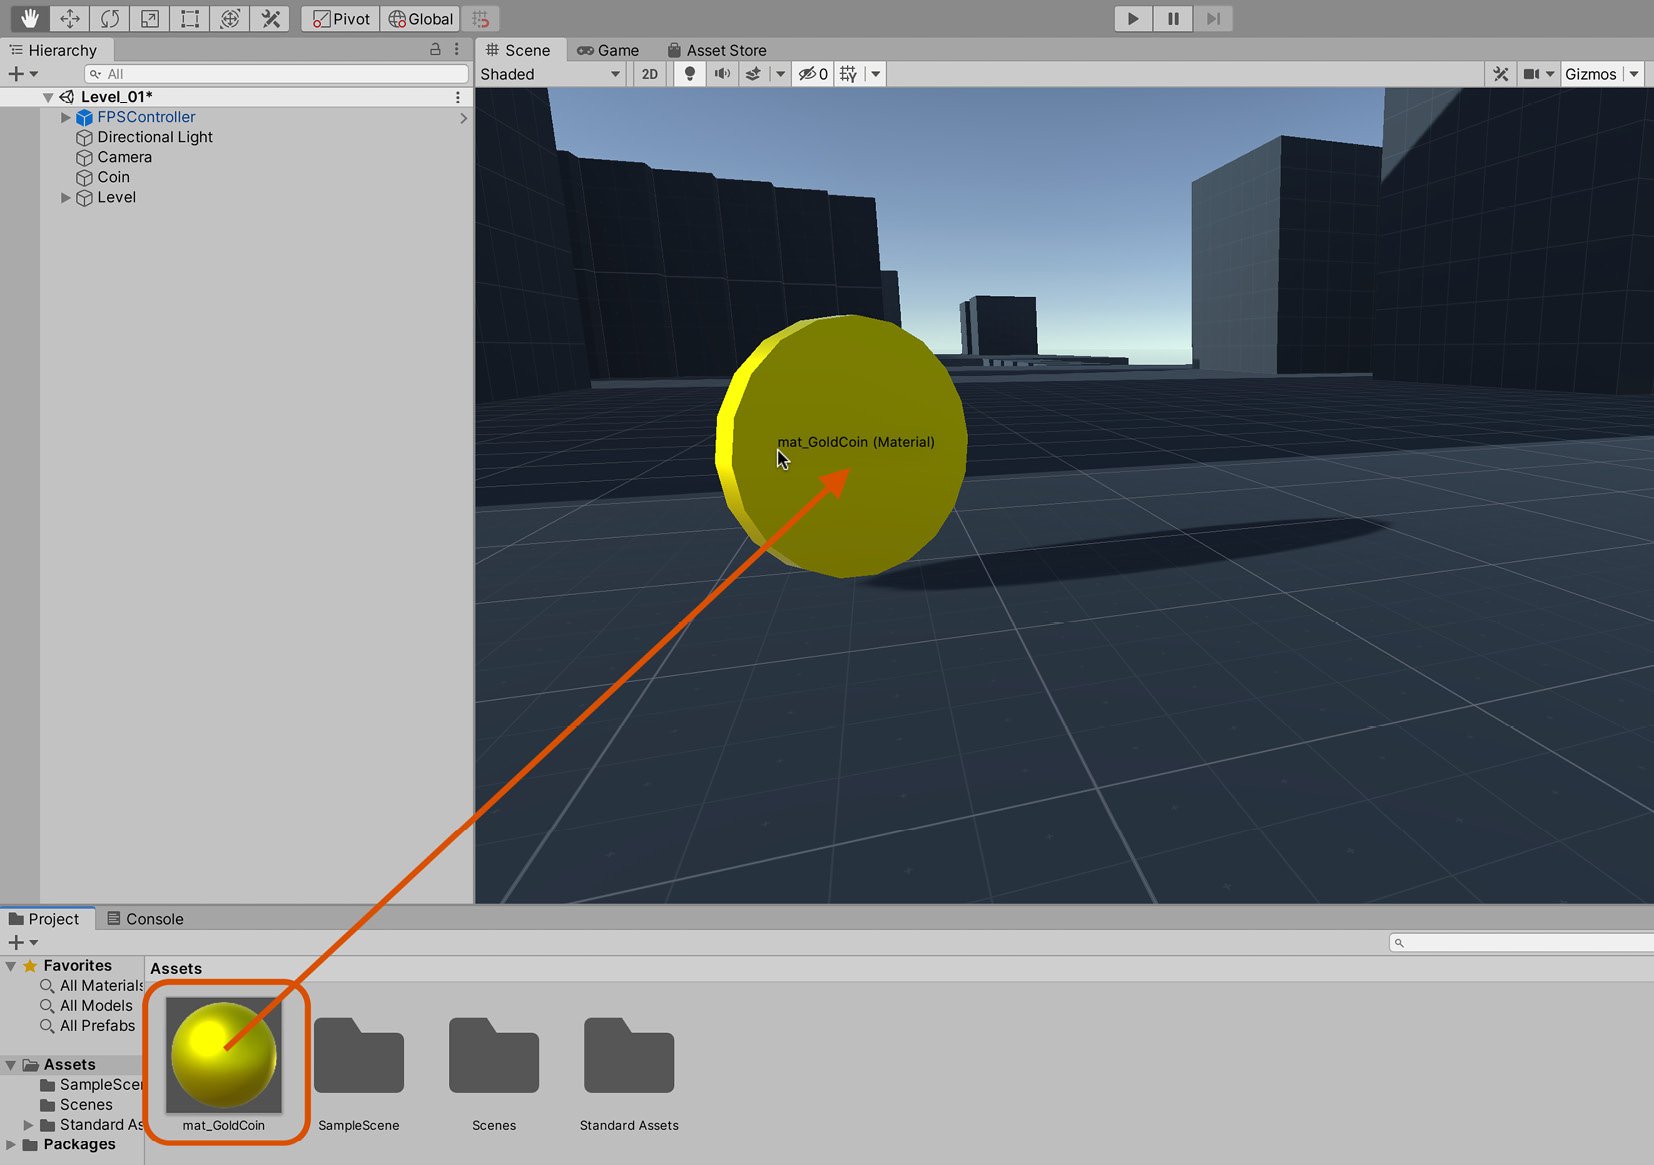
Figure 2.9 – Assigning the Material to the coin
You can confirm that Material assignment occurred successfully and can even identify which Material was assigned by selecting the Coin object in the scene and viewing its Mesh Renderer component in the Inspector. The Mesh Renderer component is responsible for making sure that a mesh object is visible in the scene. The Mesh Renderer component contains a Materials field, which lists all Materials currently assigned to the object. By clicking on the Material name from the Materials field, Unity automatically selects the Material in the Project panel, making it quick and easy to locate Materials:
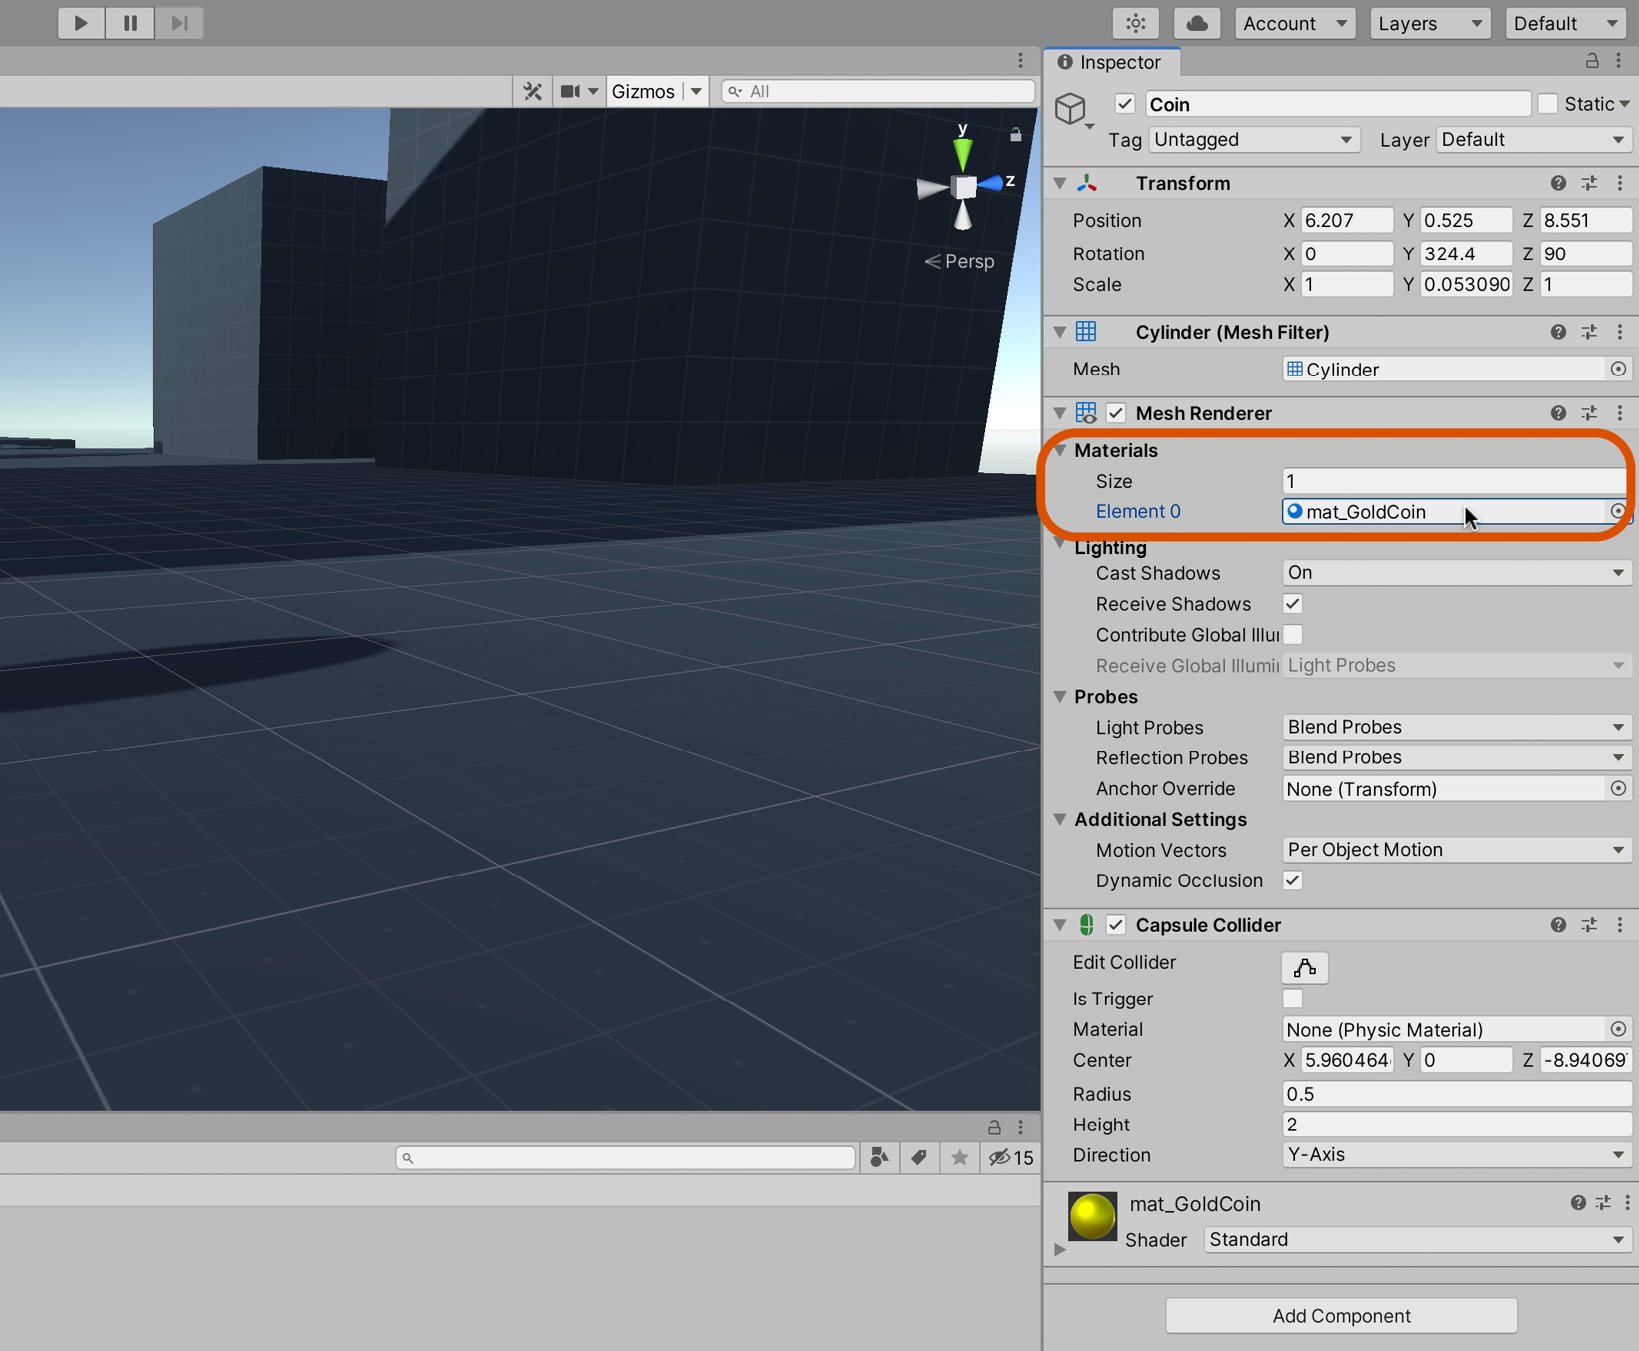
Figure 2.10 – The Mesh Renderer component lists all Materials assigned to an object
Tip
Mesh objects may have multiple Materials, with different Materials assigned to different faces. For the best in-game performance, use as few unique Materials on an object as necessary. Make the extra effort to share Materials across multiple objects, if possible. Doing so can significantly enhance the performance of your game. For more information on optimizing rendering performance, see the online documentation at https://docs.unity3d.com/Manual/OptimizingGraphicsPerformance.html.
We now have a complete and functional gold Material for the collectible coin. However, we're still not finished with the coin. It may look correct, but it doesn't behave in the way we want. For example, it doesn't disappear when touched, and we don't yet keep track of how many coins the player has collected overall. To address this, we'll need to write a script.


