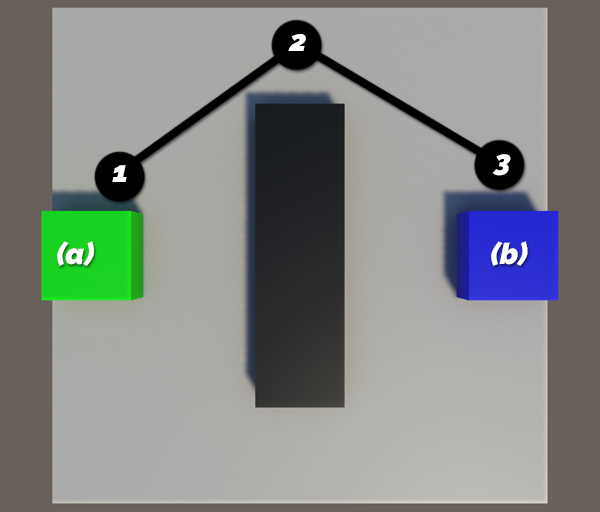
Now that we've taken a brief look at A*, let's look at some possible scenarios where we might find NavMesh a fitting approach to calculate the grid. One thing that you might notice is that using a simple grid in A* requires quite a number of computations to get a path that is the shortest to the target and, at the same time, avoids the obstacles. So, to make it cheaper and easier for AI characters to find a path, people came up with the idea of using waypoints as a guide to move AI characters from the start point to the target point. Let's say we want to move our AI character from point A to point B and we've set up three waypoints, as shown in the following figure:

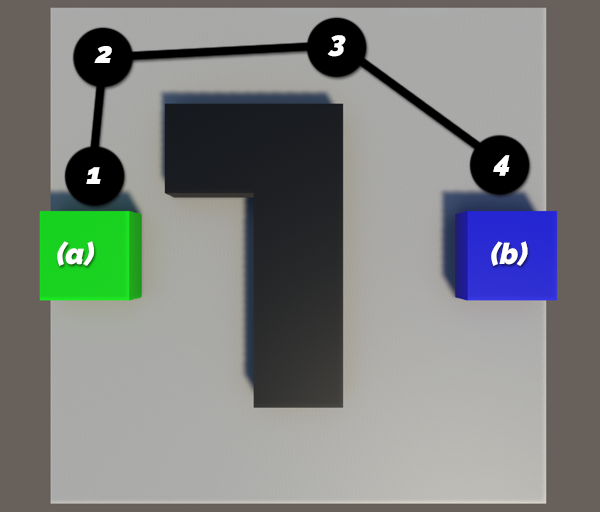
All we have to do now is to pick up the nearest waypoint and then follow its connected node leading to the target waypoint. Most games use waypoints for pathfinding because they are simple and quite effective in terms of using less computation resources. However, they do have some issues. What if we want to update the obstacles in our map? We'll also have to place waypoints for the updated map again, as shown in the following figure:

Having to manually alter waypoints every time the layout of your level changes can be cumbersome and very time-consuming. In addition, following each node to the target can mean that the AI character moves in a series of straight lines from node to node. Look at the preceding figures; it's quite likely that the AI character will collide with the wall where the path is close to the wall. If that happens, our AI will keep trying to go through the wall to reach the next target, but it won't be able to and will get stuck there. Even though we can smooth out the path by transforming it to a spline and doing some adjustments to avoid such obstacles, the problem is that the waypoints don't give us any information about the environment, other than the spline being connected between the two nodes. What if our smoothed and adjusted path passes the edge of a cliff or bridge? The new path might not be a safe path anymore. So, for our AI entities to be able to effectively traverse the whole level, we're going to need a tremendous number of waypoints, which will be really hard to implement and manage.
This is a situation where a NavMesh makes the most sense. NavMesh is another graph structure that can be used to represent our world, similar to the way we did with our square tile-based grid or waypoints graph, as shown in the following diagram:
A Navigation Mesh uses convex polygons to represent the areas in the map that an AI entity can travel to. The most important benefit of using a Navigation Mesh is that it gives a lot more information about the environment than a waypoint system. Now we can adjust our path safely because we know the safe region in which our AI entities can travel. Another advantage of using a Navigation Mesh is that we can use the same mesh for different types of AI entities. Different AI entities can have different properties such as size, speed, and movement abilities. A set of waypoints is tailored for humans; AI may not work nicely for flying creatures or AI-controlled vehicles. These might need different sets of waypoints. Using a Navigation Mesh can save a lot of time in such cases.
Generating a Navigation Mesh programmatically based on a scene can be a somewhat complicated process. Fortunately, Unity 3.5 introduced a built-in Navigation Mesh generator as a pro-only feature, but is now included for free from the Unity 5 personal edition onwards. Unity's implementation provides a lot of additional functionality out of the box. Not just the generation of the NavMesh itself, but agent collision and pathfinding on the generated graph (via A*, of course) as well. Chapter 4, Finding Your Way, will look at some of the useful and interesting ways we can use Unity's NavMesh feature in our games, and will explore the additions and improvements that came with Unity 2017.1.


