Search icon CANCEL
Subscription
0
Cart icon
Your Cart (0 item)
Close icon
You have no products in your basket yet
Save more on your purchases! discount-offer-chevron-icon
Savings automatically calculated. No voucher code required.
Arrow left icon
Explore Products
Best Sellers
New Releases
Books
Videos
Audiobooks
Learning Hub
Free Learning
Arrow right icon
Arrow up icon
GO TO TOP
Mobile DevOps

You're reading from   Mobile DevOps Deliver continuous integration and deployment within your mobile applications

Arrow left icon
Product type Paperback
Published in Mar 2018
Publisher Packt
ISBN-13 9781788296243
Length 376 pages
Edition 1st Edition
Languages
Arrow right icon
Authors (2):
Arrow left icon
Rohin Tak Rohin Tak
Author Profile Icon Rohin Tak
Rohin Tak
Jhalak Modi Jhalak Modi
Author Profile Icon Jhalak Modi
Jhalak Modi
Arrow right icon
View More author details
Toc

Table of Contents (13) Chapters Close

Preface 1. Introduction FREE CHAPTER 2. Working with Code Repository Systems 3. Cross-Platform Mobile App Development with Xamarin 4. Writing Your First Android Application with Xamarin 5. Implementing Automatic Testing Using Xamarin 6. Configuring TeamCity for CI/CD with Xamarin 7. CI/CD for Android with Visual Studio Team Services 8. Deploying Applications on AWS 9. Monitoring and Optimizing Application 10. Debugging the Application 11. Case Studies 12. Other Books You May Enjoy

Adding an icon for the Android app

App permissions are set and it's ready to run, so let's add an icon for our app:

  1. Download an icon file that you like and that best suits your phone call app.
  2. Go to Solution Explorer and add the downloaded file to the drawable folder under Resources.
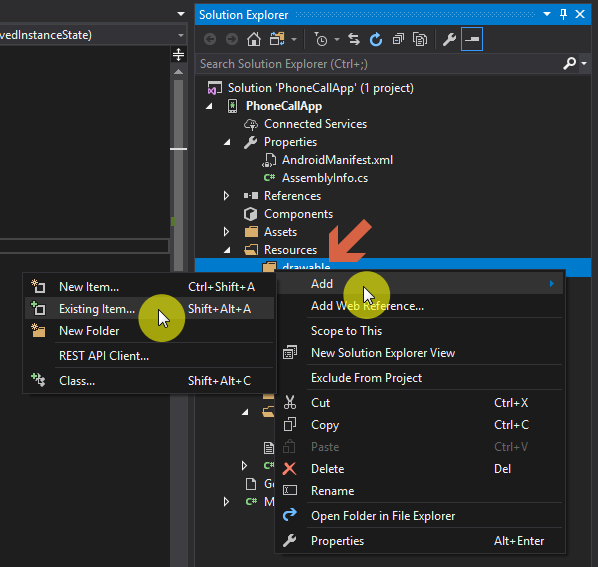
  1. Right-click on drawable | Add | Existing Item, as shown in the following screenshot:
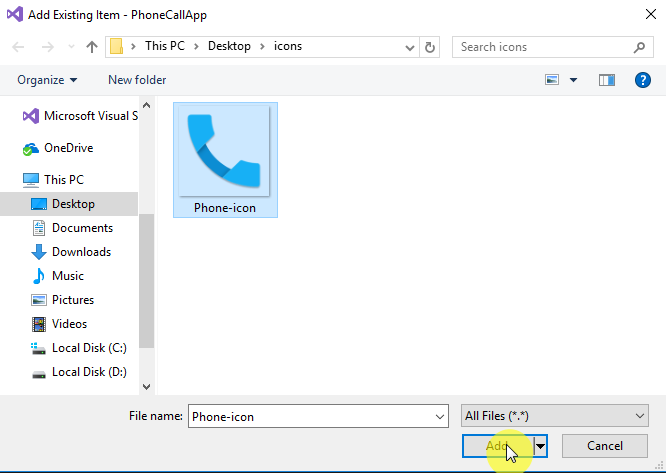
  1. A File Explorer window will open. Navigate to the icon file location, select the icon file, and click Add:
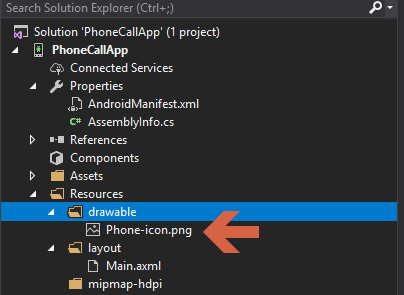
  1. The icon should now be added to the drawable folder of the project:
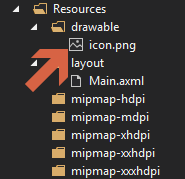
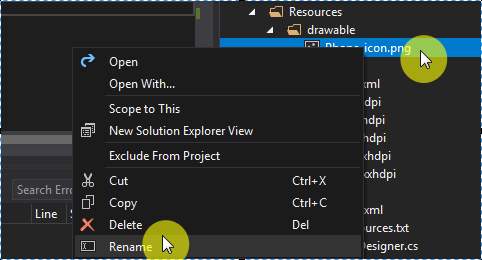
  1. Rename the icon file to icon.png by right-clicking on the file and then clicking Rename:
  1. After renaming the file, rebuild the project like we did in the previous steps.
  2. Once the rebuild is done successfully, let's add the icon to the application's Manifest file.
  3. Double-click on Properties from Solution Explorer...
lock icon The rest of the chapter is locked
Register for a free Packt account to unlock a world of extra content!
A free Packt account unlocks extra newsletters, articles, discounted offers, and much more. Start advancing your knowledge today.
Unlock this book and the full library FREE for 7 days
Get unlimited access to 7000+ expert-authored eBooks and videos courses covering every tech area you can think of
Renews at $19.99/month. Cancel anytime
Banner background image