Let's start by creating a simple REST controller as follows:
package com.dineshonjava.masteringspringboot.controller;

import org.springframework.web.bind.annotation.GetMapping;
import org.springframework.web.bind.annotation.RestController;

@RestController
public class HelloController {

   @GetMapping("/hello")
   String sayHello(){
         return "Hello World!!!";
   }
}
Let's see this small REST controller (HelloController) in detail:
- @RestController annotation: It indicates that this is the controller class and its result writes into the response body and doesn't want to render view
- @GetMapping annotation: It indicates a request handler method and it is a shorthand annotation for @RequestMapping(method = RequestMethod.GET)
- sayHello() method: It returns a greeting message
In the STS IDE, you could run your application as a Spring Boot application with an embedded server by selecting Run As | Spring Boot Application from the Run menu as follows:

Spring Initialzr creates the main application launcher class as follows:
package com.dineshonjava.masteringspringboot;

import org.springframework.boot.SpringApplication;
import org.springframework.boot.autoconfigure.SpringBootApplication;

@SpringBootApplication
public class MasteringSpringBootApplication {

   public static void main(String[] args) {
         SpringApplication.run(MasteringSpringBootApplication.class, args);
   }
}
This tiny class is actually a fully operational web application! Let's see some details:
- @SpringBootApplication: This annotation tells Spring Boot, when launched, to scan recursively for Spring components inside this package and register them. It also tells Spring Boot to enable auto-configuration, a process where beans are automatically created based on classpath settings, property settings, and other factors.
- main() method: It is a simple public static void main() method to run the application.
- SpringApplication.run(): The SpringApplication class is responsible for creating the Spring application's context, and the run() method initializes the application's context in your Spring application.
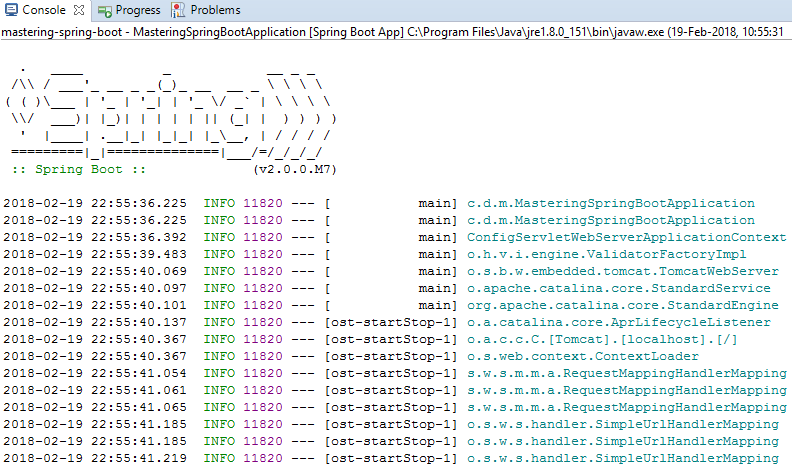
Let's run your Spring Boot application and observe the logs on the console as follows:

As you can see in the console logs, you can observe several things:
- Logs have the Spring Boot banner at the top of the logs and Spring Boot version. You can also add your own ASCII banner by creating banner.txt or banner.png and putting it into the src/main/resources/ folder.
- There is an embedded Tomcat server with the server port 8080; it is the default port, but you can customize it by adding the server.port property to the application.properties file as follows:
server.port= 8181
- Logs also shows all possible request mappings of your application as follows:

As you can see, your application is running on the default embedded Tomcat server with the default server port, 8080. Let's verify it on the system browser, where it will look as follows:

In this chapter, we have created a very simple Hello World REST application and run this application on the embedded Tomcat server of Spring Boot.
Let's see what new features and enhancements have been added to the new version of Spring Boot, 2.0.


