Search icon CANCEL
Subscription
0
Cart icon
Your Cart (0 item)
Close icon
You have no products in your basket yet
Arrow left icon
Explore Products
Best Sellers
New Releases
Books
Videos
Audiobooks
Learning Hub
Free Learning
Arrow right icon
Arrow up icon
GO TO TOP
Making Your CAM Journey Easier with Fusion 360

You're reading from   Making Your CAM Journey Easier with Fusion 360 Learn the basics of turning, milling, laser cutting, and 3D printing

Arrow left icon
Product type Paperback
Published in Mar 2023
Publisher Packt
ISBN-13 9781804612576
Length 464 pages
Edition 1st Edition
Concepts
Arrow right icon
Author (1):
Arrow left icon
Fabrizio Cimo Fabrizio Cimo
Author Profile Icon Fabrizio Cimo
Fabrizio Cimo
Arrow right icon
View More author details
Toc

Table of Contents (26) Chapters Close

Preface 1. Part 1 – Implementing Turning Operations in Fusion 360
2. Chapter 1: Getting Started with Turning and Its Tools FREE CHAPTER 3. Chapter 2: Handling Part Setup for Turning 4. Chapter 3: Discovering the Tool Library and Custom Tools 5. Chapter 4: Implementing Our First Turning Operation 6. Chapter 5: Discovering More Turning Strategies 7. Part 2 – Milling with Fusion 360
8. Chapter 6: Getting Started with Milling and Its Tools 9. Chapter 7: Optimizing the Shape of Milled Parts to Avoid Design Flaws 10. Chapter 8: Part Handling and Part Setup for Milling 11. Chapter 9: Implementing Our First Milling Operations 12. Chapter 10: Machining the Second Placement 13. Part 3 – Laser Cutting Using Fusion 360
14. Chapter 11: Getting Started with Laser Cutting 15. Chapter 12: Nesting Parts for Laser Cutting 16. Chapter 13: Creating Our First Laser Cutting Operation 17. Part 4 – Using Fusion 360 for Additive Manufacturing
18. Chapter 14: Getting Started with Additive Manufacturing 19. Chapter 15: Managing the Limitations of FDM Printers 20. Chapter 16: Printing Our First Part 21. Chapter 17: Understanding Advanced Printing Settings 22. Part 5 – Testing Our Knowledge
23. Chapter 18: Quiz 24. Index 25. Other Books You May Enjoy

Simulating the toolpath

At the moment, our screen should look a bit like this:
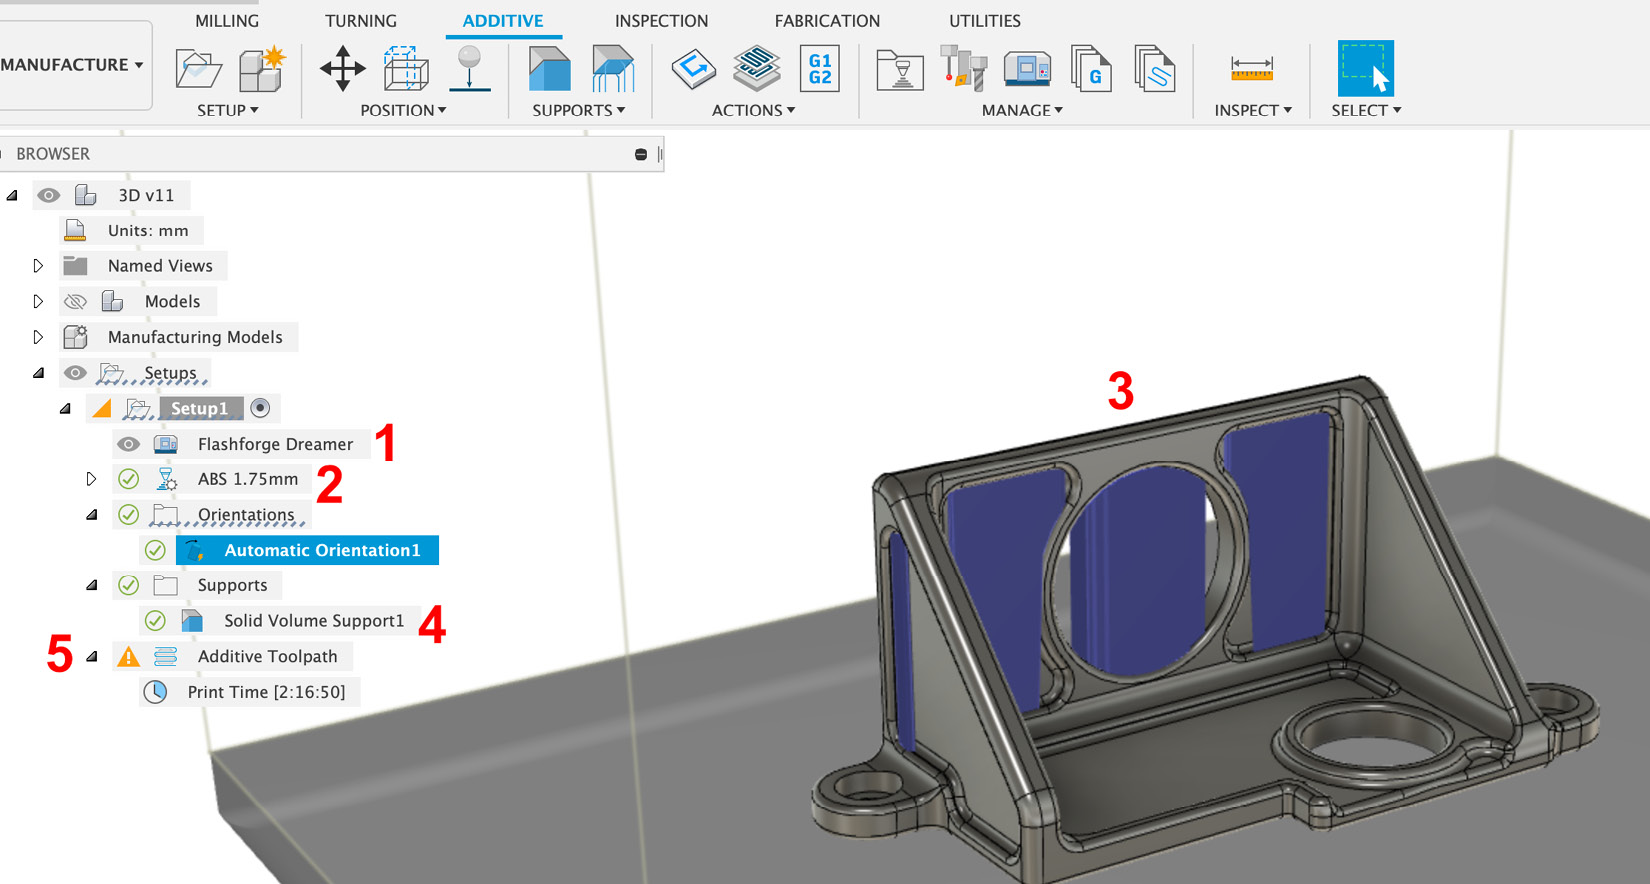
Figure 16.23: Printing environment

Figure 16.23: Printing environment

The 3D printer (and its printing volume) have been set (1), the printing settings have been selected (2), the part has been properly oriented onto the build platform (3), and the support structures are up to date (4).

However, there is still a warning for the Additive Toolpath area (5) – the yellow triangle on the left means that the toolpath data is outdated.

Luckily, updating the toolpath is very simple. To do this, we just need to click the Generate command, which we can find in the ADDITIVE tab under the ACTIONS drop-down menu:
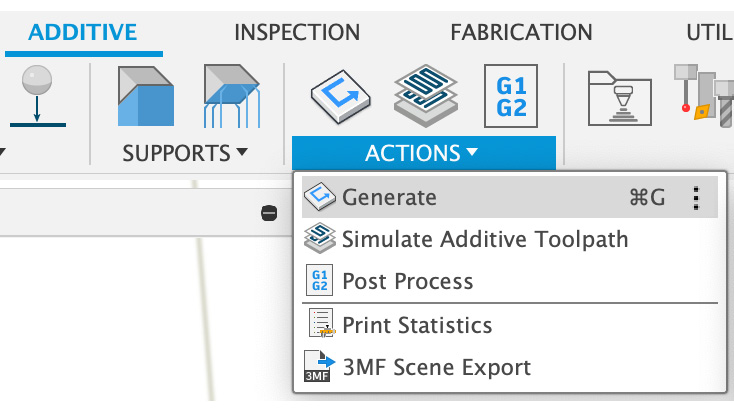
Figure 16.24: The Generate command

Figure 16.24: The Generate command

After updating the toolpath, we can check the simulation results using the Simulate Additive Toolpath command:
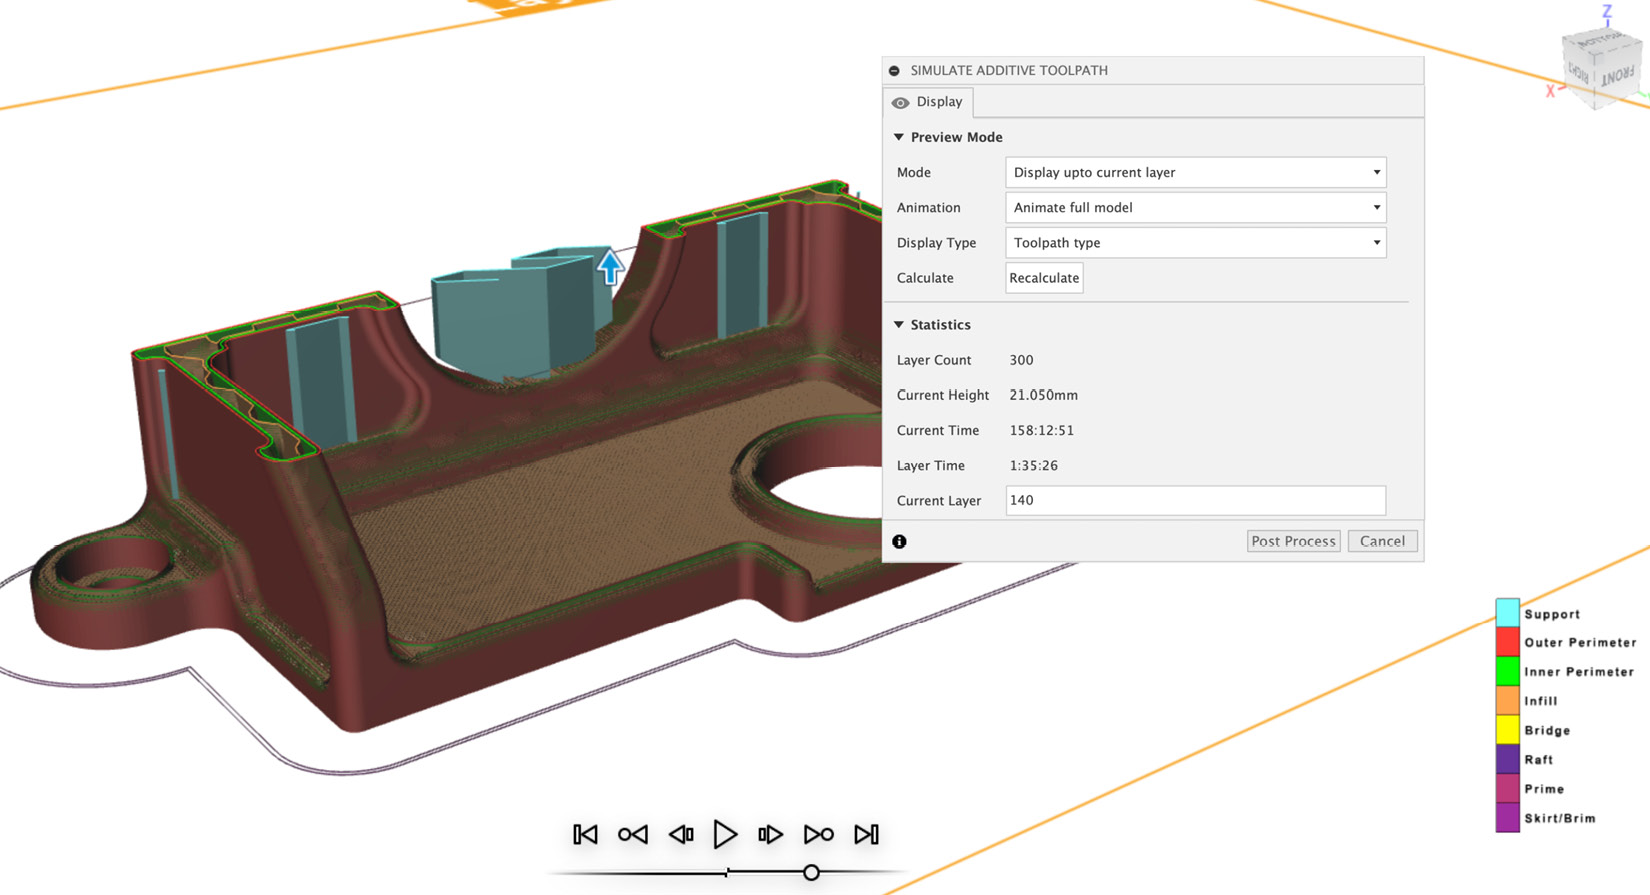
Figure 16.25: Simulated toolpath

Figure 16.25: Simulated toolpath

The simulation environment is quite similar to those found for...

lock icon The rest of the chapter is locked
Register for a free Packt account to unlock a world of extra content!
A free Packt account unlocks extra newsletters, articles, discounted offers, and much more. Start advancing your knowledge today.
Unlock this book and the full library FREE for 7 days
Get unlimited access to 7000+ expert-authored eBooks and videos courses covering every tech area you can think of
Renews at $19.99/month. Cancel anytime
Banner background image