After the installation of the database and files, there are still several additional configuration tasks left. For these tasks, you are going to use the web interface provided by Cacti to guide you through the final part of the setup. The following steps are almost identical for Windows and Linux.
Using Cacti for the first time
Time for action - configuring Cacti
- Go to the installation URL: http://<yourserver>/cacti/install. Read the license agreement and click Next:
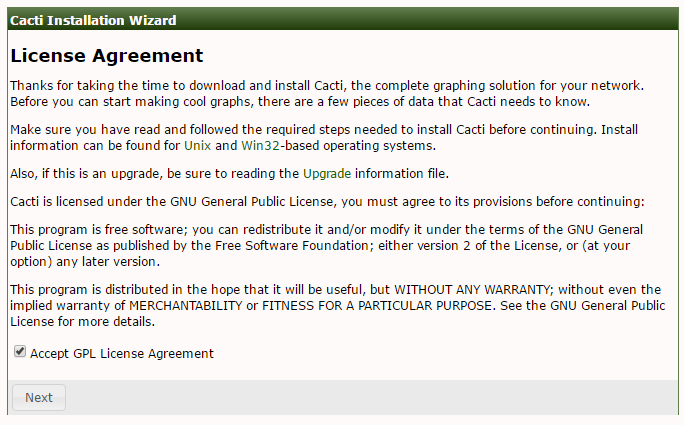
- The next page provides an overview of the different installed modules and database parameters. As you have installed all prerequisites and configured the database server according to these recommendations, you can Accept the GPL License Agreement and click Next here.
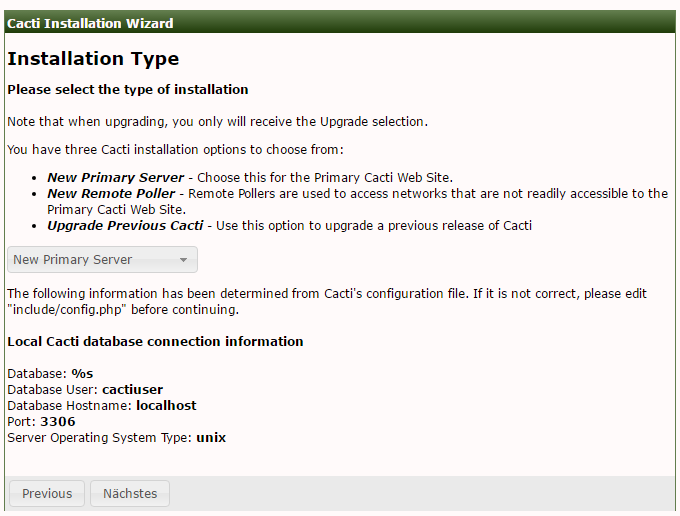
- The next page asks if you are installing a new system, a new remote poller, or upgrading an existing one. Choose New Primary Server then click Next:
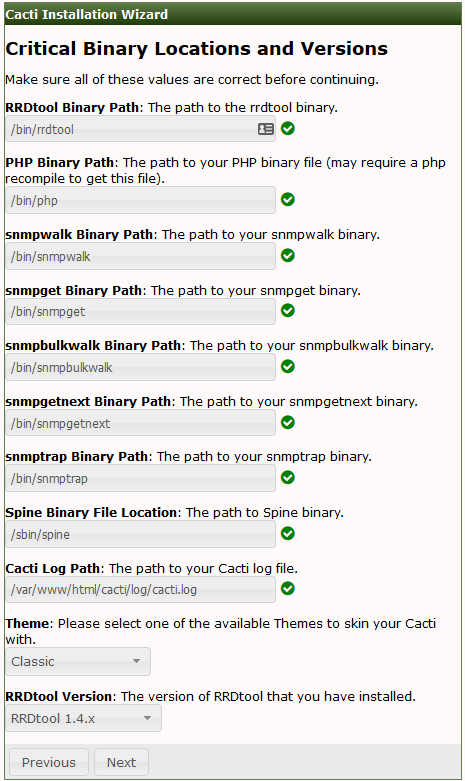
- The next page provides an overview of all required binaries and paths. If you have followed the installation steps closely, all fields should be green. Make sure to set the theme to Classic:
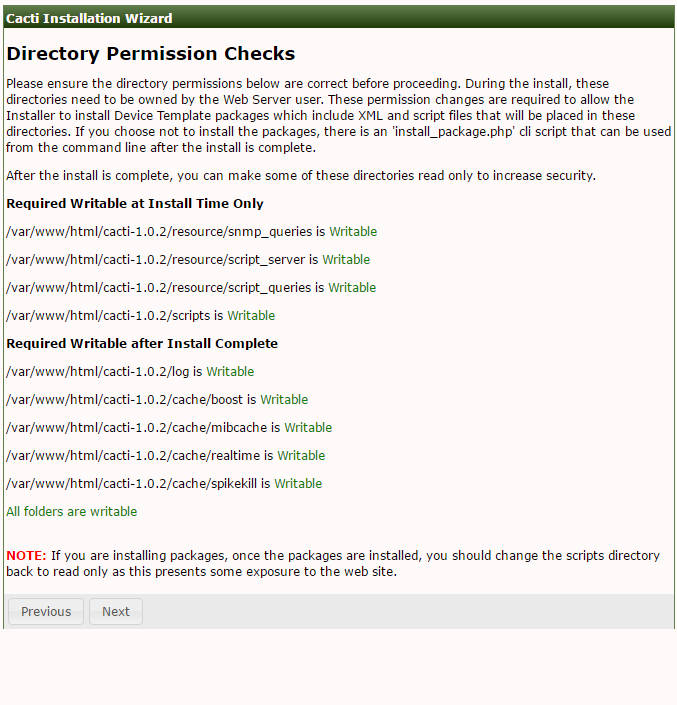
- The following page will check for the correct files and folder permissions. If you have followed the installation guide, everything shows up green here. Click on Next to continue the installation:
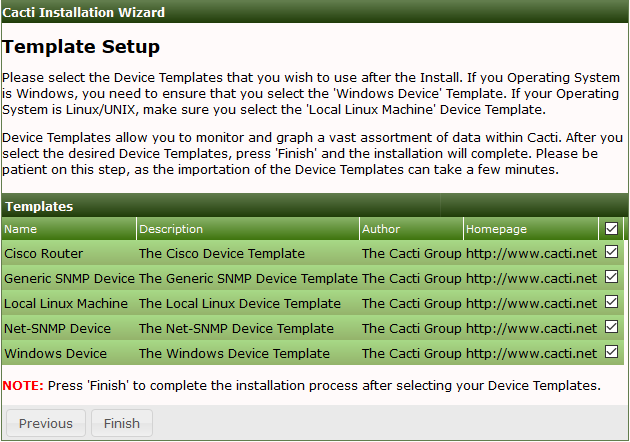
- The final step allows you to import some pre-defined templates. Select all of the templates and click Finish to complete the installation:
What just happened?
You finalized your Cacti installation by running the included web-based installer. If you have been following the instructions, you will have a working Cacti installation.
The installation will leave you with the default cmd.php poller. If you want to use Spine, you will now have to log on to the Cacti web interface and set the Spine poller file path in the Paths section of the Settings page. You also have to change the poller type to Spine in the Poller section.


