Setting up a database for Alfresco
Alfresco uses Hibernate as the Object Relational Mapping (ORM) layer. Thus, it is capable of plugging into any of the popular relational databases such as MySQL, PostgreSQL, Oracle, MS SQL Server, and so on.
In this book, we will be demonstrating examples using the MySQL database.
Getting ready
In order to set up your MySQL database for Alfresco, you would need a MySQL database server and an optional MySQL client. A MySQL client could be handy if you are working on Windows.
1. To install the MySQL Server, download the MySQL Server Community Version from http://dev.mysql.com/downloads/mysql/.
Note
The listed setups are available in the form of Microsoft Installers (
.MSIfiles). If you do not require Documentations and Development Components (in our case, for running Alfresco in a Developer Machine, we do not need these), you can download the installers without the essentials. Choose the installer that suits you and download.If you are running a 64-bit Operating System environment, you can download the 64-bit version of the server from http://dev.mysql.com/downloads/mirror.php?id=390238#mirrors. Otherwise, go for a 32-bit installation from http://dev.mysql.com/downloads/mirror.php?id=390237#mirrors
2. Choose one mirror, download, and save the installer in a suitable location on your computer.
3. Run the installer and choose Typical in installation types.

4. After completion of the installation, start configuring the server and choose Detailed Configuration.

5. Select Developer Machine and choose Multifunctional database.

6. For the next steps in INNODB tablespace settings, Concurrent connections settings, TCP/IP port settings, default character set, windows service configuration, accept the default options and settings provided.
7. Give the root password as you like, however, it is advisable not to use a blank password.

8. Click Next>, your MySQL server will be configured.
9. Clicking Finish will close the setup wizard and MySQL server is installed.
10. Install MySQL Clients. You can use any of the clients available for MySQL. However, in our example, we will be using the MySQL Workbench.
Note
Note that the MySQL Workbench requires .NET Framework 3.5 to be installed in the machine, in case it is not, there is your machine; you can use MySQL GUI tools or SQLYog. The following are some of the clients available for MySQL:
MySQL Workbench
http://dev.mysql.com/downloads/workbench/
GUI tools for MySQL 5.0
http://dev.mysql.com/downloads/gui-tools/5.0.html
SQLYog
MySQL client applications are not mandatory for Alfresco server setup. However, it is sometimes handy to get a client application of the database server in order to view, create, and configure the database and the database users. In case you do not have any client application installed, you can still use the MySQL server command prompt from your localhost.
How to do it...
After you have installed the server and the client application, let's create a database for Alfresco. By default, Alfresco stack uses the name 'Alfresco' for MySQL database as well as for the username and password. Though you can change these settings, we will go with these default settings for now.
1. Open MySQL Workbench and connect to the MySQL Server; we are assuming here that the MySQL server is running on your local machine.

2. We now need to create a database for Alfresco. After establishing the connection, open the connection to invoke the workbench SQL editor.
3. Create a new schema named alfresco in the localhost server with UTF-8 encoding and UTF-8-default collation
Note
Using UTF-8 encoding and collation is recommended by Alfresco.

4. After creating the database, create a user alfresco with the password alfresco. For that, you need to create a Server Instance for our localhost MySQL server.

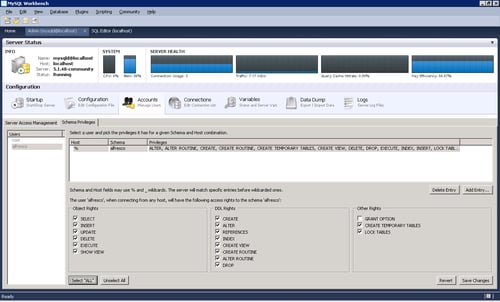
5. In the server administration panel, create a new user named alfresco and with the password alfresco.

With this, we have set up a blank database for our Alfresco server and created a user. We will now give permissions to this user for using the database schema.
Alfresco's Tomcat bundle contains database creation, user creation script, and grant right script on that database under "<<ALFRESCO_INSTALLATION_DIR>>\extras\databases\mysql\db_setup.sql". This allows the creation of a database with a single click only.

How it works...
In the previous steps, we have created a blank database for Alfresco and created a user and granted it permissions to manage the database. Now when Alfresco Tomcat or JBoss bundle runs for the first time, it will create all the database objects (tables, and so on) automatically.
The Alfresco bundle uses MySQL as the database by default, thus you don't have to perform any changes for that.
We have created a database with the name alfresco. We have also created a user with the name alfresco with the same password. This is because the default setting of Alfresco bundle is configured in this way. Thus, you don't have to change any settings in the default bundle.
Default configurations are mentioned under "ALF_HOME>>\tomcat\shared\classes\alfresco-global.properties". If needed, you can change this setting as per the database configuration.


