Search icon CANCEL
Subscription
0
Cart icon
Your Cart (0 item)
Close icon
You have no products in your basket yet
Arrow left icon
Explore Products
Best Sellers
New Releases
Books
Videos
Audiobooks
Learning Hub
Newsletter Hub
Free Learning
Arrow right icon
timer SALE ENDS IN
0 Days
:
00 Hours
:
00 Minutes
:
00 Seconds
Arrow up icon
GO TO TOP
Unity 5.x Shaders and Effects Cookbook

You're reading from   Unity 5.x Shaders and Effects Cookbook Master the art of Shader programming to bring life to your Unity projects

Arrow left icon
Product type Paperback
Published in Feb 2016
Publisher
ISBN-13 9781785285240
Length 240 pages
Edition 1st Edition
Languages
Tools
Concepts
Arrow right icon
Author (1):
Arrow left icon
Alan Zucconi Alan Zucconi
Author Profile Icon Alan Zucconi
Alan Zucconi
Arrow right icon
View More author details
Toc

Table of Contents (12) Chapters Close

Preface 1. Creating Your First Shader FREE CHAPTER 2. Surface Shaders and Texture Mapping 3. Understanding Lighting Models 4. Physically Based Rendering in Unity 5 5. Vertex Functions 6. Fragment Shaders and Grab Passes 7. Mobile Shader Adjustment 8. Screen Effects with Unity Render Textures 9. Gameplay and Screen Effects 10. Advanced Shading Techniques Index

Animating vertices in a Surface Shader


Now that we know how to access data on a per-vertex basis, let's expand our knowledge set to include other types of data and position of a vertex.

Using a vertex function, we can access the position of each vertex in a mesh. This allows us to actually modify each individual vertex while the shader does the processing.

In this recipe, we will create a shader that will allow us to modify the positions of each vertex on a mesh with a sine wave. This technique can be used to create animations for objects such as flags or waves on an ocean.

Getting ready

Let's gather our assets together so that we can create the code for our Vertex Shader:

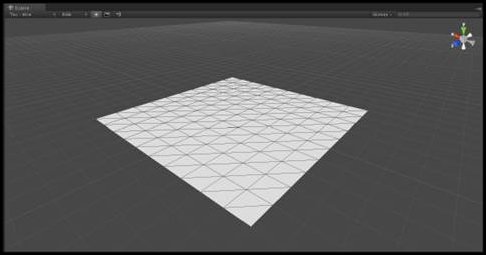
  1. Create a new scene and place a plane mesh in the center of the scene.

  2. Then create a new shader and material.

  3. Finally, assign the shader to the material and the material to the plane mesh.

Your scene should look similar to the following screenshot:
How to do it…

With our scene ready to go, let's double-click on our newly created...

lock icon The rest of the chapter is locked
Register for a free Packt account to unlock a world of extra content!
A free Packt account unlocks extra newsletters, articles, discounted offers, and much more. Start advancing your knowledge today.
Unlock this book and the full library FREE for 7 days
Get unlimited access to 7000+ expert-authored eBooks and videos courses covering every tech area you can think of
Renews at $19.99/month. Cancel anytime