The Scene window
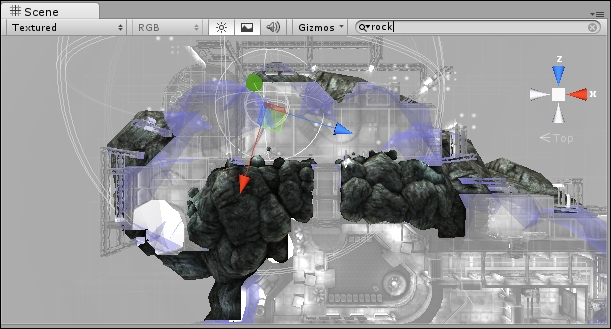
The Scene window is where you can position your GameObjects and move them around. This window has various controls to change its level of detail. Use these controls to toggle lighting on and off (in the editor only—not in your actual game), and to display the window contents with textures, wireframes, or a combination of both. You can use the colorful Gizmos at the top-right corner to constrain the view to the X, Y, and Z axes to view the top and sides of your scene. Click on the white box in the middle to return to Perspective view. This window also features a search field.
Try clicking on the gizmo's green Y cone to view the AngryBots Demo from above, and then type rock into the search field. Every object with rock in its name lights up, while the rest of the scene fades to grayscale. Click the tiny x button to clear the search field:
The Game window
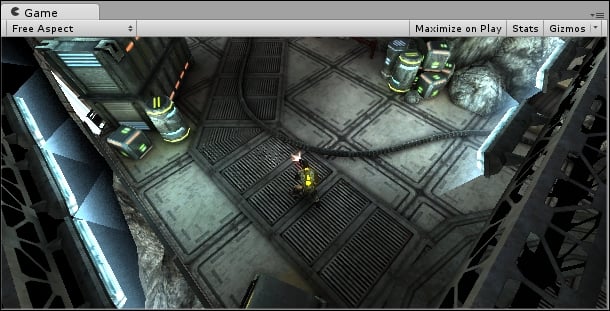
The Game window shows you what your players will see. When you click on the Play button to test your game (as you just did with the Angry Bots Demo), the results of your efforts play out in this window. Toggle the Maximize on Play button to test your game in full-screen mode:
The Hierarchy panel
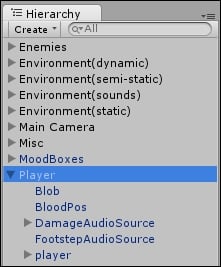
The Hierarchy panel lists all of the GameObjects in your Scene. GameObjects—cameras, lights, models, and prefabs—are the things that make up your game. They can be "tangible" things like the generators or the giant robot arm in the Angry Bots Demo. They can also include intangible things, which only you as the game developer get to see and play with, such as the cameras, the lights, the scripts, and colliders, which are special invisible shapes that tell the game engine when two game objects are touching.
The AngryBots Demo Hierarchy panel contains GameObjects for the cannisters, the tables, the airlocks and the computer terminals, to name a few. It also lists the Player, a very complicated GameObject that controls how the hero moves and collides with his environment. The player character has a camera following him. That camera is our eye into the game world. The Demo lists a collection called Environment(sounds)—a series of GameObject that determine what the player hears when he walks through different parts of the level (for example, torrential rain outside, and the droning equipment hum when he moves indoors). So, GameObject can include touchy-feely "physical" objects such as canisters and airlocks, as well as behind-the-scenes intangible things such as lights, cameras, and actions (scripts).
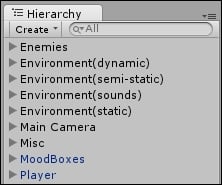
Click on a GameObject in the Hierarchy panel, and then hover your mouse over the Scene window. Press the F key on your keyboard, and the Scene window will automatically pan and zoom directly to that object. Alternatively, you can navigate to Edit | Frame Selected, which can be more reliable than using the keyboard shortcut. (I like to think of the F key standing for "Focus" to help me remember what this shortcut does). You can also double-click on the GameObjects in the Hierarchy panel.
The Project panel
The
Project panel lists all of the elements that you'll use to create GameObjects in your project. For example, look for the mech_bot in the Objects | Enemies folder. The AngryBots Demo EnemyMech GameObjects is made up of a series of meshes that represent the mech's shape, a material to depict its "skin" or coloring, and an animation to describe its movement. All of these types of goodies are listed in the Project panel.
The Project panel displays the contents of a special folder called Assets on your computer's operating system. Unity automatically creates the Assets folder for you when you create a new project. If you drag a compatible file, like a 3D model, a sound effect, or an image into the Project panel, Unity copies it to the Assets folder behind the scenes, and displays it in the Project panel.
.jpg)
The Inspector panel
The Inspector is a context-sensitive panel, which means that it changes depending on what you select elsewhere in Unity. This is where you can adjust the position, rotation, and scale of GameObjects listed in the Hierarchy panel. The Inspector can also display controls to configure components that add functionality to the GameObjects. Between the three main panels in Unity (Hierarchy, Project, and Inspector), the Inspector is where you'll likely spend most of your time because that's where you'll be tweaking and fiddling with every aspect of the elements that comprise your game projects.
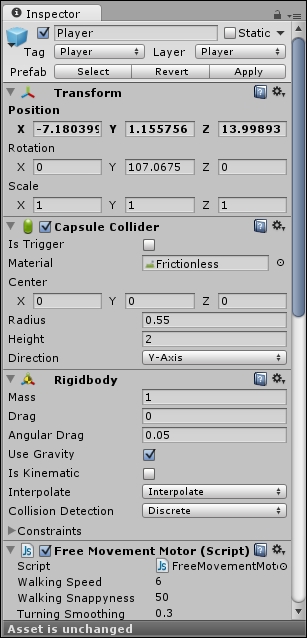
This screenshot of the Inspector panel shows the components attached to the Player GameObject in the Angry Bots Demo. This includes:
A number of scripts (including Free Movement Motor and Player Move Controller)
A Rigidbody component
A Capsule Collider
To see the same content on your computer, click to open the Player GameObject in the Hierarchy panel. In later chapters, we'll dive deeper to learn what these various components are all about.
Heads Up?
Let's use the Inspector panel to make a quick change to the orientation of the character. We'll begin the demo with the hero standing on his head (which is a sure-fire way to make those bots even angrier, by the way).
We can use the Inspector panel to change the rotation of the player. Follow these steps:
In the Hierarchy panel, click to select the Player game object.
Click on the Rotate button near the top left of the screen, which looks like two arrows sniffing each others' behinds:

A globe appears around the bottom of the Player GameObject in the Scene view. (If you don't see the player, hover over the Scene view and press the F key on your keyboard.) The blue Z-axis rotator handle encircles the player's body. Clicking and dragging it rotates the player model as if he were standing in a very dodgy canoe. The red X-axis rotator handle rotates the player as if he was a foosball player, stuck on a metal rod. If we click and drag that handle, the player rotates to either fall flat on his face, or flat on his back, like he's got space sickness. And the green Y-axis rotator handle runs around the player like a hula hoop. Dragging this handle around makes the player spin to face different directions. The Player GameObject can get pretty hairy; in order to isolate the rotation controls, type
playerinto the Scene window's search field to exclude all other GameObject.
You can click-and-drag the red X-axis rotator handle to turn the player upside down, but a better method is to change the X-axis rotation in the Inspector panel. Expand the gray arrow next to Transform in the Inspector panel if it's not already open, and change the X value under Rotation to
180. The player flips upside down.
Now, when you click on the Play button to test the game, the player will break-dance his way around the Angry Bots Demo, electric boogaloo-style. The robots are freaking out, thinking "ERROR! DOES NOT COMPUTE!" Way to keep them on their mechanical toes.
The Transform is the component that governs a GameObject's Position, Rotation, and Scale. Every object in the scene has a Transform component that determines where it is (Position), how big or small it is (Scale), and how it's oriented (Rotation). Objects can be stretched and deformed by scaling them along one axis, as we'll see in later chapters.
Layers and layout dropdowns
Above the Inspector panel, you'll see the Layer and Tag drop-down menus. Game objects can be grouped into layers, somewhat like in Photoshop or Flash. Unity stores a few commonly used layouts in the Layout drop-down menu (mine is set to the 2 by 3 configuration). You can also save and load your own custom layouts.

Playback controls
As we've seen, these three buttons help you test your game and control playback. The Play button starts and stops your game. The Pause button works as expected—it pauses your game so that you can make changes to it on the fly. The third button is a step-through control; use it to advance frame-by-frame through your game so that you can more tightly control what's going on.

Scene controls
At the top-left of your screen, you'll see four controls that help you move around your Scene, and position GameObjects within it. These controls are mapped to the Q, W, E, and R keys on your keyboard. From left to right, they are.

The Hand tool (Q): Use it to click-and-drag around your scene. Hold down the Alt key on your keyboard to rotate the view. Use your mouse wheel to zoom the scene in and out. Hold down the Shift key to pan, zoom, and rotate in larger increments to speed things up. This is a way for you to navigate around the game world. It doesn't actually impact the way the player sees the game. To modify the Game view, you need to use the Move or Rotate tools to modify the Camera position. Hold Shift to make the camera move farther. Hold the right or alternate mouse button to pivot the scene as if you're viewing it through a 3D camera.
The Move tool (W): This tool lets you move the GameObjects around your scene. You can either drag the object(s) around by the X, Y, or Z-axis handles, or by the square in the center for freeform movement. Holding down the Ctrl key or the command key (Apple) will snap movement to set grid increments.
The Rotate tool (E): Use it to spin your objects around using a neat spherical gizmo. The red, green, and blue lines map to the X, Y, and Z axes.
The Scale tool (R): This tool works much the same as the Move and Rotate tools. Use it to make your game objects larger or smaller. Dragging an X, Y, or Z handle will non-uniformly scale (squash and stretch) the object, while dragging the gray cube in the center will uniformly scale it.


