Search icon CANCEL
Subscription
0
Cart icon
Your Cart (0 item)
Close icon
You have no products in your basket yet
Save more on your purchases! discount-offer-chevron-icon
Savings automatically calculated. No voucher code required.
Arrow left icon
Explore Products
Best Sellers
New Releases
Books
Videos
Audiobooks
Learning Hub
Newsletter Hub
Free Learning
Arrow right icon
timer SALE ENDS IN
0 Days
:
00 Hours
:
00 Minutes
:
00 Seconds
Arrow up icon
GO TO TOP
The Ultimate Linux Shell Scripting Guide

You're reading from   The Ultimate Linux Shell Scripting Guide Automate, Optimize, and Empower tasks with Linux Shell Scripting

Arrow left icon
Product type Paperback
Published in Oct 2024
Publisher Packt
ISBN-13 9781835463574
Length 696 pages
Edition 1st Edition
Languages
Tools
Arrow right icon
Author (1):
Arrow left icon
Donald A. Tevault Donald A. Tevault
Author Profile Icon Donald A. Tevault
Donald A. Tevault
Arrow right icon
View More author details
Toc

Table of Contents (26) Chapters Close

Preface 1. Getting Started with the Shell 2. Interpreting Commands FREE CHAPTER 3. Understanding Variables and Pipelines 4. Understanding Input/Output Redirection 5. Customizing the Environment 6. Text-Stream Filters – Part 1 7. Text Stream Filters – Part 2 8. Basic Shell Script Construction 9. Filtering Text with grep, sed, and Regular Expressions 10. Understanding Functions 11. Performing Mathematical Operations 12. Automating Scripts with here Documents and expect 13. Scripting with ImageMagick 14. Using awk – Part 1 15. Using awk – Part 2 16. Creating User Interfaces with yad, dialog, and xdialog 17. Using Shell Script Options with getops 18. Shell Scripting for Security Professionals 19. Shell Script Portability 20. Shell Script Security 21. Debugging Shell Scripts 22. Introduction to Z Shell Scripting 23. Using PowerShell on Linux 24. Other Books You May Enjoy
25. Index

Resizing and Customizing Images

Let’s say that I want to downsize my image to 1000x1000 pixels. I would do it like this:

[donnie@fedora script_test]$ convert -resize 1000x1000 S1180001.jpg S1180001_small.jpg
[donnie@fedora script_test]$

By default, the convert command maintains the original aspect ratio of the image. So, the size of my downsized image is actually 1000x563 pixels, as you see here:

[donnie@fedora script_test]$ identify S1180001_small.jpg
S1180001_small.jpg JPEG 1000x563 1000x563+0+0 8-bit sRGB 328914B 0.000u 0:00.000
[donnie@fedora script_test]$

Instead of specifying the size by pixels, you can specify the desired size in terms of a percentage of the original size, like so:

[donnie@fedora script_test]$ convert -resize 20% S1180001.jpg S1180001_small2.jpg
[donnie@fedora script_test]$

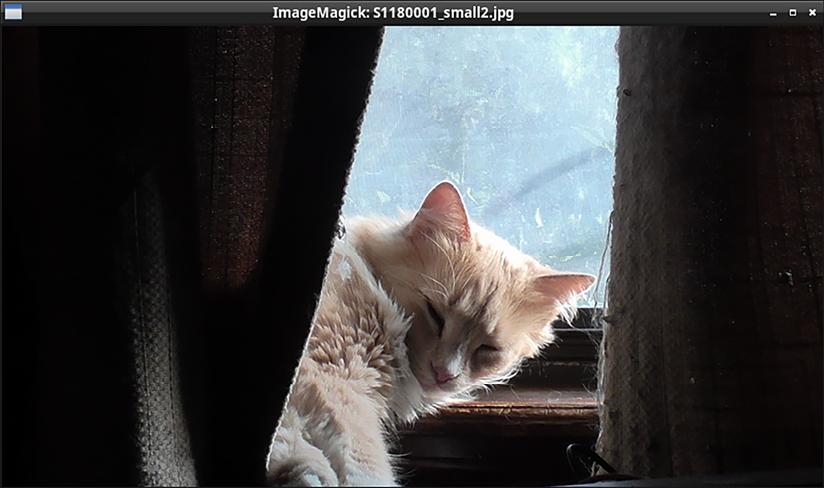
Now when I display the image, it will actually fit on my computer screen. Here’s how it looks:
B21693_13_4

Figure 13.4: Goldie, sleeping in my bedroom window sill

You can apply a special effect to an image at the same time that you resize it. For example, let’s turn this picture of Goldie into a charcoal drawing, like this:

[donnie@fedora script_test]$ convert -resize 15% -charcoal 2 S1180001.jpg S1180001_charcoal.jpg
[donnie@fedora script_test]$

The -charcoal option requires you to specify a number to determine the strength of the effect. In this case I just used -charcoal 2, which gives me just the effect that I want. (I started with -charcoal 15, but that didn’t look good at all.) Here’s how it turned out:

B21693_13_5

Figure 13.5: Goldie with the charcoal effect

There’s such a wide array of effects that you can apply to your images, that it’s impossible for me to list them all here. To see the complete list, just view the convert man page.

One of the pleasant surprises about ImageMagick is that you can learn to do these sorts of things quite quickly, by consulting the magick and ImageMagick man pages, the ImageMagick website or the various tutorials that you’ll find on the either the web or on YouTube. In fact, every time I’ve ever tried to do anything like this with a GUI-type program, such as GIMP or PhotoShop, it always took me forever to figure it out.

Something that’s always bugged me about tablets and smart phones is that when you put them into selfie mode to take a picture of yourself, the picture is always reversed. So, let’s say that I were to take a selfie of me playing guitar. I’m a right-handed guitarist, but a selfie taken with my smartphone would make me look like a left-handed guitarist. (Paul McCartney, the world’s most famous living left-handed guitarist, would appear to be right-handed.) ImageMagick makes it easy to correct that, just by using convert with the -flop option, like so:

[donnie@fedora script_test]$ convert -flop S1180001_charcoal.jpg S1180001_charcoal_flop.jpg

I don’t have any selfies handy at the moment, so I instead flopped Goldie’s picture. Here’s how it turned out:

B21693_13_6

Figure 13.6: Goldie’s picture, reversed

If you’ve ever made the mistake of holding your camera upside down while taking a picture, you can also reverse your pictures vertically by using the -flip option, like so:

donnie@fedora:~/Pictures/script_test$ convert -resize 15% -flip S1180001.jpg S1180001_flip.jpg
donnie@fedora:~/Pictures/script_test$

Here’s how it turned out:

B21693_13_7

Figure 13.7: Goldie has been flipped upside-down

The last trick I’ll show you is how to convert from one image format to another. Just use convert without any option switches, like so:

[donnie@fedora script_test]$ convert S1180001_small2.jpg S1180001_small2.png
[donnie@fedora script_test]$ ls -l *.png
-rw-r--r--. 1 donnie donnie 494190 Dec  4 17:19 S1180001_small2.png
[donnie@fedora script_test]$

So, I now have a .png file to go along with the .jpg file. To see all of the image formats that ImageMagick can work with, just do:

[donnie@fedora ~]$ identify -list format

You’re not always limited to just working with existing image files. You can also create original text image files with a variety of special effects. For example, let’s create a fancy image file of my name, like this:

[donnie@fedora Pictures]$ convert -size 320x115 xc:lightblue  -font Comic-Sans-MS -pointsize 72 -fill Navy -annotate 0x0+12+55 'Donnie' -fill RoyalBlue -annotate 0x130+25+80 'Donnie' font_slewed.jpg
[donnie@fedora Pictures]$

Of course, the font that you specify must be installed on your system. In this case, I’m using the infamous Comic Sans font that everybody loves to hate. (It’s a Microsoft font, which I do have installed on this Fedora machine. I always install the full suite of Microsoft fonts on my Linux machines so that I can work with my publisher and my clients.) Also, note that you can’t have blank spaces in the font names. Replace each blank space with a dash, and you should be good. To understand the rest of the command, look in the ImageMagick man pages for explanations of all of the options. Anyway, here’s what my new image looks like:

B21693_13_8

Figure 13.8: The text image file that I created with ImageMagick

Pretty cool, right? It gets even more cool, when you look at the plethora of examples on the Font Effects page of the official ImageMagick documentation, which you can find here: https://imagemagick.org/Usage/fonts/

There’s a whole lot more that you can do with ImageMagick, but this is enough for now. Let’s now talk about using ImageMagick in shell scripts.

lock icon The rest of the chapter is locked
Register for a free Packt account to unlock a world of extra content!
A free Packt account unlocks extra newsletters, articles, discounted offers, and much more. Start advancing your knowledge today.
Unlock this book and the full library FREE for 7 days
Get unlimited access to 7000+ expert-authored eBooks and videos courses covering every tech area you can think of
Renews at $19.99/month. Cancel anytime
Banner background image