


Creating a XAML page
Before we delve into XAML syntax, let’s first understand how to create a XAML page in Visual Studio and through the dotnet command line.
To create a XAML page using Visual Studio, right-click on the project node, then select Add > New Item…. This will bring up the dialog box shown in Figure 3.1:
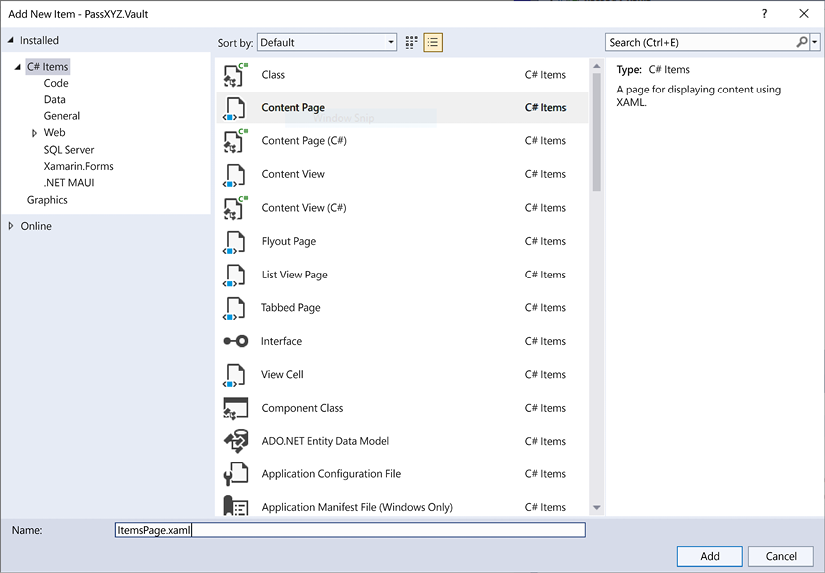
Figure 3.1: Adding a XAML page
On this screen, select Content Page from the templates and click Add. This action will generate a pair of files – a XAML file and a C# code-behind file.
The same can be achieved using a dotnet command. To locate all .NET MAUI templates, we can use the following dotnet command in the PowerShell console:
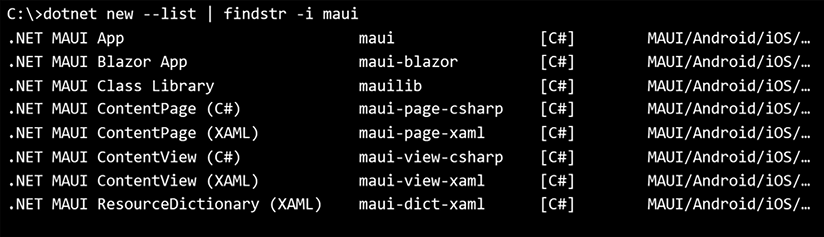
Figure 3.2: dotnet command for listing templates
From the preceding output, we can observe that the short name of the XAML content page is maui-page-xaml. We can create a XAML page using the following command:
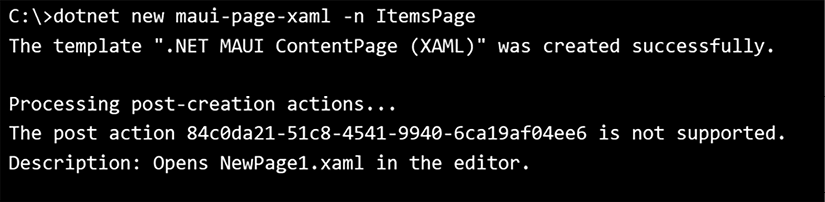
Figure 3.3: Creating a XAML page
The preceding command will generate...


