Time for action - add Item, add Folder, delete Item
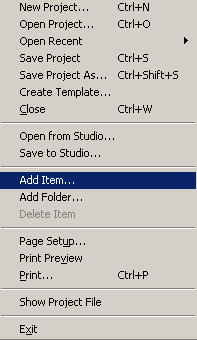
Look at the following screenshot to see where we are on the File menu:

Add Item..., Add Folder..., and Delete Item have already been covered in detail. We first came across Add Item... in Chapter 2 and again in Chapter 4 along with Add Folder... and Delete Item.
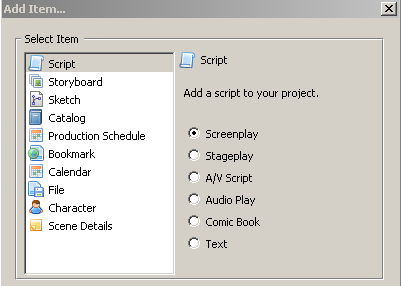
To refresh our memory, clicking on Add Item... brings up the Add Item... dialog box depicted in the following screenshot:

We can then add these items (Script, Storyboard, Sketch, and so on) to our current Celtx project. Another way of adding items is by clicking on the blue box with the white star in it, which is the Add button, just below the File menu in the upper left of the Celtx window. A third way is by clicking on the plus icon just below the Project Library title. Celtx is quite flexible and often offers us more than one way to accomplish tasks.
Newly created items appear in the Project Library window.
Folders—created with the Add Folder... menu item—as we saw in Chapter 4...


