UMG text
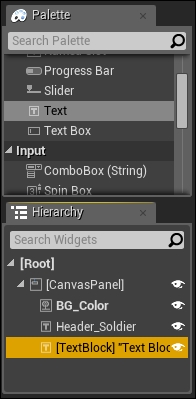
Now that we have finished creating a background for our menu, it is time to lay out our text and navigation. We will add text by navigating to Common | Text. Then, we will drag and drop the text into the Canvas Panel located in the Hierarchy tab:
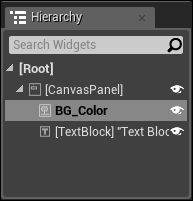
Note down a few important details. Firstly, you will see that in the Hierarchy tab, the Text Block is located within the Canvas Panel. This means that the Canvas Panel is acting as a container for the text; thus, it can only be seen if the player is navigating through the Canvas Panel. You will also notice that the Details tab has changed in order to include specific properties for the text. Some really important details are listed here, such as position, size, text, and anchors. Lastly, you should see that the selected text is in the form of a movable and resizable text box, which means we can place and edit this however we choose to. For now, we won't worry about making the pause screen look pretty, we just need to focus on the layout and functionality. A common layout will be one that navigates the eyes left to right and top to bottom. Since we are starting with the characters, we will make our first text be the character names. Also, we will have them start at the top-left corner of the pause menu.
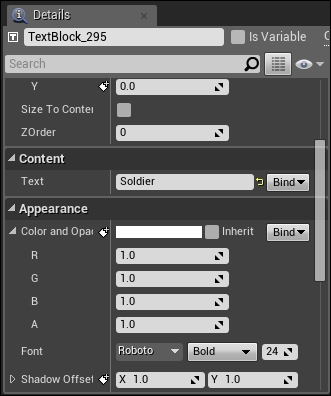
Firstly, we will add the text necessary for the character names or classes. While selecting the text, navigate to Details | Content | Text and type the name of the first class—Soldier. You will notice that the text that you wrote in the Content tab is now written in your Text Block in the Designer view. However, it is small, which makes the text hard to see. Change its size by navigating to Details | Appearance | Font. Here, you can change the size to something larger such as 48:
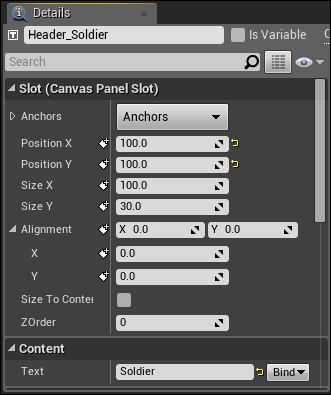
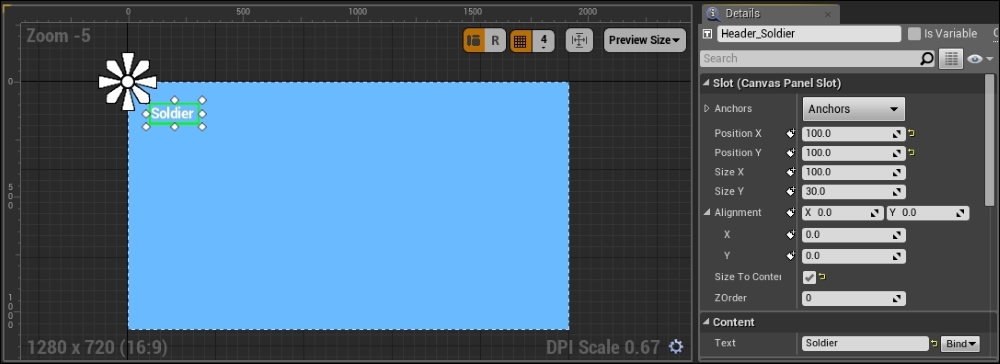
Position the text by navigating to Details | Slot and moving the text so that it is located on the top-left corner, but give it some padding. In our example, we will set Position X to 100 and Position Y to 100 so that there is a 100-pixel padding for Soldier. Lastly, we will rename the text as Header_Soldier:
You will notice that the font size does not change and this is because you must press Compile at the top-left corner of the window. You will need to press Compile whenever you make technical changes such as these in your Design view. Once compiled, you should see that your font is resized. However, the text is too large for the Text Block. You can fix this by simply checking Size to Content, which is located in Details | Slot:
Now that we have created the header for our first character, we can continue to create more texts for its stats. We will start by creating a font for HP. To do so, you will need another Text Block on your canvas:
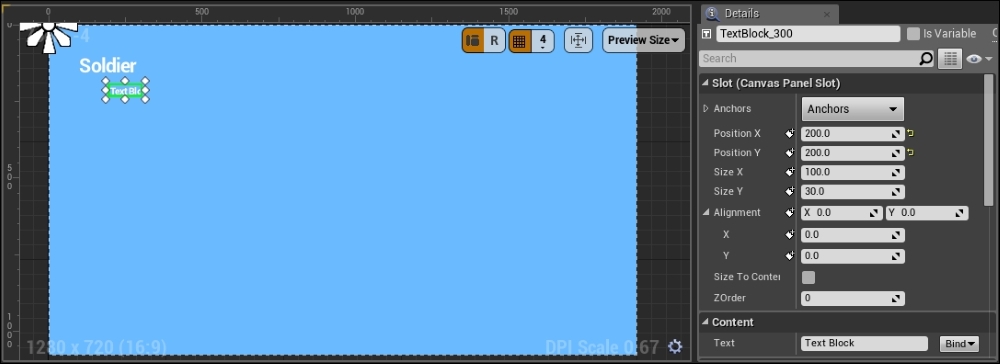
From here, you can position your Text Block so that it is somewhere below the Header_Soldier text. In this example, we will place it at a Position X value of 200 and a Position Y value of 200:
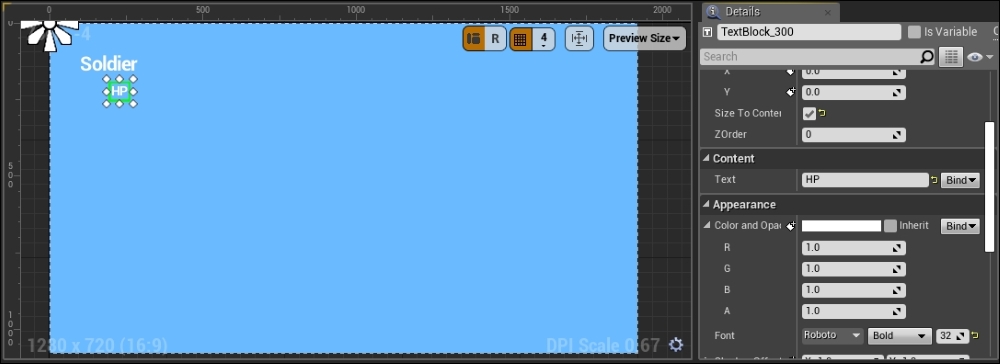
We will then write content for the text; in this case, the content will be HP. Here, we will give a font size of 32 to the text and compile it; then, we will check Size to Content:
Lastly, we will name this widget Menu_HP:
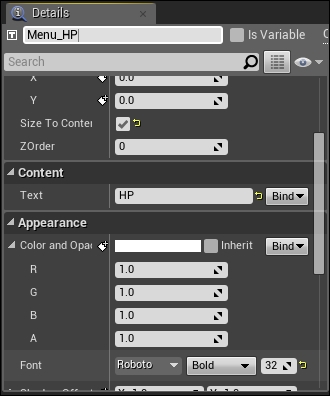
As you can see, all we did was added text that says HP in the menu; however, you will also need actual numbers for the HP displayed on the screen. For now, we are simply going to make a blank Text Block on the right-hand side of the HP text. Later on in this chapter, we will tie this in with the code we created for the character HP in the previous chapter. So for now, drag and drop a Text Block as a child of your Canvas Panel:
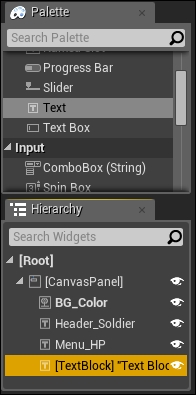
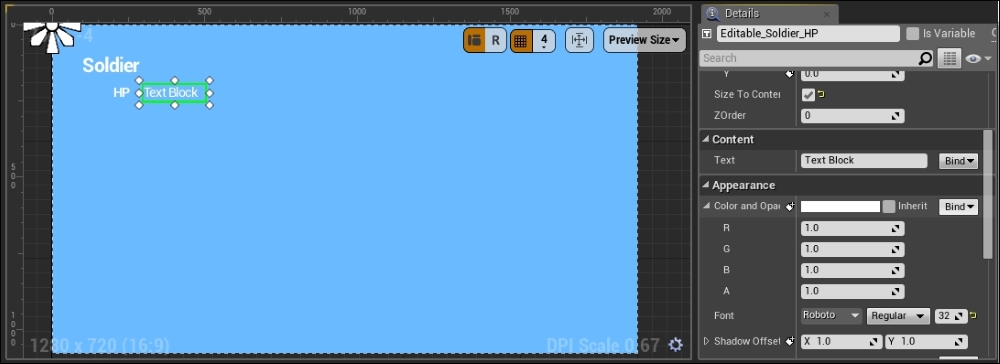
Rename it as Editable_Soldier_HP. Then, position it so that it is to the right of Menu_HP. In this case, we can set the Position X value as 300 and the Position Y value as 200:

Lastly, we can change the font style to Regular, the font size to 32, check Size to Content, and compile:
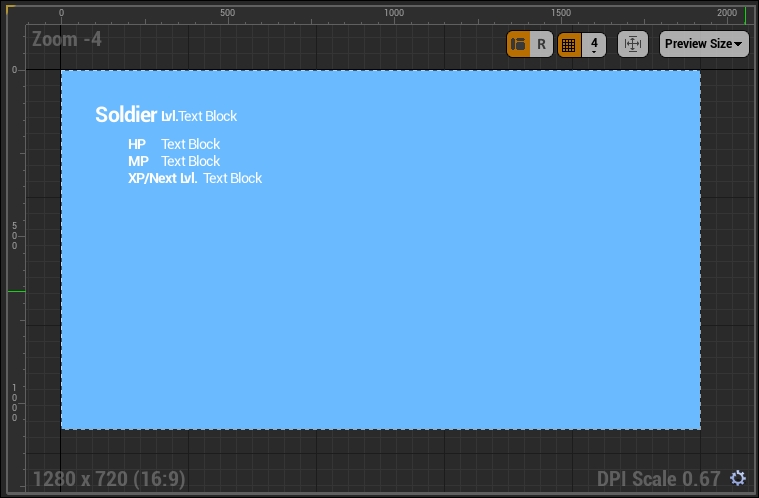
Now that you know what the layout is like and how we can create text blocks for characters and their stats, you can proceed to create the other necessary stats for your character such as level, MP, and experience/next level. After you have finished laying out characters and their stats, your final result should look something like the following:
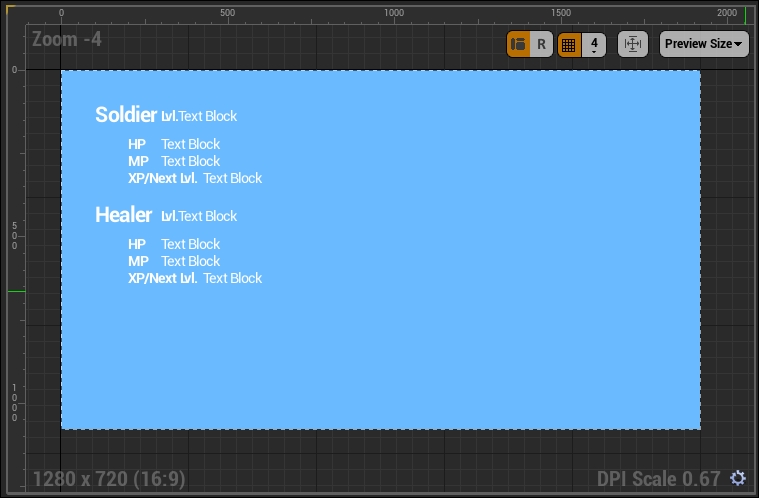
At this point, you may also move on to creating more characters. For instance, if you wanted to create a Healer, you could have easily copied most of the content we created for the Soldier and its layout in our pause screen. Your pause screen with placeholders for both Soldier and Healer stats may look something like the following:
The last placeholder we need to make on this screen is for gold that is collected by the player. Just like we did for the party stats, create a Text Block and make sure the content of the text is Gold. Place this somewhere away from the character stats, for example, in the bottom-left corner of the pause screen. Then, rename the Text Block as Menu_Gold. Finally, create a second Text Block, place it to the right of Menu_Gold, and call it Editable_Gold:
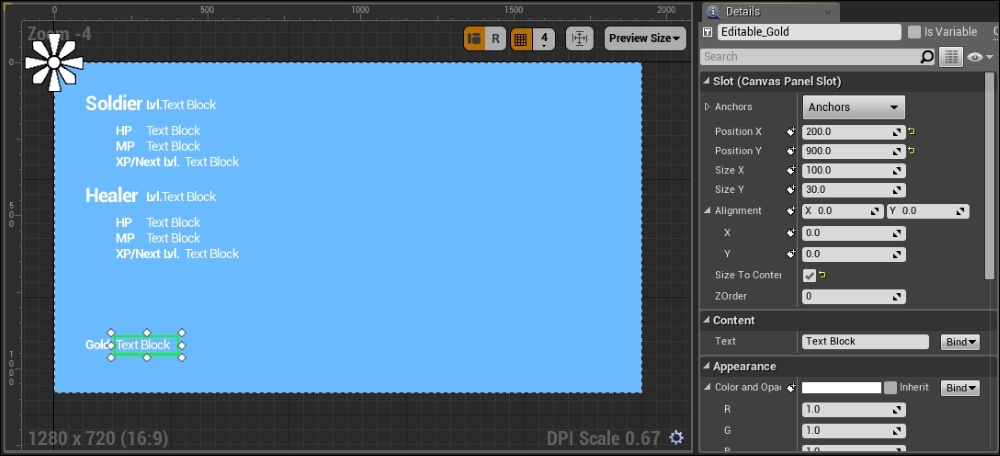
Like the empty text boxes in the character stats, we will link Editable_Gold with the gold accumulated in the game later on.
We can now move on to creating buttons for our menu, which will eventually navigate to submenus.


