Adding jQuery to an empty ASP.NET web project using a script block
To create ASP.NET 4 .6 Web Applications, Visual Studio provides various ready templates such as Empty, Web Forms, MVC, Web API, and so on. This recipe will use the Empty template, which provides the developer with an empty project structure that consists of only the web.config file.
Tip
Downloading the example code
You can download the example code files for this book from your account at http://www.packtpub.com. If you purchased this book elsewhere, you can visit http://www.packtpub.com/support and register to have the files e-mailed directly to you.
Getting ready
Following are the steps to create a project by using Empty template:
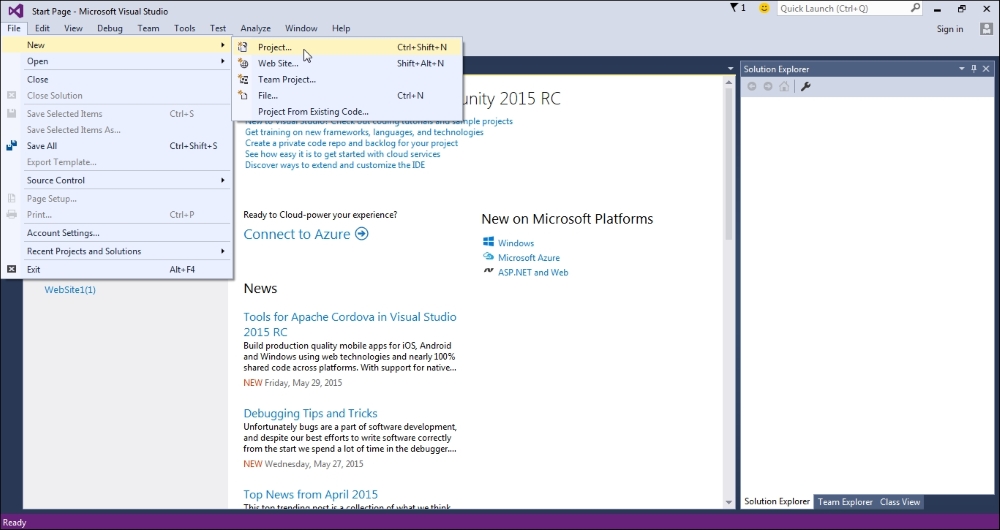
- Create a new project in Visual Studio by going to File | New | Project..., as shown in the following screenshot:
Tip
Website or web project?
Instead of creating a new project, you can also create a new website. Unlike a project, a website does not contain a collective project file to track individual files in the application. To create a website, go to File | New | Web Site.... This will launch the New Website dialog box with the list of available templates. Select the ASP.NET Empty WebSite template.
- This will launch the New Project dialog box, as shown in the following screenshot. From the left-hand side panel, select your desired programming language, Visual C# or Visual Basic, and then, select ASP.NET Web Application from the middle panel:

- Enter
WebApplication1(or any suitable name) in the Name field. Click on the Browse button to go to the desired Location where you would like to save the application. Click on OK. - This will launch the Select a template dialog box, as shown in the following screenshot:
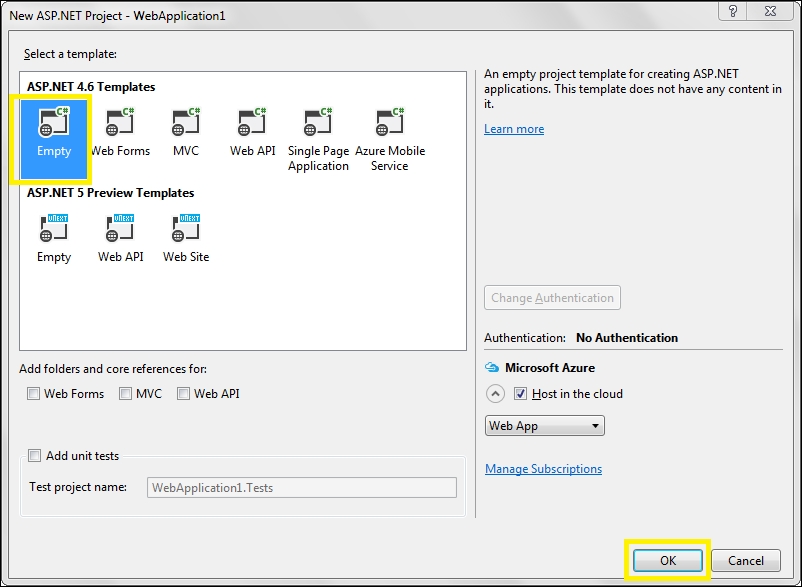
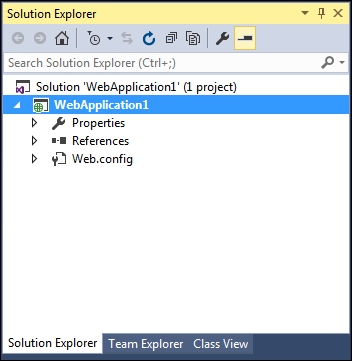
- From ASP.NET 4.6 Templates, select Empty, and click on OK. Visual Studio will create an empty project in the Solution Explorer tab, as shown in the following screenshot:
Note
In the remaining recipes, when asked to create a Web Application project using the Empty template, follow the steps listed in this section.
How to do it…
Following are the steps to include jQuery using script block:
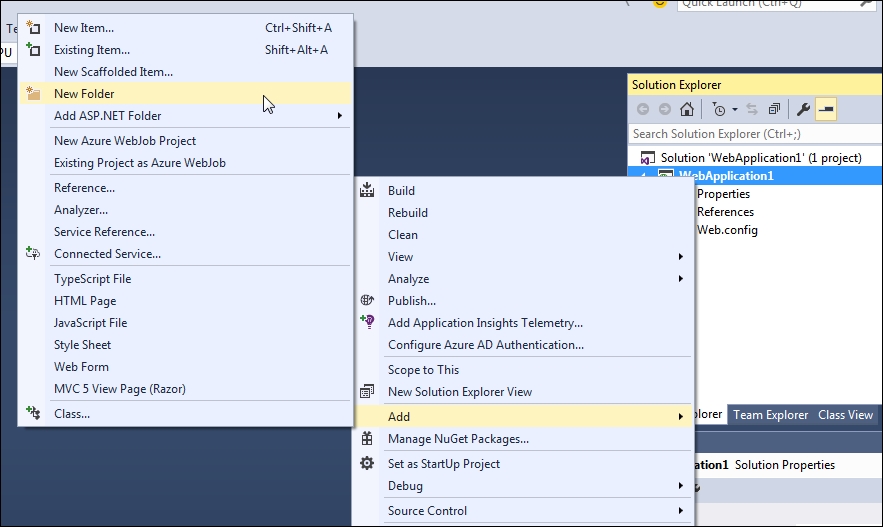
- JavaScript files are usually placed in a folder named Scripts in the web application. So, in the Solution Explorer tab, right-click on the project and go to Add | New Folder from the menu:
- Rename the folder to
Scripts. Now, right-click on the Scripts folder, and go to Add | Existing Item... as shown in the following screenshot: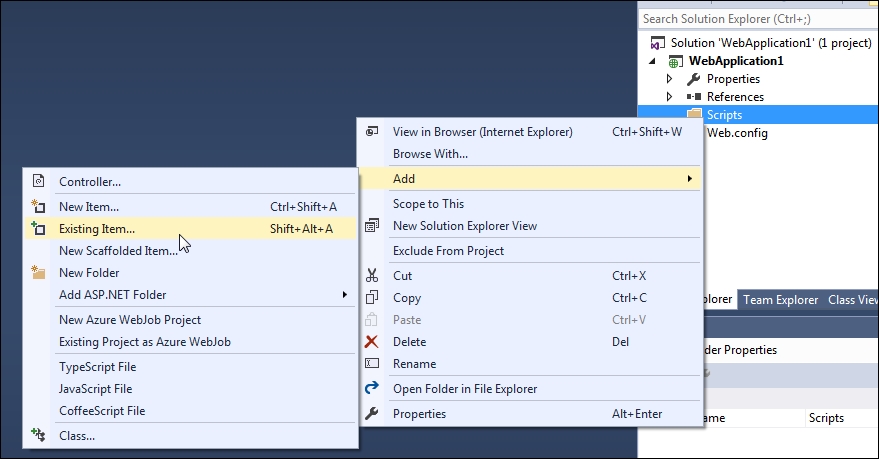
- Now, browse to the location where you have saved the downloaded copy of the jQuery files (refer to the Downloading jQuery from jQuery.com recipe), and click on OK. It is recommended that you add both the uncompressed and compressed versions. The Scripts folder will be updated, as shown in the following screenshot:
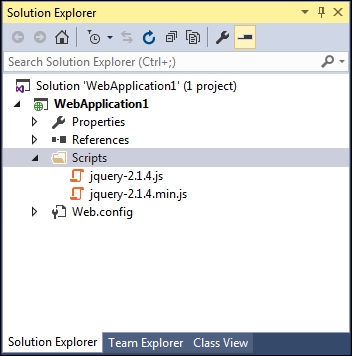
- Next, create a new web form in the project by right-clicking on the project and navigating to Add | New Item.... From the dialog box, select Web Form, and enter a suitable name for the web form, such as
Default.aspx: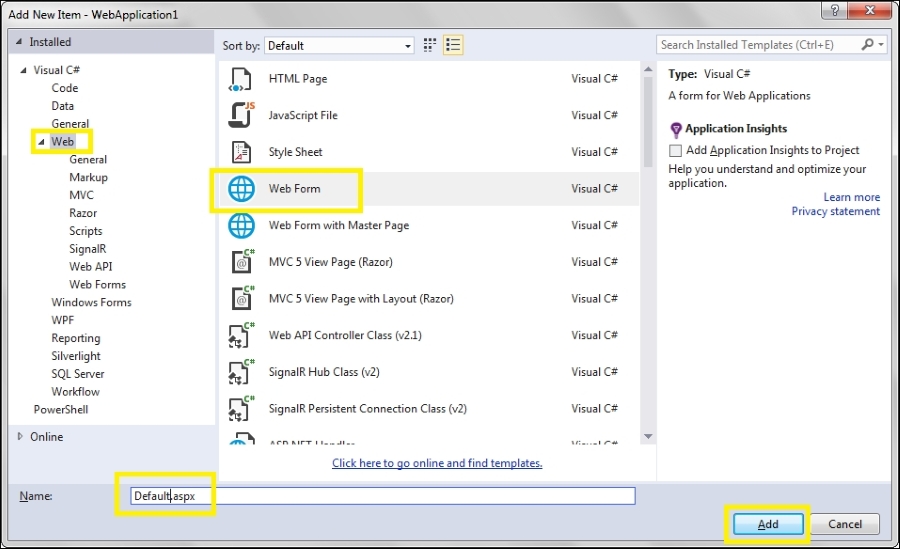
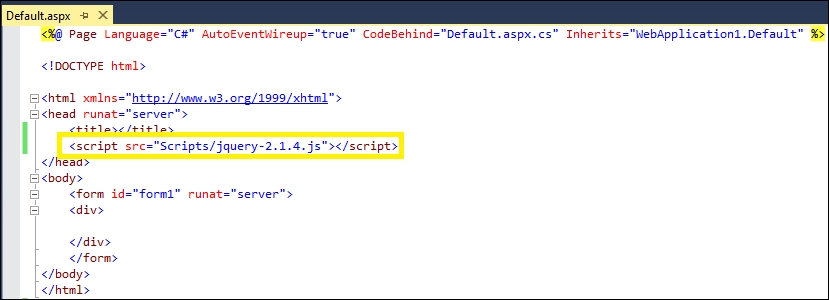
- To use jQuery on the web form, simply drag and drop the required jQuery file, that is, uncompressed or compressed on the web form. Or alternatively, include the following
<script>tag in the<head>element:For development mode, the code is as follows:
<script src="Scripts/jquery-2.1.4.js"></script>
For release mode, the code is as follows:
<script src="Scripts/jquery-2.1.4.min.js"></script>
See also
The Downloading jQuery from jQuery.com recipe


