"Hello, Svelte!"
Now that we've scaffolded our project, we're ready to launch a "hello world" application!
This "hello world" application demonstrates that the Svelte project has been bootstrapped successfully, and that everything has been set up correctly.
Creating the App component
Let's start by creating our first Svelte component. Create the src/App.svelte file and paste the following content:
src/App.svelte
<h1>Hello, {name}!</h1>
<p>My first Svelte app</p>
<style>
p {
    color: #1d4585;
}
</style>
<script>
export let name = ''
</script>
Even before we get into the details of how Svelte components are written, which we'll do in the next chapter, you can already notice a few things.
To begin with, each Svelte component is placed in a file with the .svelte extension. Each file contains one, and only one, component.
The content of the Svelte component file looks like normal HTML pages:
- The layout is written using regular HTML tags.
- You can place CSS rules within a
<style></style>block. All CSS rules defined here are scoped to the component. That is, the preceding rule only applies toptags in the App component. - JavaScript code is again put in a familiar place, between
<script></script>tags.
In the first line, we're seeing for the first time the Svelte templating syntax: at runtime, {name} is bound to the value of the name variable.
The same name variable is also exported using the export statement, just like we'd do with ES2015 modules. The Svelte compiler looks for exported variables and makes them props (or properties), which can be set by outer components.
We'll cover components, the Svelte templating syntax, and props in much detail in the next chapters, but for now let's look at how we can initialize our App component.
The application's entrypoint
Svelte components can't be entrypoints for applications; only JavaScript files can be.
As you will recall, in the Webpack configurations, we defined the entrypoint as the src/main.js file. Let's create that:
src/main.js
import App from './App.svelte'
const app = new App({
    target: document.body,
    props: {
        name: 'Svelte'
    }
})
export default app
This short snippet imports the App component as a class. It instantiates the class, and finally exports the component as the application's code.
The constructor for the App class accepts a JavaScript object with a dictionary of options, including the following:
targetis the DOM element where the component should be rendered as a child; in our example, we want the application to be rendered in the page's<body>.- The
propsdictionary is an optional one that allows a value to be passed to the component's props. OurAppcomponent is exporting a prop calledname, and we're passing the string'Svelte'as its initial value.Note
In most cases, the app's entrypoint is the only place where Svelte components are manually instantiated with the
new Component()syntax.
Index file
Lastly, we need to pre-create the index file that will load our Svelte application. Paste the following content into the public/index.html file (note the use of the public directory!):
public/index.html
<!DOCTYPE html>
<html lang="en">
<head>
    <meta charset="utf-8">
    <meta http-equiv="X-UA-Compatible" content="IE=edge">
    <meta name="viewport" content="width=device-width,initial-      scale=1">
    <title>Svelte Journal</title>
    <link rel="stylesheet" href="/bundle.css">
</head>
<body>
    <script async defer src="/bundle.js"></script>
</body>
</html>
This index file is a pretty standard HTML5 boilerplate page, but it does reference the /bundle.css and /bundle.js files, which are generated by the bundler.
Running the application
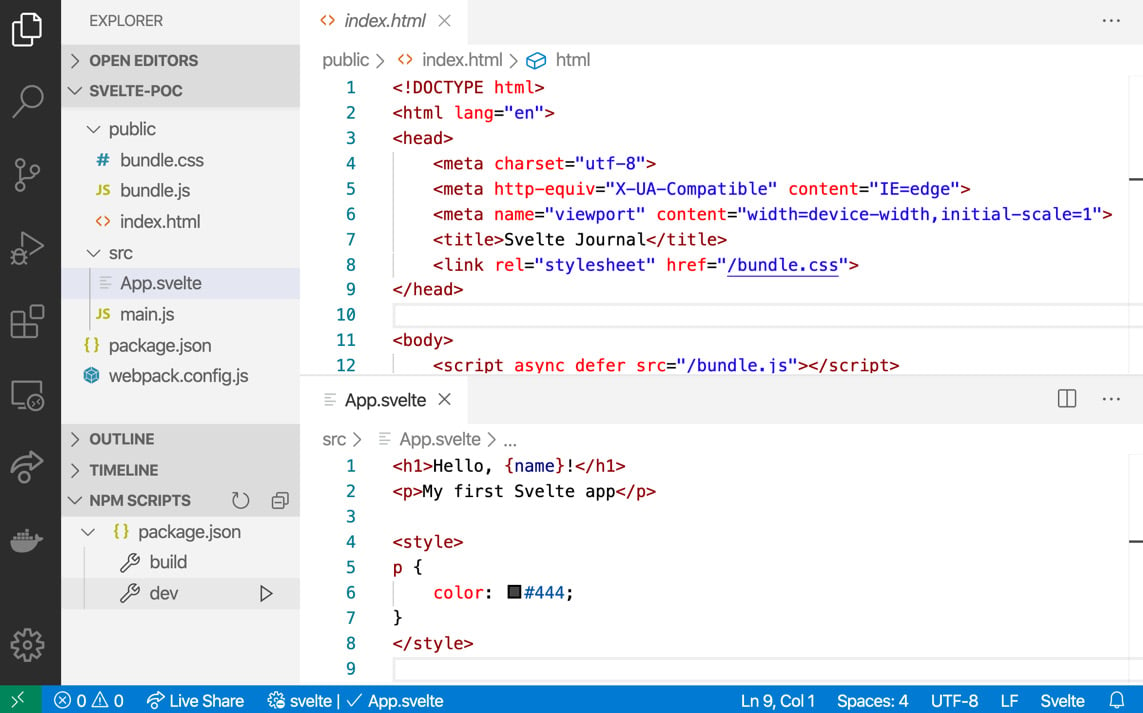
At the end of the setup, your project should look like the following screenshot:

Figure 2.3 – The "Hello, Svelte!" app
We're now ready to launch the application, using the dev NPM script:
- Open a terminal and run the following command:
$ npm run dev
- If you're using Visual Studio Code, you can also launch NPM scripts from the NPM SCRIPTS drawer in the bottom-left corner (if you just created a new project and you don't see it yet, relaunch the editor). Click on dev to launch it, highlighted in the preceding screenshot.
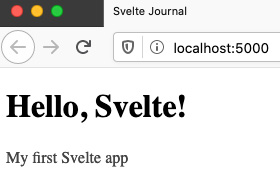
The bundler will compile your app and launch a local server. To see your application running, open a web browser and visit the following link:

Figure 2.4 – Our "Hello, Svelte!" application running
The script you launched is watching for code changes, and bundlers include live-reloading. Try making a code change (for example, change the text in the App.svelte component), and then save the file. Your browser will immediately reload to show your updates!
To stop the bundler from running and watching for code changes, press Ctrl + C in the terminal window:
Warning message
Running the preceding command, as well as the one in the next section, you'll likely see an error similar to Failed to load ./.env in the terminal window. This is just a warning that you can ignore for now; we'll create the .env file in the next chapter.
Compiling for production
Lastly, let's look at how the application can be compiled for production.
Running npm run dev compiles your application in a way that is designed for development. For example, it includes live-reload capabilities, it outputs source maps, and it does not minify or otherwise optimize the code for production.
To generate a production-ready bundle, run the following command:
$ npm run build
This build will take a few seconds more, but will minify all your JavaScript code and run other optimizations, including tree-shaking when possible.
After building for production, you will find your compiled, bundled application in the public folder, ready to be deployed (don't worry, we'll cover deployment options later in the book):
$ ls public
bundle.css
bundle.js
index.html


