Open the NetBeans IDE and create a new project named ZumoRobot.
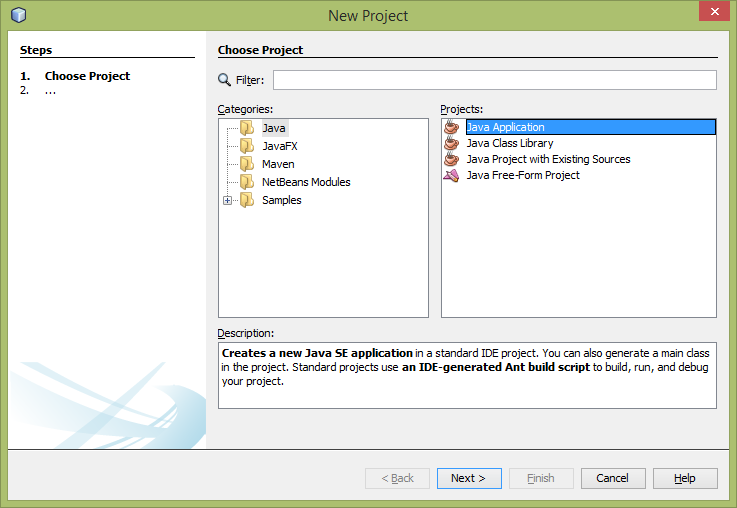
- In the menu bar, click File|New Project. The New Project wizard will appear. In the New Project wizard, click on Java under Categories and click on Java Application under Projects. Then click the Next button:

Figure 5-20: Creating ZumoRobot project with NetBeans IDE - step 1. Image credits: Courtesy of Adafruit (https://www.adafruit.com/)
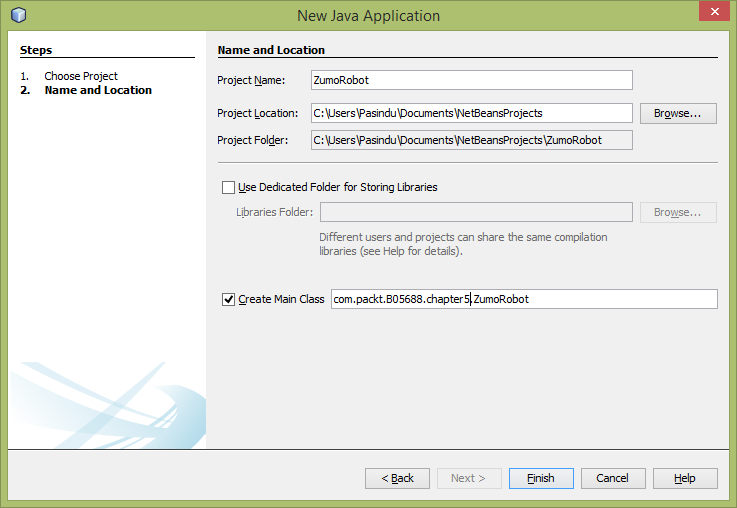
- In the Name and Location step, type ZumoRobot for the Project Name and com.packt.B05688.chapter5.ZumoRobot for the Create Main Class. Click the Finish button to create the project:

Figure 5-21: Creating ZumoRobot project with NetBeans IDE - step 2. Image credits: Courtesy of Adafruit (https://www.adafruit.com/)
- The NetBeans IDE will create a file named ZumoRobot.java and the project environment for you.
- To work with Raspberry Pi GPIO pins, you should add the Pi4j library to your...


