Creating sample BPEL business processes
Start JDeveloper from the Start menu with the default role. In JDeveloper, from the Application tab, click on New and select SOA Application and then click on Next, as shown in the following screenshot:

Enter the Project Name and click on Finish, as shown in the following screenshot:

It will load the JDeveloper's Design view for developing SOA applications, as shown in the following screenshot:

Drag-and-drop a BPEL Process from Component Pallet to the JDeveloper canvas. The Create BPEL Process screen will appear on the JDeveloper console.
As shown in the following screenshot, you can name your BPEL process. In this case the name is the default BPELProcess1. In the Template field, select Synchronous BPEL Process. Executing Synchronous BPEL processes returns a result. The Asynchronous BPEL processes may not return any value:

As shown in the following screenshot, double-click on BPELProcess1 to view the BPEL:

After double-clicking on the BPEL process, a window, as shown in the following screenshot, will appear:

The next step is to debug the basic BPEL process. Currently, the business process has only receiveInput and replyOutput activity. Click on Run (or Make) to compile the project, as shown in the following screenshot:

After selecting Debug, the following dialog is displayed as no Default Run Target was specified in Run/Debug page of the Project Properties dialog.
Use the dialog in the following screenshot to specify the Default Run Target. Ignore any warning message about the non-existence of the
srcfolder:
From the Activities toolbar on the right-hand side of your window, drag an Assign activity and drop it between receiveInput and replyOutput. The following screenshot will appear after the changes:

You can rename it by double-clicking on Assign1.
An Assign activity is usually used for manipulating data. For example, Assign activity can be used for copying the contents of one variable to another.
Assign activity is mainly used for copying the XML data contained in one BPEL variable to another BPEL variable. The data in a variable is visible and shared among all process activities.
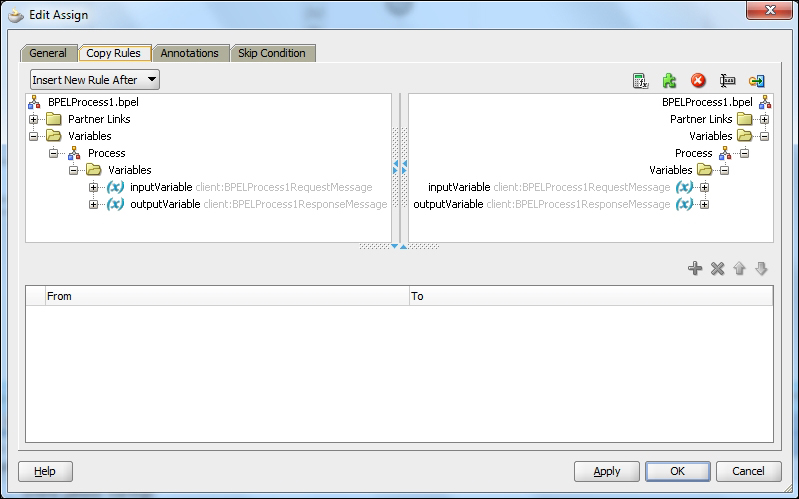
Partner Link represents a link to services. JDeveloper's Source tab allows you to make the changes to the sources if required. The following screenshot shows how the Copy Rules tab can be used for creating a copy rule and connecting the source and target types:

In the sample BPEL process being shown in the preceding screenshot, input data from an input string is being copied to an output string using the concat function of XPath.
XPath is language for navigating through elements and attributes in an XML document and finding information within an XML document. The syntax of XPath's concat function is as follows:
fn:concat(string,string,...)
It returns the concatenation of the strings. For example, concat("My","first","XPATH function!") gives the output as My first XPATH function.
While copying the value of an input string to an output string, use the concat function of XPath to combine the strings together to manipulate the data. The Assign activities in BPEL build the XPath queries.
It is recommended to use the drag-and-drop feature for copying and assembling functions. The source code example of the Assign activity is given as follows (you can view the source code from JDeveloper' Source tab):
<assign>
   <copy>
      <from expression="concat('BPEL working ',
         bpws:getVariableData('input', 'payload', '/p:input))"/>
      <to variable="output" part="payload" query="/p:result/p:message"/>
   </copy>
</assign>
Assign activity in BPEL can do the following:
Copy data of one XML variable from input to output
Calculate the value of an expression and store it in a variable
The Assign syntax of the copy function is as follows:
<copy> <from...> <to...> </copy>


