Installing ImageJ
ImageJ is software written in the Java programming language. In order to run it, Java Runtime Environment (from now on, just Java) should be installed in your system (go to http://java.com for more information). If you do not have it installed and cannot do it for any reason, you can download several ImageJ packages that include it, but the download size will be considerably larger. The current stable version of ImageJ (1.46r at the time of this writing, though the development is fast and new versions are released almost on a weekly basis) can be downloaded from: http://imagej.nih.gov/ij/download.html. The exact package to be downloaded depends on your particular situation (what operating system are you using, whether you have administrator privileges to perform a system-wide installation, and so on).
Depending on your particular needs, you may want to download the platform-specific installer package, or simply the platform-independent version that consists of a ZIP file, that can be uncompressed and run from your user directory, or even from a USB stick. The platform-specific packages are straightforward to use and behave just like a regular application for the operating systems they are built for; there is extensive documentation regarding the particular details of the installation process for each system in the main ImageJ webpage (Windows: http://imagej.nih.gov/ij/docs/install/windows.html; Linux: http://imagej.nih.gov/ij/docs/install/linux.html; Mac OS: http://imagej.nih.gov/ij/docs/install/osx.html). In the next subsections, we will talk a bit about performing a local installation with the platform-independent file. Depending on your particular configuration, you might want to use these files, as they do not require you to have administrative privileges, and allow you to install ImageJ in any folder in your user directory.
Windows
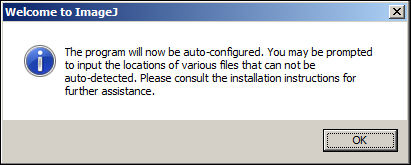
Download the file ij146.zip (or the one currently being offered) from the download page and unzip it to the folder where ImageJ will be installed. Inside the ImageJ/ folder, double-click on ImageJ.exe. The following dialog will pop up:

The auto-configuration process is pretty straightforward, and consists basically of detecting the path to your Java installation. If the path cannot be automatically found, you will be asked to provide the location of the javaw.exe file. Once this has been done, a new ImageJ.cfg file will be created in the directory where you have unzipped the file, and ImageJ will start. This file is created only in Windows. From that point on, double clicking on ImageJ.exe runs ImageJ, and a direct shortcut can be created on the desktop or where it is useful for your purposes.
Linux / Mac OS
Just like with the Windows version, download the ij146.zip (or the most current) file. Unzip it to the desired folder and execute the run script (on Mac systems, you can also double-click on the application icon). This file just contains a call to the Java virtual machine with the necessary parameters, so the java command needs to be in the system path; in this case, there is no Java autodetection or ImageJ.cfg generation. You can safely delete ImageJ.exe, as it is a Windows-only file.


