Installing JDeveloper
Now your GlassFish server is ready to run ADF applications—but we still need a tool to build them.
JDeveloper or Eclipse?
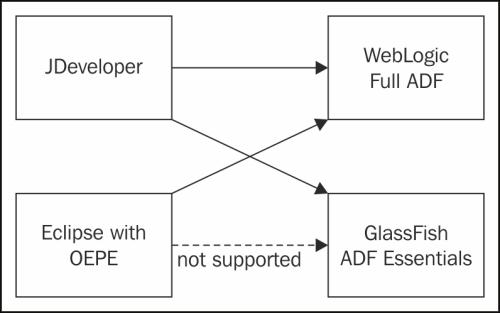
There are two tools for building Oracle ADF applications: Oracle JDeveloper and Eclipse with Oracle Enterprise Pack for Eclipse. There are two kinds of ADF: Full ADF, which needs a WebLogic server (and a license fee), and ADF Essentials, which is free.
Note
ADF Essentials is enough to build most applications. Some features that are only available in Full ADF include ADF Mobile, ADF Desktop Integration, ADF Security, ADF remote taskflows, MetaData Services, and so on. Refer to the ADF Essentials FAQ for a full list: http://www.oracle.com/technetwork/developer-tools/adf/overview/adfessentialsfaq-1837249.pdf.
At the time of writing, JDeveloper was supported for developing both kinds of ADF applications, but Oracle Enterprise Pack for Eclipse is only supported for building applications for Full ADF. We can see the same in the following diagram:

Which JDeveloper?
There are two flavors of JDeveloper:
The 11g Release 1 branch (called 11gR1, version numbers 11.1.1.x. At the time of writing, the latest was 11.1.1.7.0)
The 11g Release 2 branch (called 11gR2, version numbers 11.1.2.x. At the time of writing, the latest was 11.1.2.3.0)
11.1.1.7.0 is actually the latest release, and Oracle are developing all of their big internal applications using 11gR1 versions. These are the ones that get bug fixes first and are the only ones to offer support for modern distributed version control tools like Git.
Unfortunately, only the 11gR2 branch has support for GlassFish, so this is the version we have to use for developing applications with ADF Essentials.
Note
Oracle is promising eventually to bring these two tracks together in a JDeveloper 12c version. If this version is available by the time you read this book, choose that one. It might also have support for GlassFish 4.0.
JDeveloper installation
You can download JDeveloper from the Oracle Technology Network (OTN) website at http://otn.oracle.com. Click on the Downloads link and you will normally find a link to JDeveloper under Popular Downloads to the right. If it's not there, find it via the download index on the left.
Read and accept the OTN JDeveloper License and download the latest version for your platform. At the time of writing, this was 11.1.2.4.0. You'll want the Studio edition because this one includes Oracle ADF. Choose the install for your platform—the Windows install is an .exe file, and the Linux install is an executable (.bin). For other platforms, you will need to get the Generic installer. If you need the Generic installer, refer to the installation guide (under Prerequisites & Recommended Install Process) for detailed instructions. If you're not signed in to www.oracle.com, you'll have to do so before you can download.
The installation of JDeveloper on Windows is straightforward—just run the jdevstudio11124install.exe file. When prompted for an install directory, select C:\adfessentials\Middleware111240. Choose to perform a Typical installation.
Tip
If you later decide to install other versions of JDeveloper on your development machine, keep each version in its own directory.
The first time you start JDeveloper, you will be prompted to select a role. Select Studio Developer and remove the checkmark in the Always prompt for role selection on startup box.
Installing the MySQL Connector in JDeveloper
By default, JDeveloper does not come with a connector to MySQL databases. However, you have already downloaded the JDBC Connector for MySQL (Connector/J) that you can use in JDeveloper as well.
To install it in JDeveloper, copy the mysql-connector-java-5.1.25-bin.jar file (or whatever the version number is by the time you read this) to C:\adfessentials\middleware111240\jdeveloper\jdev\lib.
Note
The driver just needs to be placed on JDeveloper's classpath—the preceding directory is one possible option.
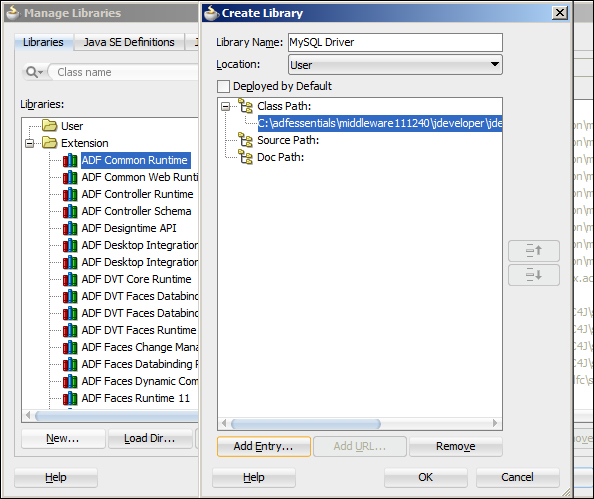
Then, from within JDeveloper, choose Tools | Manage Libraries. Click on New to add a new library and call it MySQL Driver. Choose the Class Path node and click on Add Entry. Navigate to the C:\adfessentials\middleware111240\jdeveloper\jdev\lib directory, choose the JAR, file and click on Select.
Tip
Choose the JAR file itself, not the directory.
The Create Library dialog should look like this:

Click on OK twice to close the dialog boxes. Now you have the MySQL driver available for your projects.
Installing the GlassFish Server Extension
In order to make it easier to manage the GlassFish server from within JDeveloper, you should install the GlassFish Server Extension into JDeveloper.
In JDeveloper, choose Help, Check for Updates. In step 2 of the Check for Updates wizard, make sure that Open Source and Partner Extensions is checked. In step 3, find the Glassfish Server Extension and select it. Click on Next and then click on Finish, and allow JDeveloper to restart. When JDeveloper starts again, you should see some GlassFish icons on your toolbar, like this:

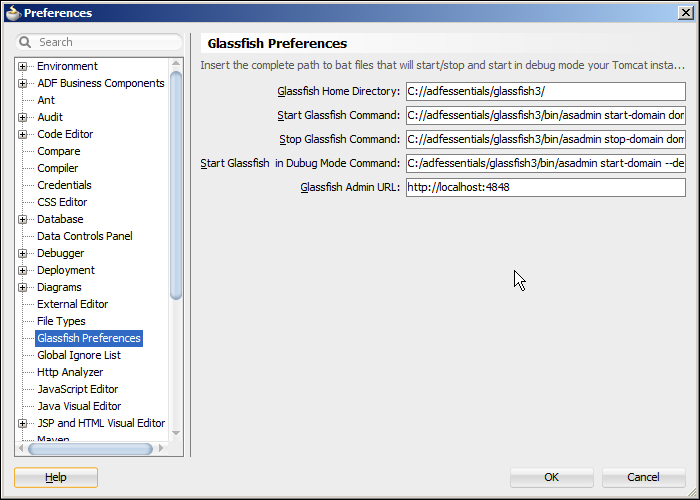
You also need to tell JDeveloper where you have installed GlassFish. Choose Tools | Preferences | GlassFish Preferences. If you only see a Load Extension button, click on it to load the GlassFish. Then, update all the paths to match your GlassFish installation. If you use the same directories as this book, your dialog box will look like this:

Connecting to the GlassFish server
If your GlassFish server is not running, start it. On Windows, this is done via Start | GlassFish Server Open Source Edition | Start Application Server, or you can use the new GlassFish icons on the toolbar in JDeveloper.
Choose File | New | Connections | Application Server Connection. Give your connection a name and choose Glassfish 3.1 as Connection Type. In step 2, provide the admin username (admin) and leave the password field blank (the default GlassFish install doesn't set an admin password). In step 3, you can leave the default hostname and ports.
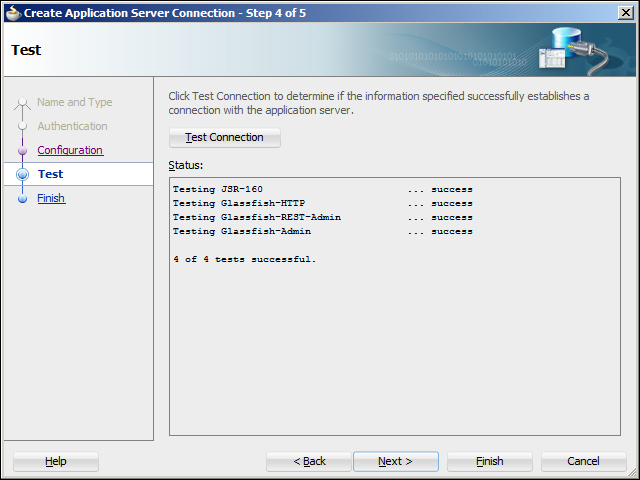
In step 4 of the wizard, test the connection. You should see all tests successful as shown in the following screenshot if your GlassFish server is running and JDeveloper can connect to it:


