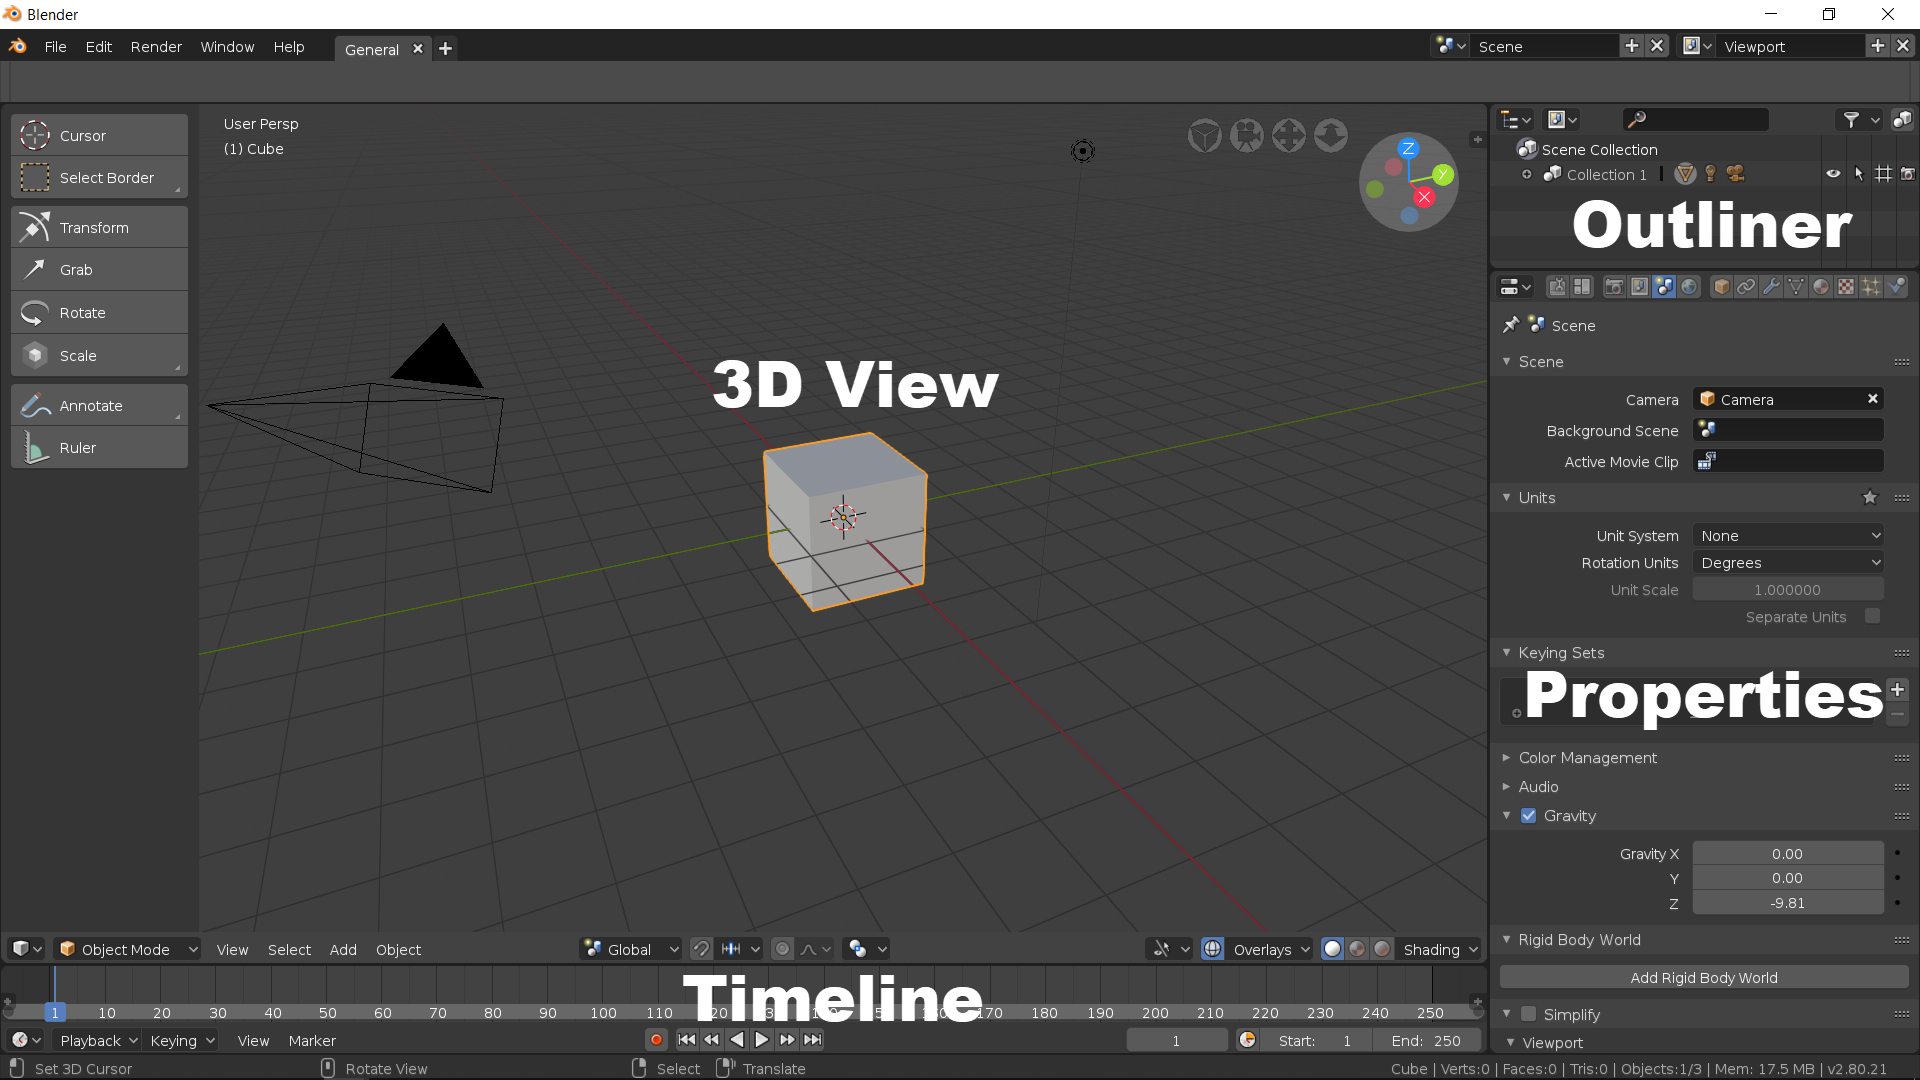
The first time you open Blender, you will see a user interface with lots of tools and buttons and a big area to create 3D content (Figure 1.1). One of the primary goals of Blender is to make 3D content for animation, effects, and other types of productions. How is it possible to edit video in Blender? Take a look at the following screenshot:

Besides having all those tools for 3D content creation, Blender will also feature a lot more options. One of those options is a video editor inside the software. Unlike many competitors in 3D content creation, Blender's developers wanted to create a tool that could handle all aspects of media production.
If you have an idea that requires 3D content creation that will result in a video file, you can create that in Blender. Better yet, you will be able to get additional footage and blend it with your 3D content.
One crucial aspect of the Blender user interface that you will notice is that you can change and manipulate almost all aspects related to windows. Look at Figure 1.1, and you will see divisions at the interface. Each division might assume a unique function, depending on what you want to do with the software.
The main windows available in the default user interface are the following:
- 3D View: The sizeable 3D space with a tray cube that will allow you to add and manipulate such content
- Timeline: At the bottom of your 3D View you will see a horizontal window showing options to play back and set animation
- Properties: On the right-hand side, you have a tall vertical window called Properties, where you will get options to render and change lots of options regarding a scene
- Outliner: Finally, we will also find a small window in the upper-right corner with a word, Collection 1, where you can organize 3D content in your scene
Which one of these will be the best option for video editing? None of them. We have to use another window that is not part of the default user interface.


