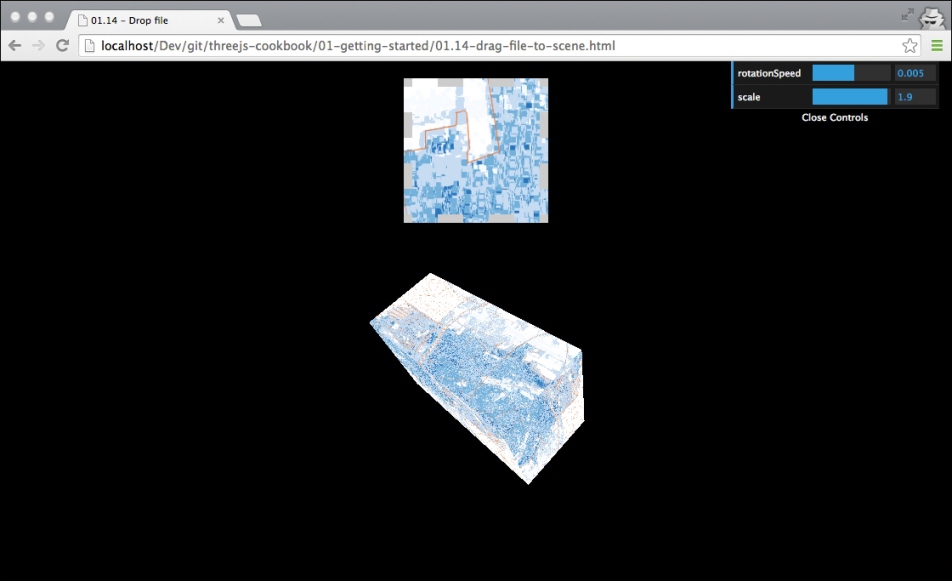
Dragging a file from the desktop to the scene
When you create visualizations, it is a nice feature to let your users provide their own resources. For instance, you might want to let the user specify their own textures or models. You can implement this with a traditional upload form, but with HTML5, you also have the option to let the user drag and drop a resource directly from the desktop. In this recipe, we'll explain how to provide this drag and drop functionality to your users.
Getting ready
The easiest way to prepare for this recipe is by first looking at the example we created for you. Open an example 01.14-drag-file-to-scene.html in your browser.
Note
Please note that this only works when running your own web server, or with security exceptions disabled.

When you drag and drop an image file onto the drop area (the dashed square), you'll immediately see that the texture of the rotating box is changed and the image that you provide is used.
In the following section, we'll explain how you can create this functionality.
How to do it...
To do this, please carry out the following steps:
- First, we have to set up the correct CSS and define the drop area. To create the dashed drop area, we add the following CSS to the
styleelement in theheadelement of our page:#holder { border: 10px dashed #ccc; width: 150px; height: 150px; margin: 20px auto;} #holder.hover { border: 10px dashed #333; #333}As you can see in this CSS, we style the HTML element with ID
holderto have a dashed border. The HTML for theholder divelement is shown next:<body> <div id="holder"></div> </body>The drop area has been defined, so the next step is to add drag and drop the functionality to it.
- Then, we have to assign the correct event handlers so that we can respond to the various drag and drop related events.
- Just as in our previous recipes, we defined a function that contains all the required logic:
    function setupDragDrop() {
      var holder = document.getElementById('holder');

      holder.ondragover = function() {
        this.className = 'hover';
        return false;
      };

      holder.ondragend = function() {
        this.className = '';
        return false;
      };

      holder.ondrop = function(e) {
        ...
      }
    }
In this code fragment, we defined three event handlers. The
holder.ondragoverevent handler sets the class on the div element to'hover'. This way, the user can see that they are allowed to drop the file there. Theholder.ondragendevent handler is called when the user moves away from the drop area. In the event handler, we remove the class of thedivelement. Finally, if the user drops a file in the designated area, theholder.ondropfunction is called, which we use to process the dropped image. - The final step is to process the dropped resource and update the material of our box. When a user drops a file, the following piece of code is executed:
      this.className = '';
      e.preventDefault();

      var file = e.dataTransfer.files[0],
      var reader = new FileReader();
      reader.onload = function(event) {
        holder.style.background =
        'url(' + event.target.result + ') no-repeat center';

        var image = document.createElement('img');
        image.src = event.target.result;
        var texture = new THREE.Texture(image);
        texture.needsUpdate = true;

        scene.getObjectByName('cube').material.map = texture;
      };
      reader.readAsDataURL(file);
      return false;
The first thing that happens is that we call
e.preventDefault(). We need to do this to make sure that the browser doesn't just show the file, since that is its normal behavior. Next, we look at the event and retrieve the dropped file usinge.dataTransfer.files[0]. We can't really do much with the file itself, since Three.js can't work directly with those, so we have to convert it to animgelement. For this, we use aFileReaderobject. When the reader is done loading, we use the content to create thisimgelement. This element is then used to create theTHREE.Textureobject, which we set as material for our box.
How it works...
Drag and drop functionality isn't something that is supported by Three.js out of the box. As we saw in the previous section, we use the standard HTML5 drag and drop related events. A good overview of what events are available can be found in the official HTML5 documentation at http://www.w3.org/TR/html5/editing.html#drag-and-drop-processing-model.
One interesting thing to note is the addition of texture.needsUpdate = true to the ondrop event handler. The reason we need to set this property of the texture is to inform Three.js that our texture has changed. This is needed because WebGL and also Three.js caches textures for performance reasons. If we change a texture, we have to set this property to true to make sure that WebGL knows what to render.


