Exploring My Account
In this section, you will explore your account details view, where you will find information about your account and what services are available to you. This includes services such as the ability to view the list of backend systems available to you, notification settings, and resetting your password.
To open the account view, follow these steps:
- Click on your avatar at the top right of the dashboard (as highlighted in the following screenshot) and select My Account:

Figure 1.6 – The My Account option on the dashboard
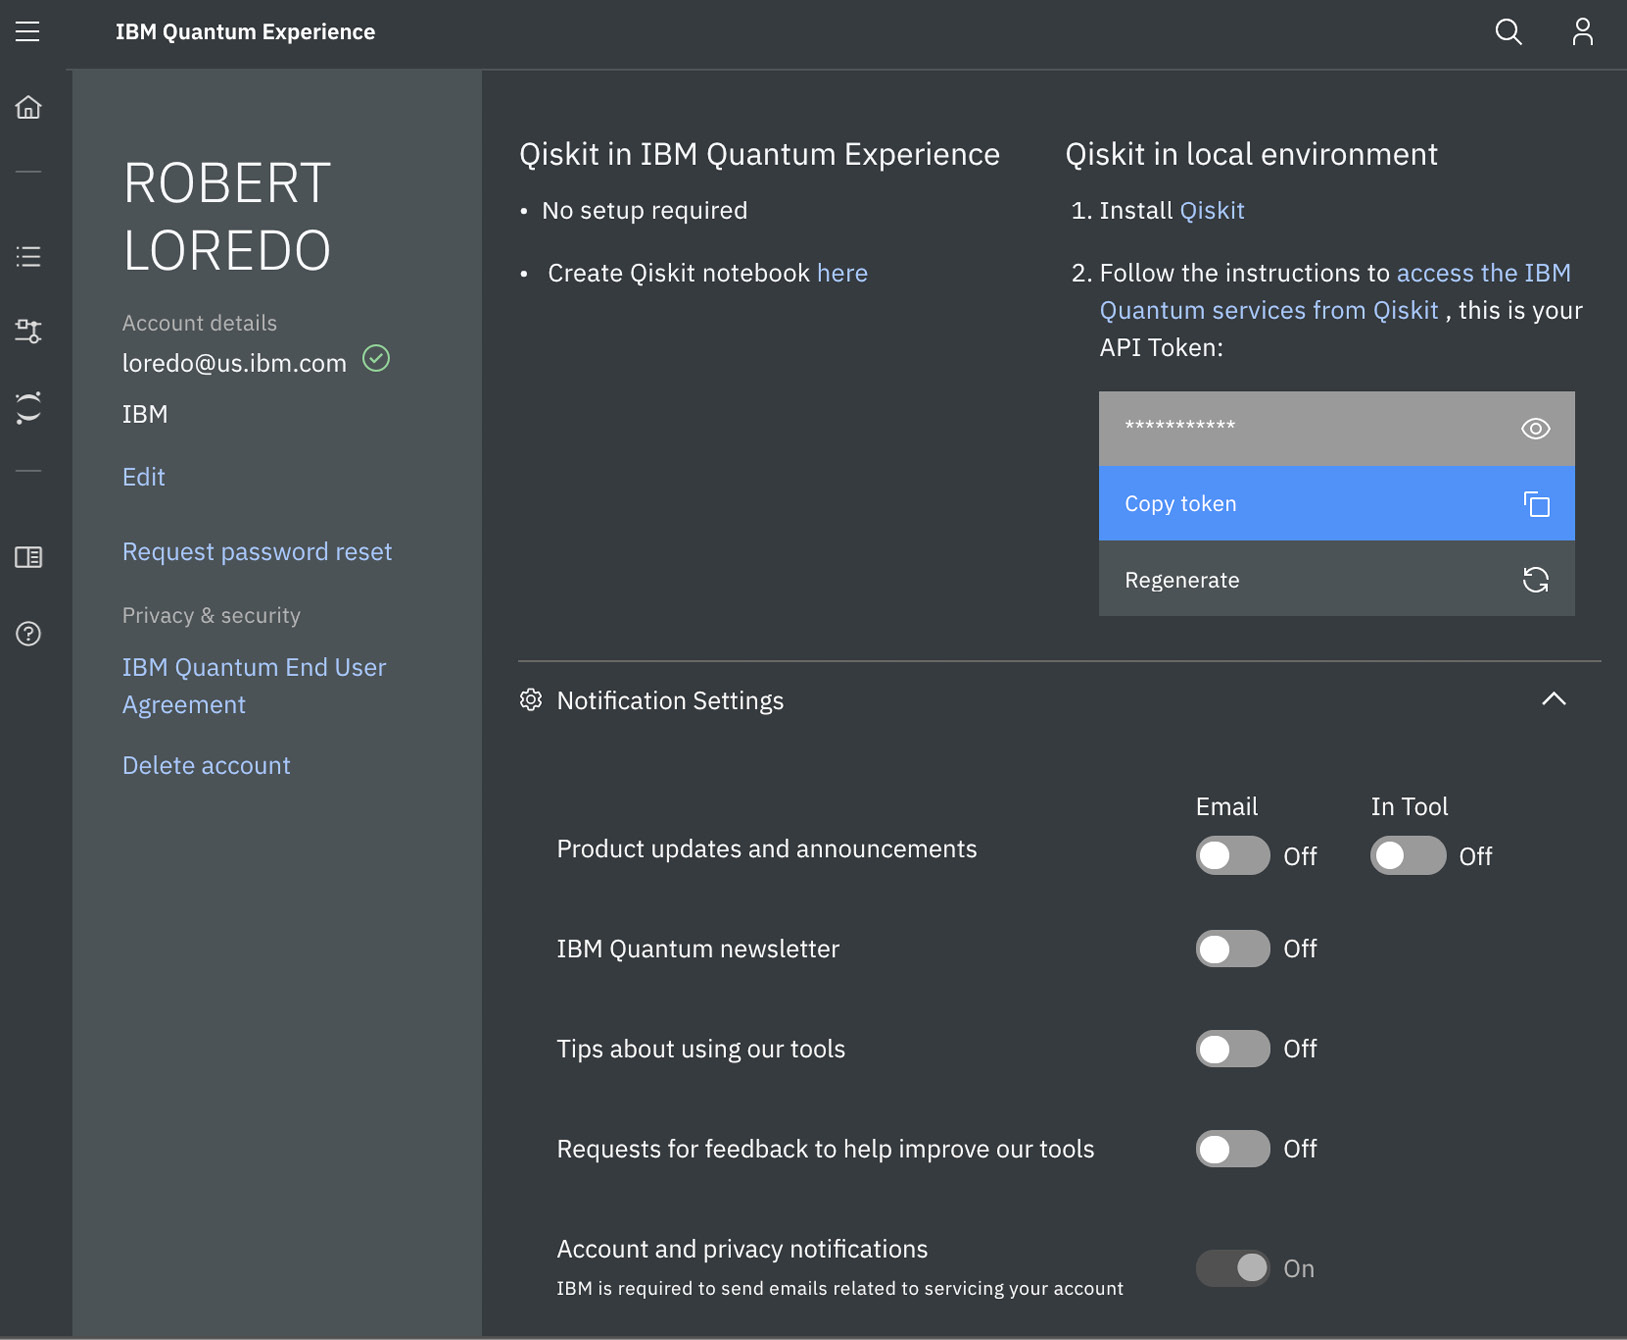
- Once the My Account view is loaded, you will see a page similar to this:

Figure 1.7 – The My Account view
From the preceding screenshot, you can see that on your account page, you will see the following information sections:
- Account details: This section has your account and contact information that you used to register. It also includes options such as resetting your password, privacy and security information, and the option to delete your account.
- Qiskit in IBM Quantum Experience: This includes a quick link to launch a Qiskit notebook to run your experiments. We will review the Qiskit notebook later in this book, but for now, just know that you can launch a Qiskit notebook from here as well.
- Qiskit in local environment: This section allows you to install Qiskit and run experiments from your local machine without the need to connect to IQX via the cloud. This is exceptionally helpful when you wish to run experiments but do not have access to a network. By running experiments from your local machine, this allows you to run simulators that are installed as part of the Qiskit installation. However, keep in mind that in order to run the experiments on a real quantum device, you will need network connectivity to those real devices.
If you want to run the experiments on a real device from your local machine, then you will need to copy the token (highlighted in Figure 1.7) that was generated for you in the background. You should then assign it to the Qiskit IBMQ provider class. Details of the IBMQ provider class will be discussed in Chapter 9, Executing Circuits Using Qiskit Aer, but for now, this is where you can copy the Application Programming Interface (API) token.
Also, note that there is an option to regenerate the API token. If you choose to regenerate the token, you will need to delete your old token and save the regenerated one in your local IBMQ provider class. The save account method of the IBMQ provider class will persist the value in your local machine, so you will only have to save it once and then load the account each time you wish to use a real quantum device for your experiment.
Since this book is written primarily for use on the IBM Quantum Experience site, we will cover running and setting up on your local machine. Just in case you happen to not have network connectivity, you can still run simulated experiments locally.
- Notification Settings: This section simply allows you to set your notifications and how you prefer to receive information, such as when experiments have completed or other information or surveys that you wish to contribute.
- Your accounts: This last section toward the bottom of the My Account view is an overview of the accounts that you have and a list of the provisioned systems you have access to. These provisions are selected and assigned as part of the sign-up process. This includes information such as when you first signed up, the project that you are associated with (main is usually the default project), provider information, and the allocated backend systems that you have access to. These allocated backends that you can see are either real devices, such as ibmq_16_melbourne, or simulators, such as ibmq_qasm_simulator, which are running on the IQX cloud. We will discuss the details of the simulators and devices in later chapters.
Now that we are done with our tour of the IBM Quantum Experience layout, we're ready to get to work. In the following chapters, we will delve into each section and progress to writing quantum programs.


