Search icon CANCEL
Subscription
0
Cart icon
Your Cart (0 item)
Close icon
You have no products in your basket yet
Save more on your purchases! discount-offer-chevron-icon
Savings automatically calculated. No voucher code required.
Arrow left icon
Explore Products
Best Sellers
New Releases
Books
Videos
Audiobooks
Learning Hub
Newsletter Hub
Free Learning
Arrow right icon
Arrow up icon
GO TO TOP
Cross-platform UI Development with Xamarin.Forms

You're reading from   Cross-platform UI Development with Xamarin.Forms

Arrow left icon
Product type Paperback
Published in Aug 2015
Publisher
ISBN-13 9781784391195
Length 330 pages
Edition 1st Edition
Languages
Tools
Arrow right icon
Author (1):
Arrow left icon
Paul Johnson Paul Johnson
Author Profile Icon Paul Johnson
Paul Johnson
Arrow right icon
View More author details
Toc

Table of Contents (22) Chapters Close

Cross-platform UI Development with Xamarin.Forms
Credits
About the Author
Acknowledgments
About the Reviewers
www.PacktPub.com
Preface
1. In the Beginning… 2. Let's Get the Party Started FREE CHAPTER 3. Making It Look Pretty and Logging In 4. Making Your Application Portable 5. Data, Generics, and Making Sense of Information 6. A View to a Kill 7. Connect Me to Your Other Services 8. What a Bind! 9. Addressing the Issue 10. This is the World Calling… 11. A Portable Settings Class 12. Xamarin Forms Labs 13. Social Media into the Mix 14. Bringing It All Together Index

Setting up Azure


Although I have set up Azure with the one month free version of Azure, it offers everything I need to get the code for this chapter up and running without any financial layout. Setting up Azure is a fairly painless process.

Signing up

Let's assume that you have a valid Microsoft login (this can be for Hotmail or any other Microsoft service, such as Skype). You will need to use this to sign up. The initial sign up screen currently looks similar to the following screenshot:
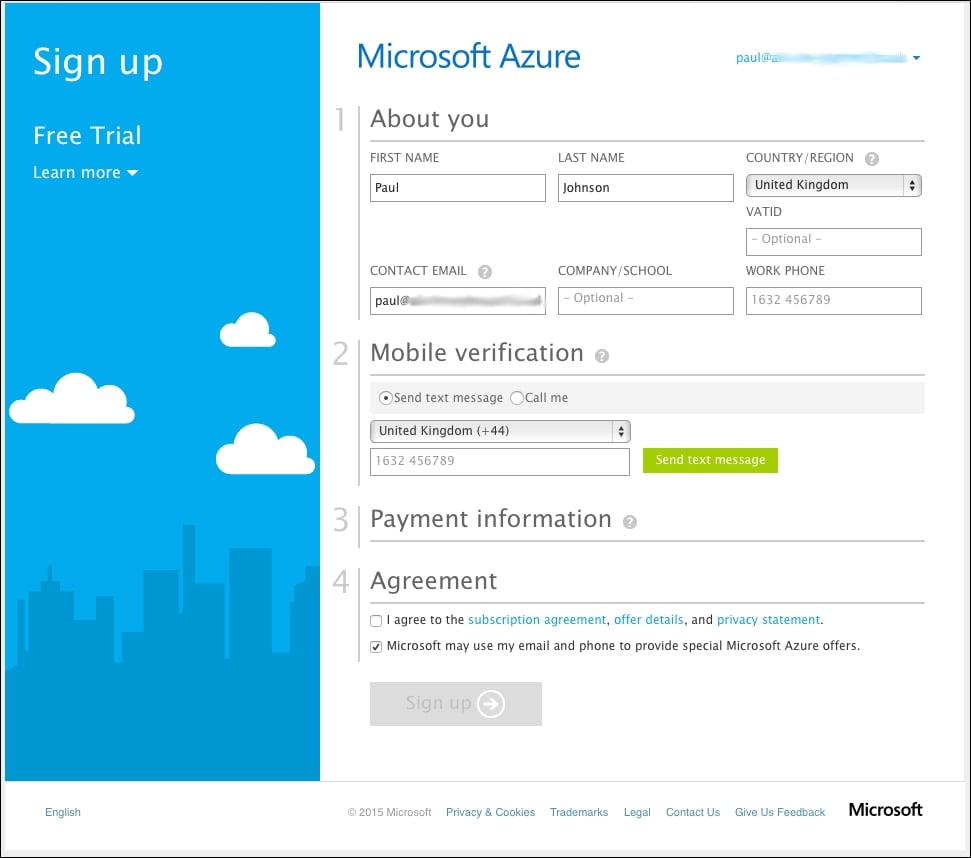
Now, perform the following steps:

  1. Enter the sections as requested. You will need to expand the payment information and fill it as required. Don't worry about supplying a credit/debit card; it's never used unless you say to use it.

  2. Once everything has been filled, click on the Sign up button. You will see the following set up screen:

    Once everything has been set up, the screen will change to this:

  3. Clicking on Start managing my service will take you to the settings screen on the Azure web interface:

    We are interested...

lock icon The rest of the chapter is locked
Register for a free Packt account to unlock a world of extra content!
A free Packt account unlocks extra newsletters, articles, discounted offers, and much more. Start advancing your knowledge today.
Unlock this book and the full library FREE for 7 days
Get unlimited access to 7000+ expert-authored eBooks and videos courses covering every tech area you can think of
Renews at $19.99/month. Cancel anytime
Banner background image