Microsoft's Visual Studio Community 2017 contains the Visual C++ compiler, the C++ standard libraries, and a collection of standard tools that you can use to write and maintain C++ projects. This book is not about how to write Windows code; it is about how to write standard C++ and how to use the C++ Standard Library. All the examples in this book will run on the command line. Visual Studio was chosen because it is a free download (although you do have to register an e-mail address with Microsoft), and it is standards-compliant. If you already have a C++ compiler installed, then you can skip this section.
Installing Visual C++
Setting up
Before starting the installation, you should be aware that, as part of the agreement to install Visual Studio as part of Microsoft's community program, you should have a Microsoft account. You are given the option to create a Microsoft account the first time you run Visual Studio and if you skip this stage, you will be given a 30-day evaluation period. Visual Studio will be fully featured during this month, but if you want to use Visual Studio beyond this time you will have to provide a Microsoft account. The Microsoft account does not impose any obligation on you, and when you use Visual C++ after signing in, your code will still remain on your machine with no obligation to pass it to Microsoft.
Of course, if you read this book within one month, you will be able to use Visual Studio without having to sign in using your Microsoft account; you may view this as an incentive to be diligent about finishing the book!
Downloading the installation files
To download the Visual Studio Community 2017 installer go to https://www.visualstudio.com/vs/ community/.
When you click on the Download Community 2017 button, your browser will download a 1 MB file called vs_community__1698485341.1480883588.exe. When you run this application, it will allow you to specify the languages and libraries that you want installed, and then it downloads and installs all the necessary components.
Installing Visual Studio
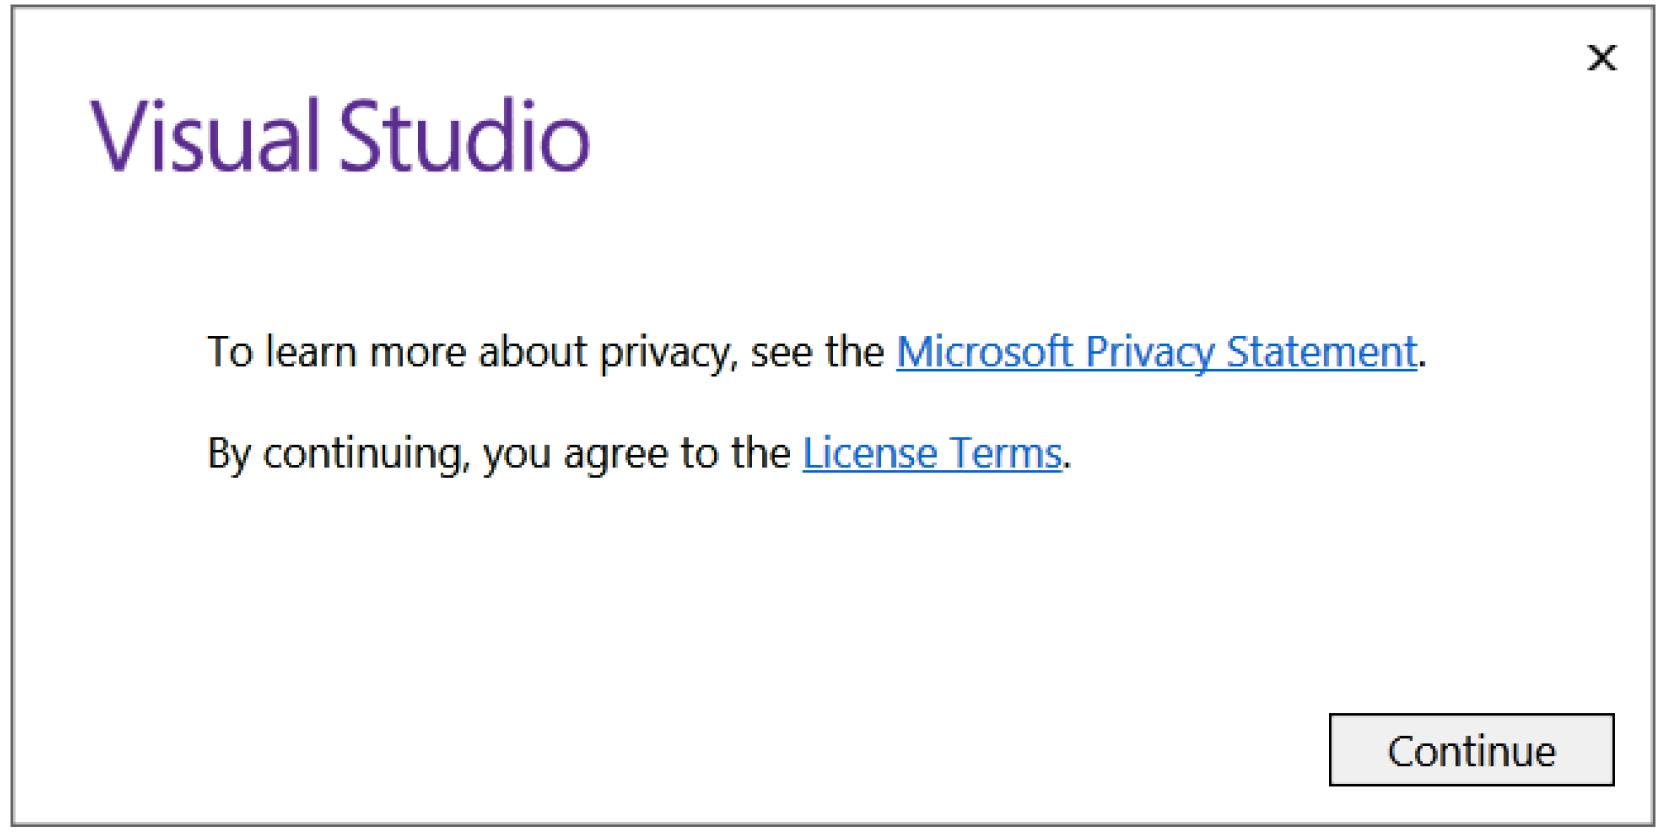
Visual Studio 2017 treats Visual C++ as an optional component, so you have to explicitly indicate that you want to install it through custom options. When you first execute the installer, you will see the following dialog box:
When you click on the Continue button the application will set up the installer, as shown here:
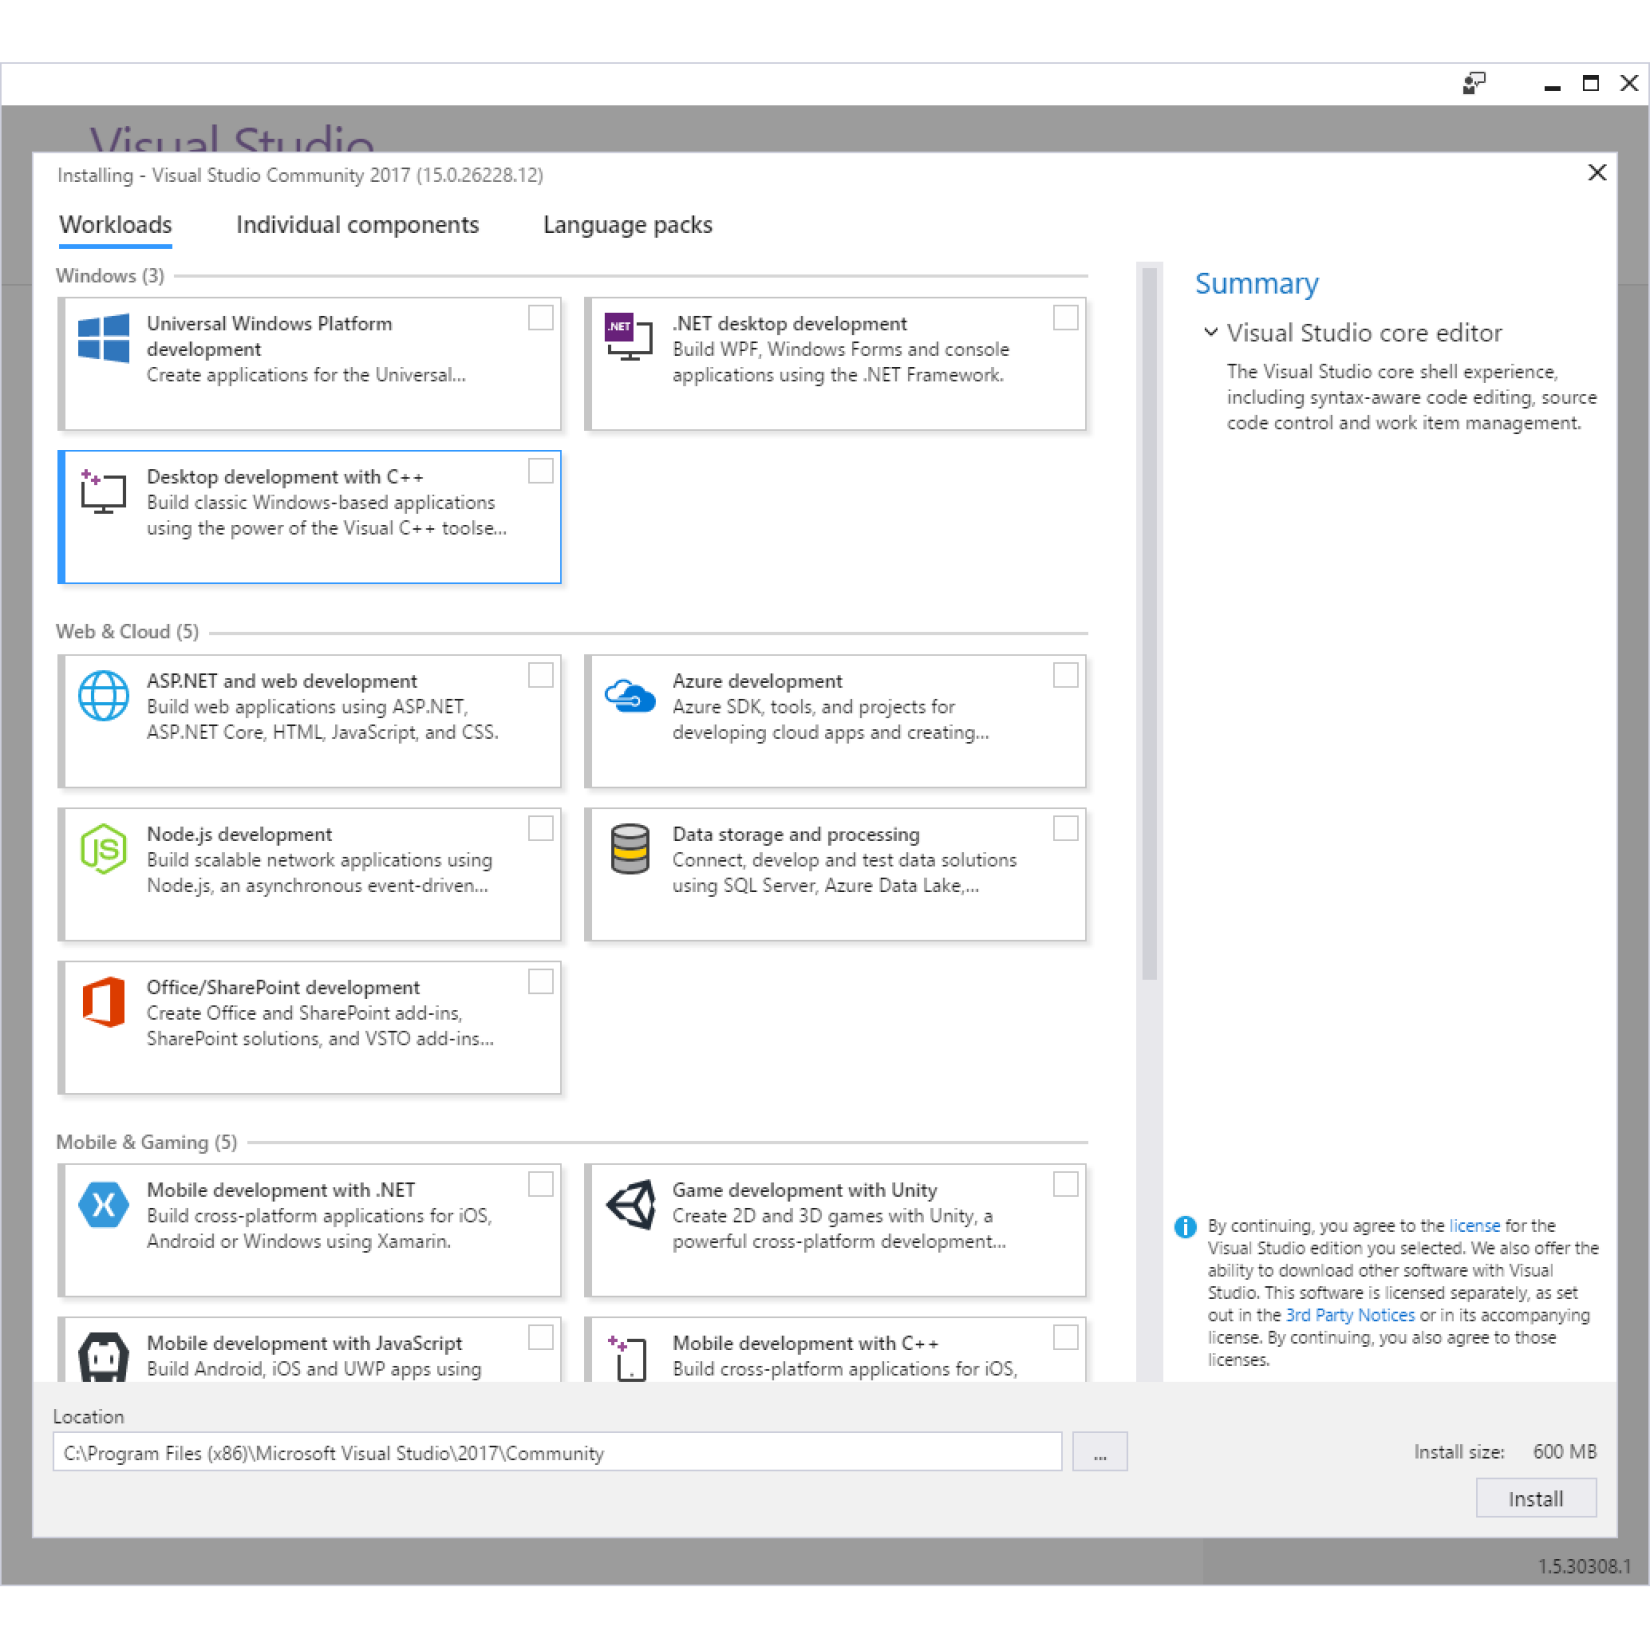
Along the top are three tabs labeled Workloads, Individual Components and Language Packs. Make sure that you have selected the Workloads tab (as shown in the screenshot) and check the checkbox in the item called Desktop development with C++.
The installer will check that you have enough disk space for the selected option. The maximum amount of space Visual Studio will require is 8 GB, although for Visual C++ you will use a lot less. When you check Desktop development with C++ item, you will see the right side of the dialog change to list the options selected and the disk size required, as follows:
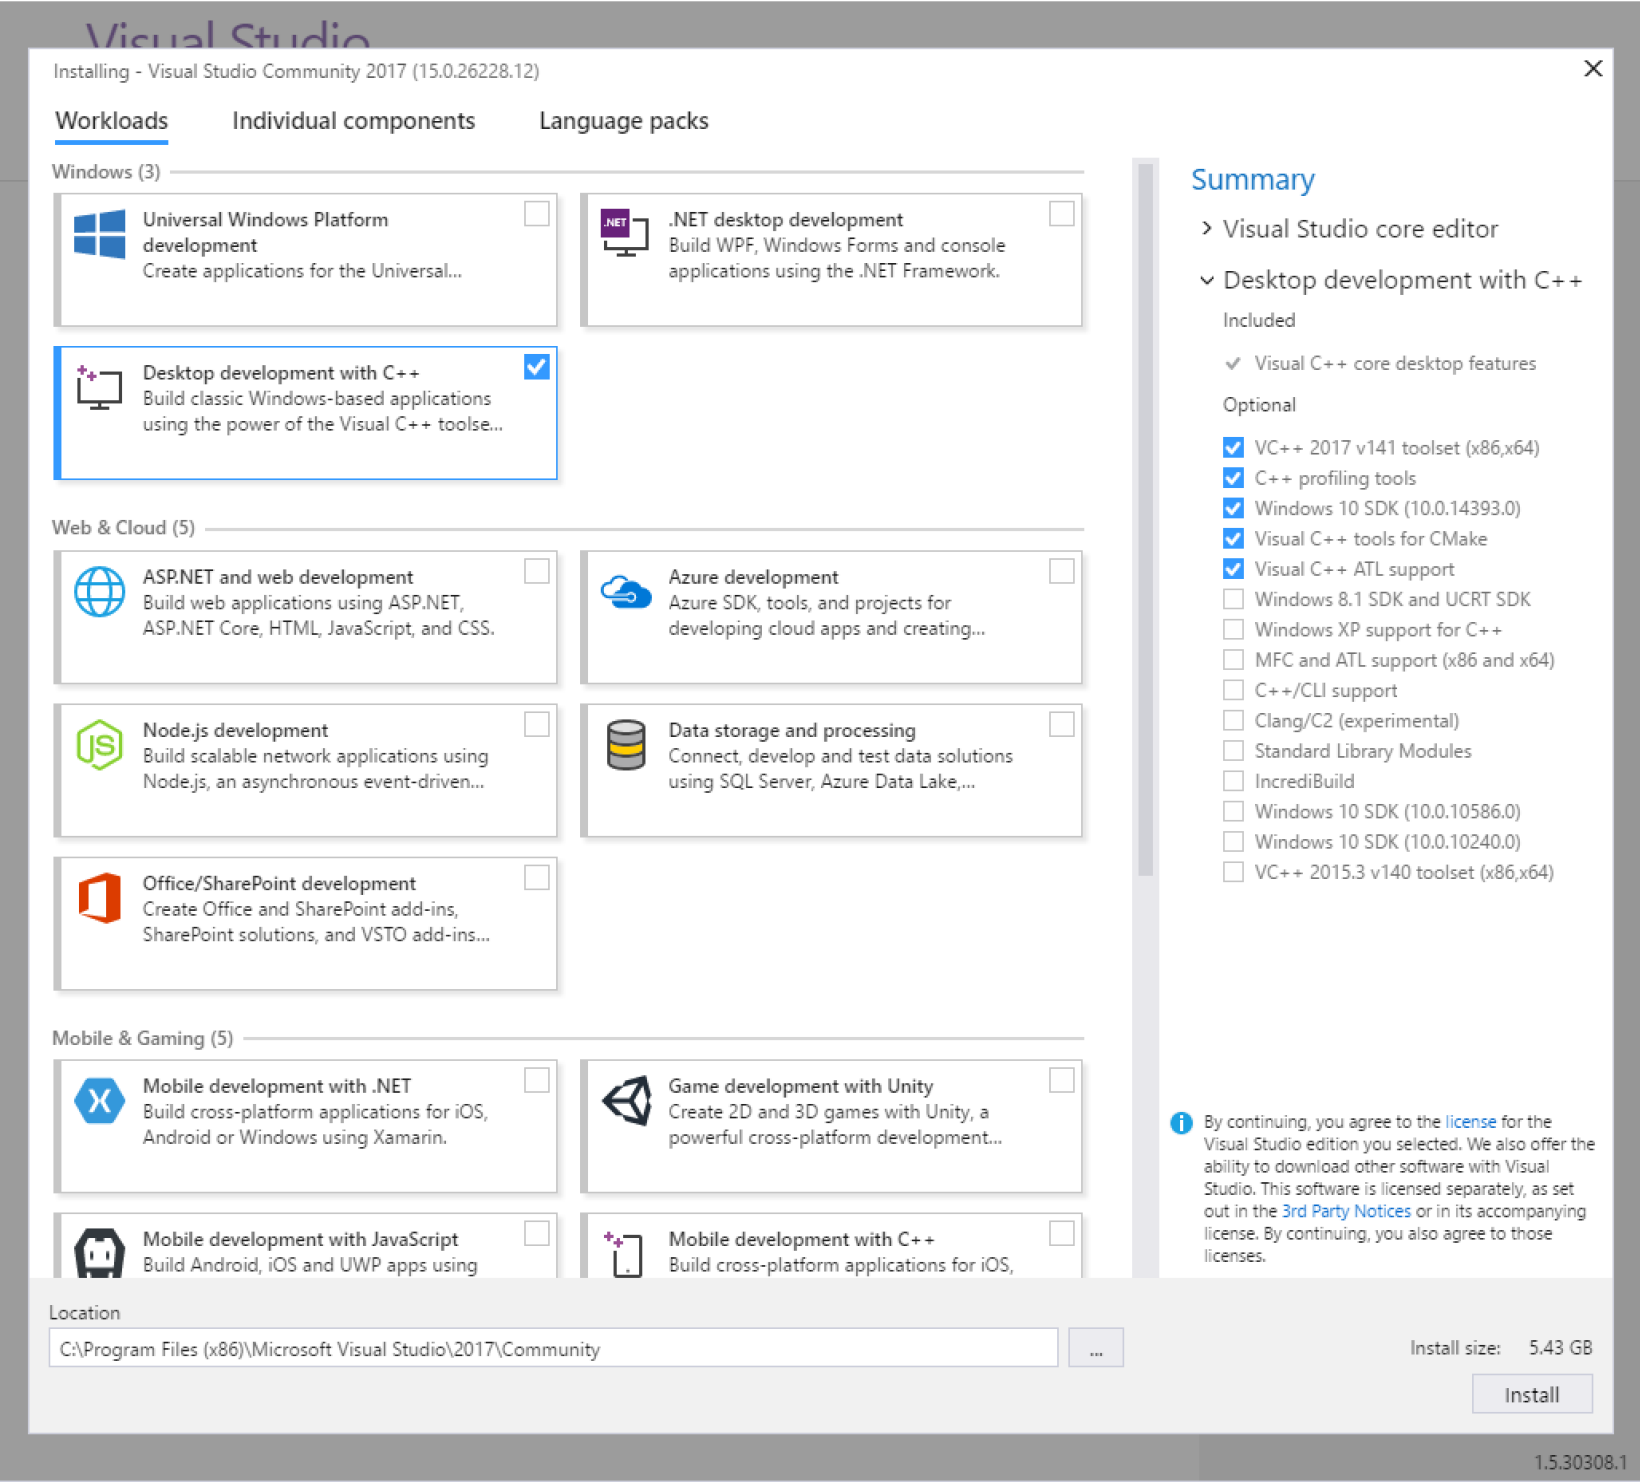
For this book, leave the options selected by the installer and then click the Install button in the bottom right hand corner. The installer will download all the code it needs and it will keep you updated with the progress with the following dialog box:
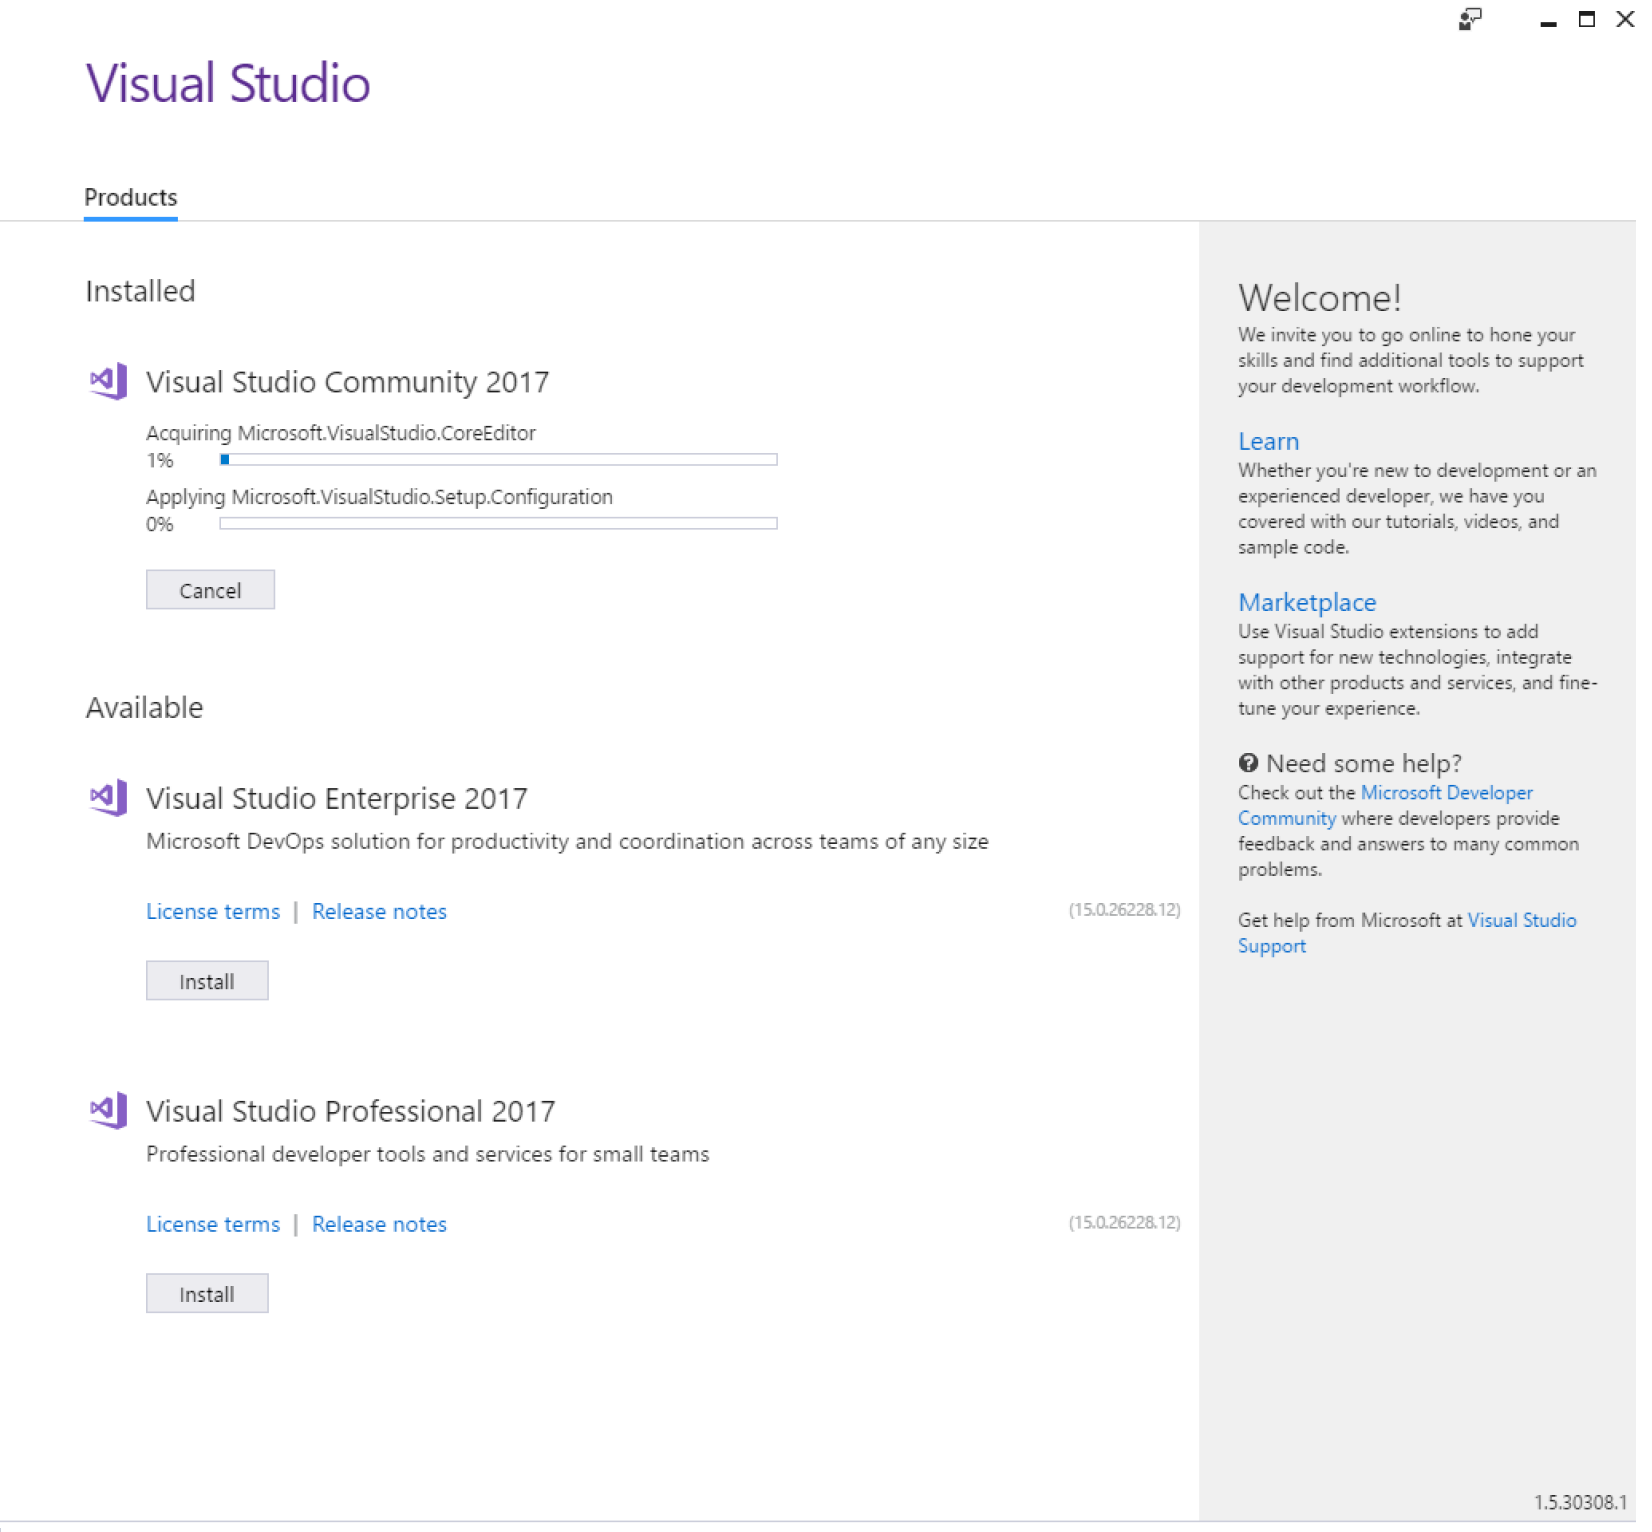
When the installation is complete the Visual Studio Community 2017 item will change to have two buttons, Modify and Launch, as showing here:
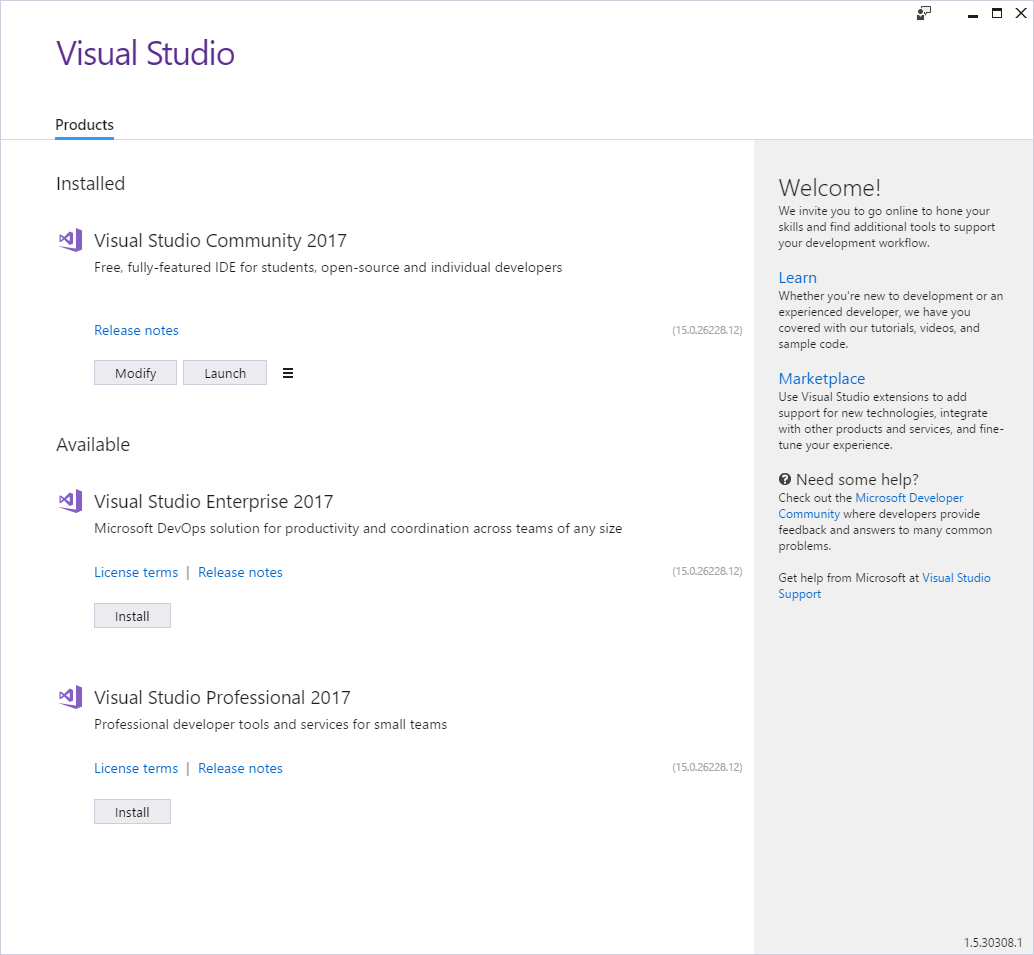
The Modify button allows you to add more components. Click on Launch to run Visual Studio for the first time.
Registering with Microsoft
The first time you run Visual Studio it will ask you to sign in to Microsoft services through the following dialog:
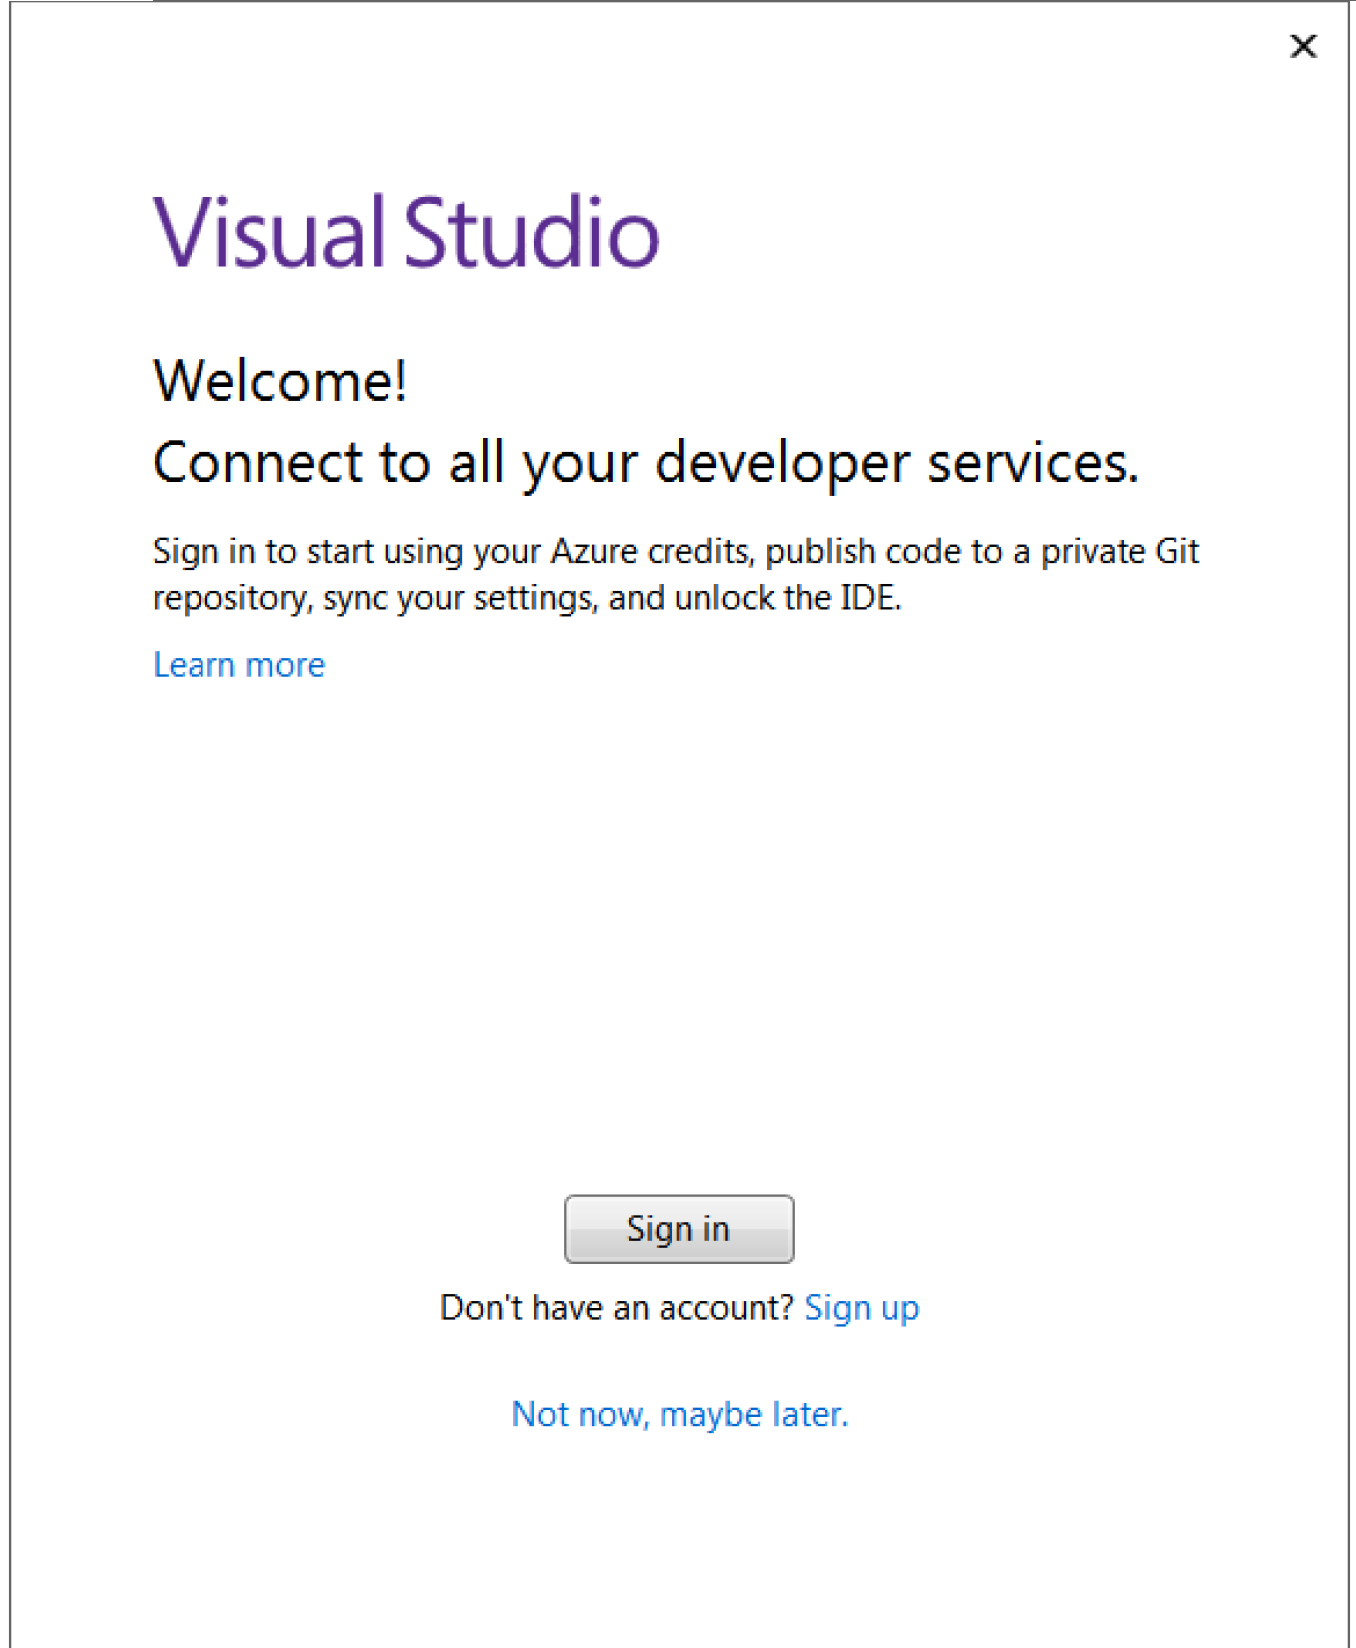
You do not have to register Visual Studio, but if you choose not to, Visual Studio will only work for 30 days. Registering with Microsoft places no obligations on you. If you are happy to register, then you may as well register now. Click on Sign in button provide your Microsoft credentials, or if you do not have an account then click on Sign up to create an account.
When you click on the Launch button a new window will open, but the installer window will remain open. You may find that the installer window hides the Welcome window, so check the Windows task bar to see if another window is open. Once Visual Studio has started you can close the installer window.
You will now be able to use Visual Studio to edit code, and will have the Visual C++ compiler and libraries installed on your machine, so you will be able to compile C++ code in Visual Studio or on the command line.


