Beside adding subnets while creating a virtual network, we can add additional subnets to our network at any time.
Adding a subnet in the portal
Getting ready
Before you start, open a web browser and go to the Azure portal at https://portal.azure.com. Here, locate the previously created virtual network.
How to do it...
In order to add a subnet to a virtual network using the Azure portal, we must use the following steps:
- In the virtual network blade, go to the Subnets section.
- Select the Add subnet option.
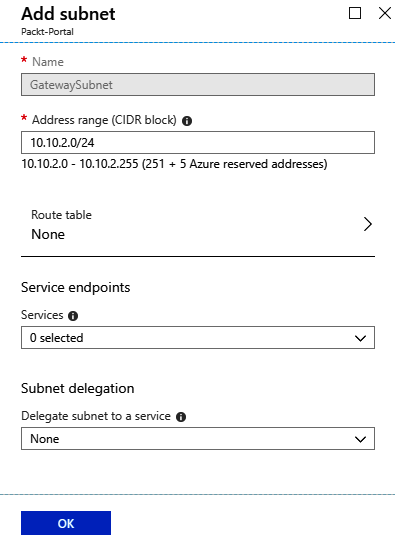
- A new blade will open. We need to provide information for the subnet, including Name and Address range in the CIDR format. Address range must be in the range limit of the virtual network address range and cannot overlap with the address range of other subnets in the virtual network. Optionally, we can add information for Network security group, Route tables, Service endpoints, and Subnet delegation. These options will be covered in later recipes:

- We can also add a gateway subnet in the same blade. To add a gateway subnet, select the Gateway subnet option.
For a gateway subnet, the only parameter we need to define is Address range. The same rules apply as for adding a regular subnet. This time, we don't have to provide a name as it's already defined. You can add only one gateway subnet per virtual network. Service endpoints are not allowed in the gateway subnet:

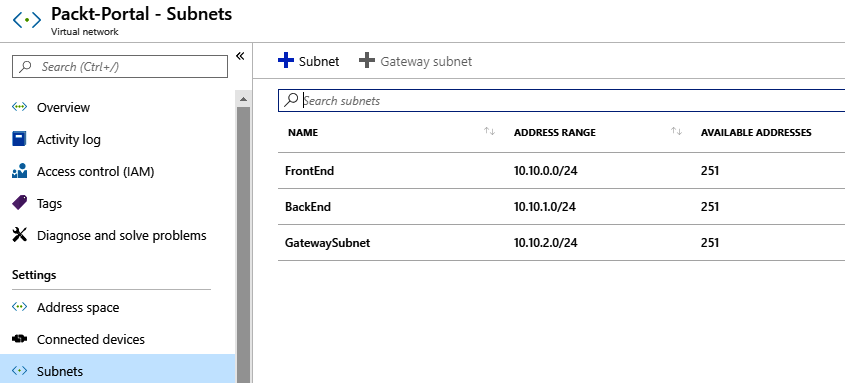
- After the subnets are added, we can see the newly created subnets in the subnet blade under the virtual network:

How it works...
A single virtual network can have a multiple number of subnets defined. Subnets can't overlap and must be in the range of the virtual network address range. For each subnet, four IP addresses are used for management and can't be used. Depending on the network settings, we can define the communication rules between subnets in the virtual network. A gateway subnet is used for VPN connections, and this will be covered in later chapters.


