Securing the Database
The Windows security for a SourceSafe database is divided across two layers:
Windows Shared Folder Security: applied to the shared folders, based on Windows user accounts.
Windows NTFS Security: applied to the file system database folders, based on Windows user accounts.
The following diagram shows these layers:
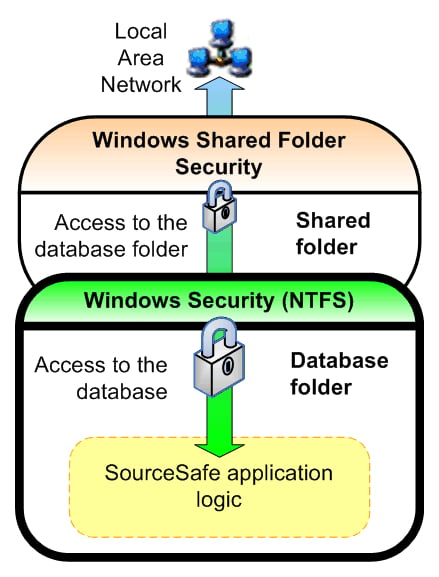
The most important layer in securing a SourceSafe database is the Windows NTFS Security layer applied to the database folder. This is the only way to assign strict access permissions to the users that must access the database files. The security of SourceSafe databases is determined by the security of the folder that contains them. To implement the necessary security, the database must be installed on an NTFS file system because you can grant permissions for individual files and folders.
In contrast, the File Allocation Table (FAT) file system applies the same permissions to the entire shared folder. Shared folder security is not restrictive enough and can be bypassed by users logged in locally on the database server.
In addition to these security layers, SourceSafe has its own mechanisms for account management and project rights, but they are not security measures. These mechanisms are applied at the application logic level and complement the operating system's security applied to the database folders and files. SourceSafe usernames and project rights assignments can be bypassed by malicious users; therefore, it is important to secure your database using Windows integrated security.
Every user that will access the SourceSafe database will have a Windows user account for the database server and a SourceSafe user account for the database.
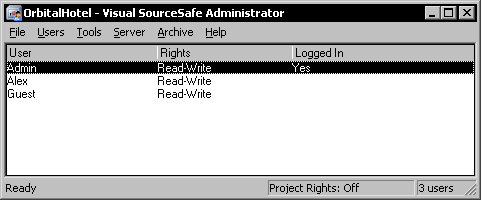
After a new SourceSafe database is created, its initial configuration contains three SourceSafe users, the Admin user, the Guest user, and a third user named after the Windows user account that created the database, in my case Alex.
Note
These users initially have blank passwords. Do not forget to assign a password for the Admin user before sharing the database. If you are not interested in giving access to someone as a guest in the database, you can delete the Guest account.
The SourceSafe Admin User
The SourceSafe Admin user is a special user account. This is the only account name you can use to administer a SourceSafe database and cannot be edited or deleted. When opening the Visual SourceSafe Administrator application to log in to an existing database, you can see that the User name is always set to Admin and it cannot be changed.
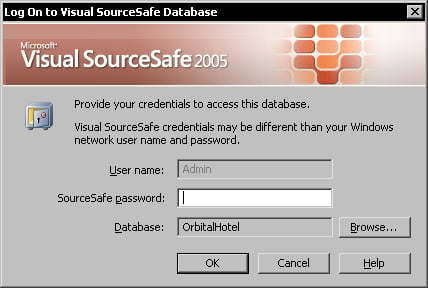
As a result, if there are several database administrators, they will all have to log in to the database using this built-in Admin account.
To set the Admin user password use the Users | Change Password command.

Note
Do not choose the same password as your Windows account password because if your Windows password is weak, the SourceSafe password may be used as leverage in a dictionary attack in an attempt to guess your Windows password.
If third-party tools are used to access the SourceSafe database, they may not secure the SourceSafe passwords enough and may accidentally disclose the Windows passwords this way.
Setting the Windows Security for the Database
Every SourceSafe database user will have a Windows user account on the database server for authentication in addition to the SourceSafe user account. This can be a domain user if the database server and the user's machine are part of the same domain, or a local Windows user on the database server.
The best way to simplify user administration on the database server is by creating Windows user groups to which the database users will be assigned depending on their role.
Creating the Windows Groups for the Database Users
There are two user roles for a SourceSafe database:
Administrators: they have full access to the database
Users: they have restricted access to the database
As a result, the database's users will be assigned to one of these two user groups.
For the OrbitalHotel database, I will create two groups using the Local Users and Groups snap-in in the Computer Management console, one for the administrators, named OrbitalHotel Admins and one for the users, named OrbitalHotel Users.

When adding users or administrators to the database, all that is required to manage the Windows security for the database is adding their Windows user accounts to one of these groups.
Setting the Security Permissions for the Database
After creating the two groups of users, we have to configure the NTFS security permissions for the database folder.
In my case I will configure the C:\SourceSafe\OrbitalHotel folder I used to create the OrbitalHotel database in.
The default security for a Windows folder is inherited from its parent folder and looks something like this:
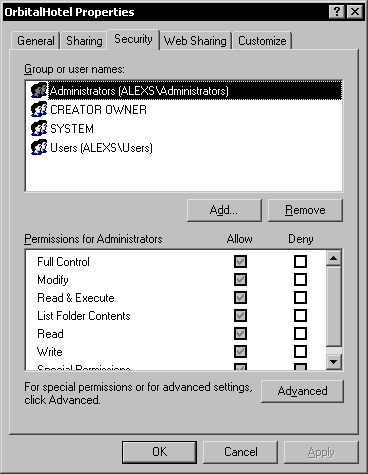
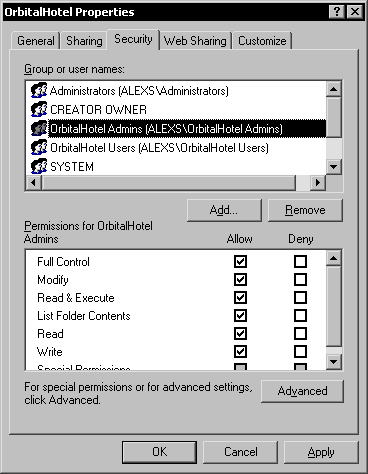
Because we don't want all the default users to be able to access the database folder, the inherited security must be removed. Before doing that, we must add the two Windows user groups for the database, using the Add button. The Admins group will have Full Control security permissions on the database folder.
The Users group will only have the List Folder Contents and Read security permissions on the database folder.
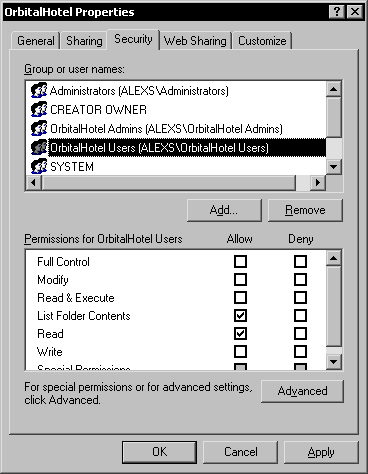
This is because the database folder contains files like the srcsafe.ini that contain the database configuration information and should be modified only by administrators. As a result, several security permissions must be added individually to the other folders under the database folder. To ease this task let's first remove the inherited security permissions.
To remove the inherited security permissions, we have to go to the advanced security settings by clicking the Advanced button. This will display the Advanced Security Settings dialog.
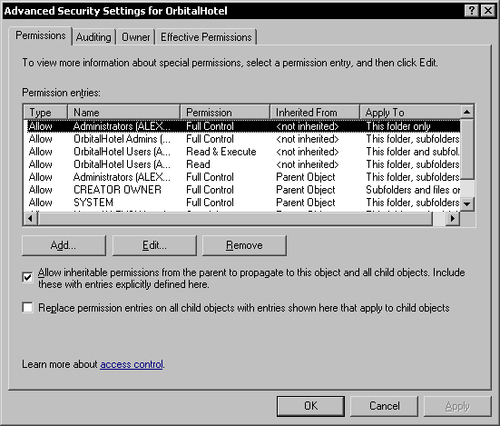
To remove the inherited security permissions we must uncheck the option allowing permission inheritance. This will display a question dialog asking whether to copy the inherited permissions or to remove them.
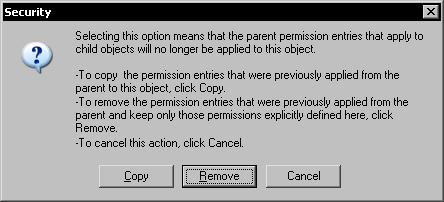
Click the Remove button to remove the inherited security and then click OK to close the Advanced Security Settings dialog. Now, the security permissions for the database folder contain only the two required user groups.
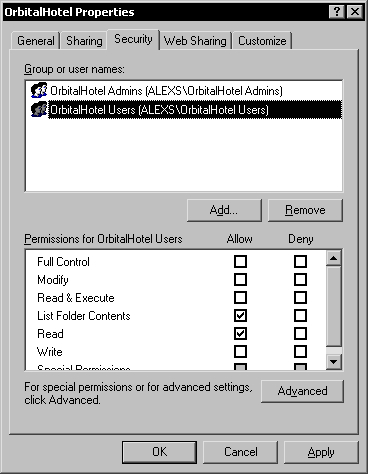
After removing the inherited security we can continue to assign permissions for the folders under the database folder.

All the folders under the database folder (except for the users folder) must be granted Modify permissions for the Users group.
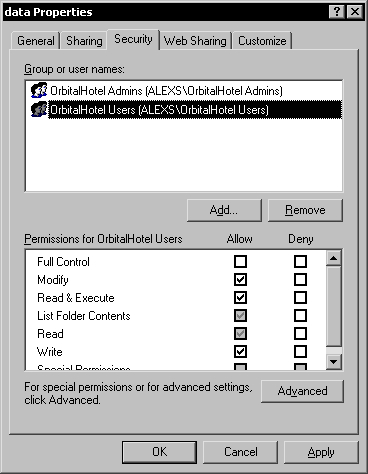
As you already know, the users folder contains a folder for each database user that stores individual customizations and configurations. Each user must be allowed to modify only his or her personal folder. This will also ensure that each user can log in into the database only using his or her username. For each user folder we must grant Modify permissions for the user Windows account.
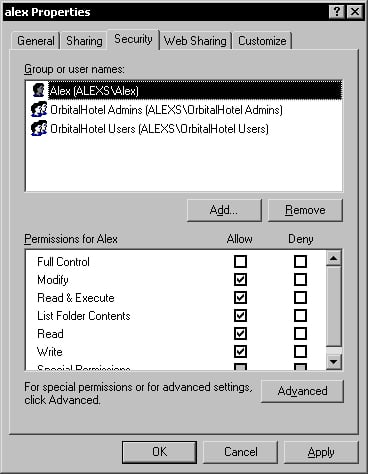
In my case, I will add the Windows user Alex in the security for the users/alex folder and give it permissions to modify its contents.
