At this point we have installed and prepared the Raspbian Linux OS and downloaded and installed Java JDK 1.8 on the Raspberry Pi. Our final step is to install and prepare NetBeans with Java as our editor, which is also used to upload and run the applications on our Raspberry Pi. We will be using NetBeans 8.1 as a reference for installing and preparing.
If you are not used to using NetBeans; no problem, we will go step-by-step with downloading and installing and preparing the application. To install NetBeans on your computer we first need to download the correct version onto our PC or Mac. As NetBeans runs on Java, it is also available for Linux-based OSes. To get NetBeans, go to http://www.netbeans.org and press the Download link on the top right of the page. You will be redirected to the download page, where you will see three download options. As we are focused on Java SE, the first and smallest download will suffice for our projects. Press the download button for the left-most download to download the smallest version. After download is completed, we need to install it. The installation procedure is almost identical for all platforms. All platforms have their dedicated installer, and the installation instructions are linked to on the download page below the show download bundles.
When you open NetBeans for the very first time you will be presented with a welcome screen. You can set a mark in the top-right corner of this welcome screen that says Do not show this again. Otherwise it will show up every time we start up the editor. We will now configure NetBeans in such a way that we are able to write our application on our local computer, and when we want to run our code, let NetBeans upload the application to the Raspberry Pi and run it. We will be able to see all the output we normally would see when we log in on the Raspberry Pi and run the Java application in the output window of the NetBeans editor! This will speed up our projects a lot as we do not need to do any manual actions such as uploading and logging in. To make use of this very handy feature we need to configure a Remote platform. To configure the remote platform with the Raspberry Pi, we will adding it to NetBeans.
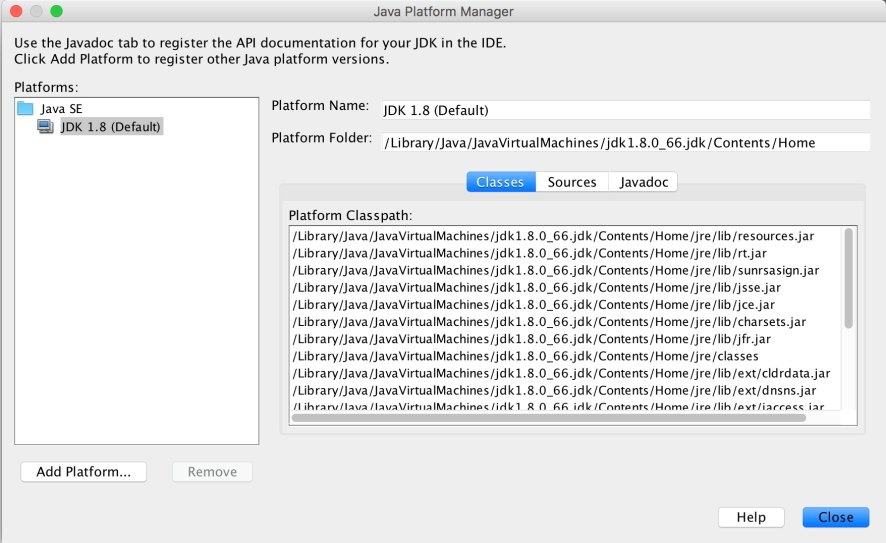
First, we will be defining the platform itself. In NetBeans, click Tools | Java Platforms. The Java platforms settings dialog will show up:

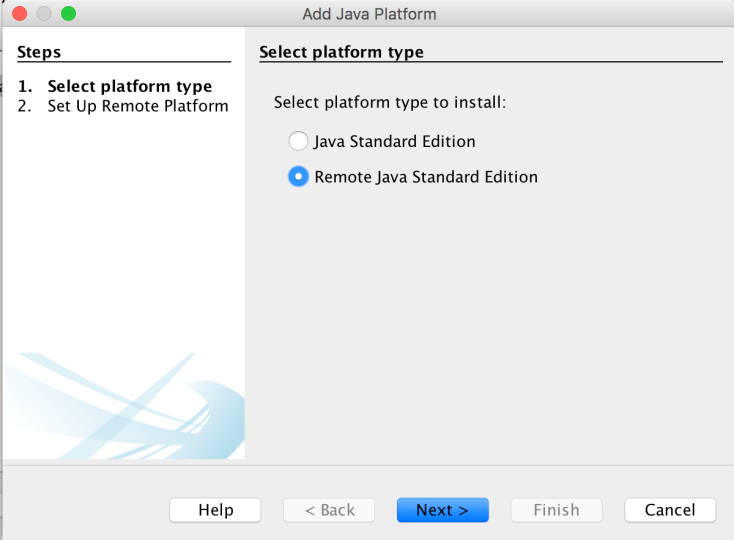
On the left bottom, click on the Add Platform button. We are now presented with a selection if we want to add a local or a Remote Java Standard Edition. We select the Remote Java Standard Edition and press Next:

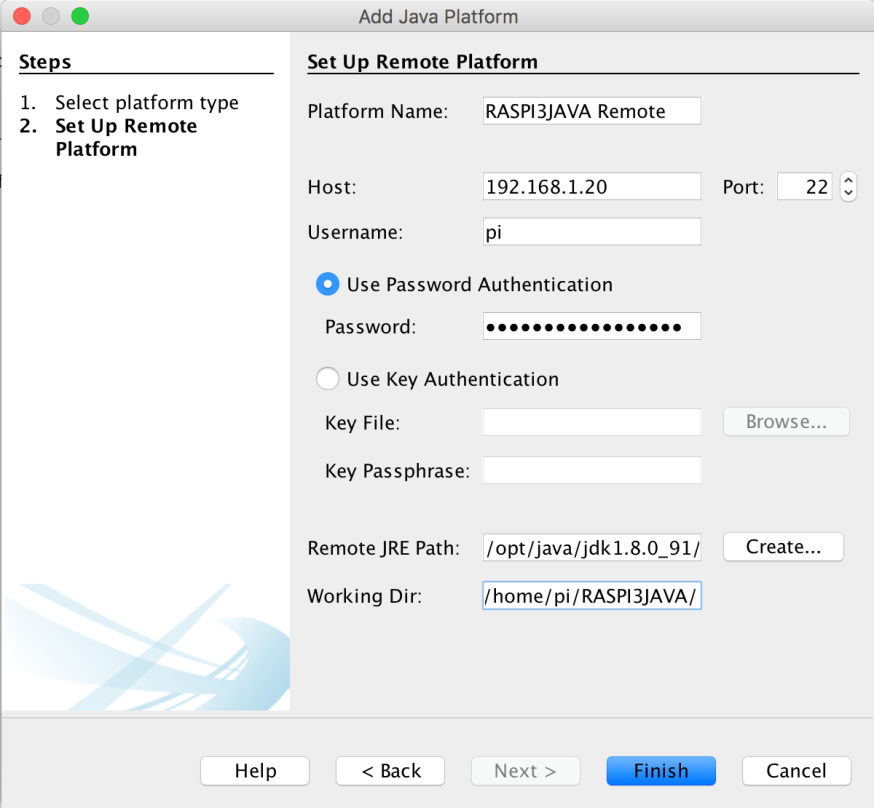
We are now presented with a follow up popup were we can enter the details of the remote platform, which is installed on the Raspberry Pi. In the following screenshot, examples are filled in, which we can use for the remote platform:

We just replace the Host IP address with the address that the Raspberry Pi is reachable on. We keep the Username pi and enter the Password we set during the preparation. We set the path to the JDK installation according to the version we have installed. In the example, it is JDK1.8 build 91. Change the 91 to the build you have installed. We do not press the Create button as the directory is already there. As the working directory, we keep the /home/pi/RASPI3JAVA/, so that we know where all our projects will be placed.
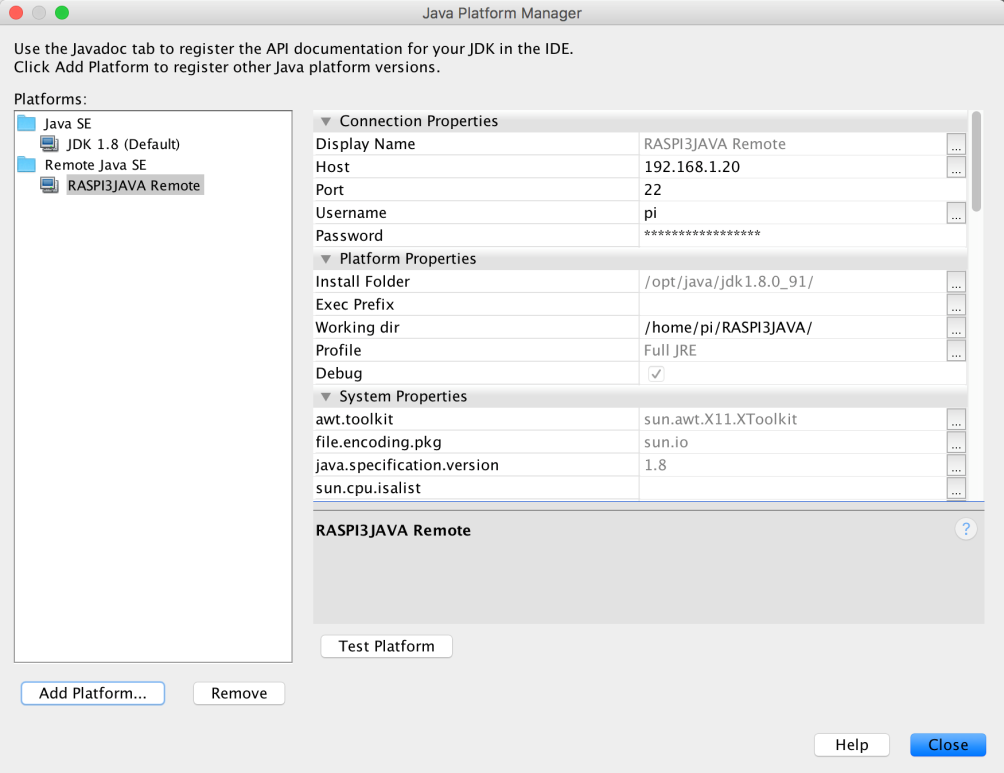
Press the Finish button to have NetBeans verify the remote platform and have it download properties from the remotely installed Java version. This action will take a couple of seconds. When you see the following screen, the remote platform has been confirmed by NetBeans:

We press Close to close the dialog so we can begin with our projects.


