Managing multiple Groovy installations on Linux
If a developer needs to work with different Groovy distributions on the same machine, chances are that he or she would be involved in a lot of environment variable fiddling, such as PATH, JAVA_HOME, and GROOVY_HOME.
Luckily, there is a tool that helps to manage those variables as well as to download the required setup files on demand.
The name of this goody is GVM (Groovy enVironment Manager). GVM was inspired by similar tools from the Ruby ecosystem, RVM, and rbenv.
In this recipe, we will demonstrate how to use the GVM tool and show the benefits it delivers.
Getting ready
Use the package manager available on your Linux distribution to install curl, unzip, and java on your machine. For example, on Ubuntu it can be achieved with the following command sequence:
sudo apt-get update
sudo apt-get install curl
sudo apt-get install zip
sudo apt-get install openjdk-6-jdk
The GVM installation script will not work without those packages. You can skip the OpenJDK package in case you have Java 5 or later distribution already installed.
Then you need to fetch the installation script from GVM's website (http://get.gvmtool.net) and pass it to bash using the following command:
curl -s get.gvmtool.net | bash
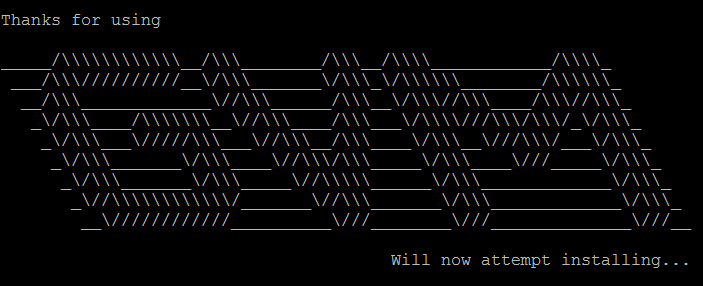
It will start the set up process as shown in the following screenshot:

To finalize the installation, open a new terminal and run the following command:
source ~/.gvm/bin/gvm-init.sh
How to do it...
As soon as GVM is installed and running, you can start putting it to use:
To install the latest Groovy distribution, you can issue the following command:
> gvm install groovy
Downloading: groovy 2.1.6
...
Installing: groovy 2.1.6
Done installing!
At the end of the installation, it will ask you whether to make it the default or not. Since we all like "the latest and greatest", type
Y(yes):Do you want groovy 2.1.6 to be set as default? (Y/n): YTo install different Groovy distribution (for example, v1.8.6, which is still rather popular) you can fire the following command:
> gvm install groovy 1.8.6
Downloading: groovy 1.8.6
...
Installing: groovy 1.8.6
Done installing!
Again it will ask about setting
1.8.6as default Groovy distribution. Answern(no) in this case since we would like to keep v2 as the primary one:Do you want groovy 1.8.6 to be set as default? (Y/n): nTo set (or to ensure) Groovy version used by default, use the following command:
> gvm default groovy 2.1.6
Default groovy version set to 2.1.6
You can also verify that Groovy is running and is the requested version by typing:
> groovy --version
Groovy Version: 2.1.6 JVM: ...
To switch temporarily to a different Groovy distribution, just type:
> gvm use groovy 1.8.6
Using groovy version 1.8.6 in this shell.
Another way to check which version of Groovy is currently active is:
> gvm current groovy
Using groovy version 1.8.6
For example, this script will not run under 1.8.6:
> groovy -e "println new File('.').directorySize()"
Caught: groovy.lang.MissingMethodException:
   No signature of method:
      java.io.File.directorySize() is applicable ...
If we switch to the latest Groovy, the script will succeed as shown:
> gvm use groovy
Using groovy version 2.1.6 in this shell.
> groovy -e "println new File('.').directorySize()"
126818311
To remove the unnecessary distribution, we can just run:
> gvm uninstall groovy 1.8.6
Uninstalling groovy 1.8.6...
How it works...
The reason the directorySize() method (steps 9 and 10) didn't work for v1.8.6 of Groovy is simply because this method was only introduced in v2.
As we already mentioned, GVM manages the values of environment variables to direct your Groovy commands to the proper distribution. It also downloads, unpacks, and caches Groovy installation archives under the ~/.gvm/var directory.
There's more...
GVM also can manage other popular Groovy-based products; for example, Gradle (to build a framework that we are going to discuss in the Integrating Groovy into the build process using Gradle recipe in Chapter 2, Using Groovy Ecosystem), Grails (a web application framework), Griffon (a desktop application framework), and so on in a similar way.
This recipe can also be applied to a Mac running OS X. You can enjoy GVM on Windows too, but you need to install and run Cygwin (a Linux environment simulation for Windows).
See also
Additional useful information can be found on the following product's home pages:
GVM home page: http://gvmtool.net/
Cygwin home page: http://www.cygwin.com/


