Technical requirements
For this chapter, you will need the following:
- A PC with Windows or Linux and the tools listed later in this section
- A text editor (such as Notepad++ or Kate) or a full IDE (such as Visual Studio or Eclipse)
Now, let’s get the source code for this book and start unpacking the code.
Getting the source code and the basic tools
The code for this book is hosted on GitHub, which you can find here:
https://github.com/PacktPublishing/Cpp-Game-Animation-Programming-Second-Edition
To unpack the code, you can use any of the following methods.
Getting the code as a ZIP file
If you download the code as a ZIP file, you will need to unpack it onto your system. My suggested way is to create a subfolder inside the home directory of the local user account on your computer as the destination, that is, inside the Documents folder, and unpack it there. But any other place is also fine; it depends on your personal preference.
Please make sure the path contains no spaces or special characters such as umlauts, as this might confuse some compilers and development environments.
Getting the code using Git
To get the code of the book, you can also use Git. Using Git offers you additional features, such as reverting changes if you have broken the code during the exploration of the source, or while working on the practical sessions at the end of each chapter. For Linux systems, use your package manager. For Ubuntu,the following line installs git:
sudo apt install git
On Windows, you can download it here: https://git-scm.com/downloads
You can get a local checkout of the code in a specific location on your system either through the git GUI, or by executing the following command in CMD:
git clone (GitHub-Link)
Also, please make sure that you use a path without spaces or special characters.
Downloading and installing GLFW
If you use Windows, you can download the binary distribution here: https://www.glfw.org/download
Unpack it and copy the contents of the include folder here, as CMake will only search within this location:
C:\Program Files (x86)\glfw\include
Then, copy the libraries from the lib-vc2022 subfolder into this lib folder:
C:\Program Files (x86)\glfw\lib
As a Linux user, you can install the development package of glfw3 using the package manager of your distribution. For Ubuntu, this line installs GLFW:
sudo apt install libglfw3-dev
Downloading and installing CMake
To build the code, we will use CMake. CMake is a collection of tools used to create native Makefiles for your compiler and operating system (OS).CMake also searches for the libraries, the headers to include, and more. It refers to all that “dirty” stuff you don’t want to lay your hands on during compilation time.
Important note
You only need CMake if you are using Eclipse or the command-line-based approach to compile the source code. Visual Studio installs its own version of CMake.
Windows users can download it here: https://cmake.org/download/.
Linux users can use the package manager of their distribution to install Cmake. If you use Ubuntu, the following line will install CMake on your system:
sudp apt install cmake
Using the example code with Visual Studio 2022 on Windows
If you want to use Visual Studio for the example files and don’t have it installed yet, download the Community Edition of Visual Studio at https://visualstudio.microsoft.com/de/downloads/.
Then, follow these steps:
- Choose the Desktop development with C++ option so that the C++ compiler and the other required tools are installed on your machine:

Figure 1.1: Installing the C++ Desktop development in VS 2022
- Then, under Individual components, also check the C++ CMake tools for Windows option:
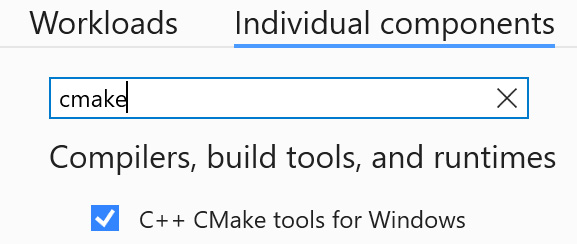
Figure 1.2: Installing the CMake tools in VS 2022
- Finish the installation of Visual Studio, start it, and skip the initial project selection screen.
Compiling and starting the example code can be done using the following steps:
- To open an example project, use the CMake... option, which appears after installing the CMake tools:

Figure 1.3: Open a CMake project in VS 2022
- Navigate to the folder with the example file and select the
CMakeLists.txtfile. This is the main configuration file for CMake:
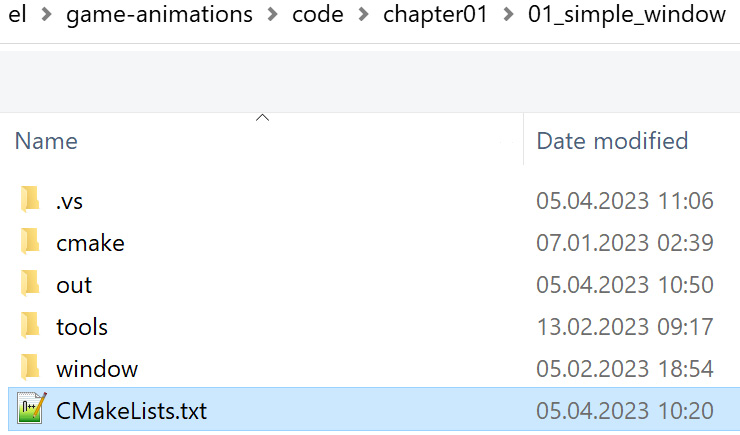
Figure 1.4: Selecting the CMakeLists.txt file in the project
Visual Studio will automatically configure CMake for you. The last line of the output window should be as follows:
1> CMake generation finished.
This confirms the successful run of the CMake file generation.
- Now, set the startup item by right-clicking on the
CMakeLists.txtfile – this step is required to build and run the project:

Figure 1.5: Configuring the startup item in VS 2022
- After setting the startup item, we can build the current project. Right-click on the
CMakeLists.txtfile and choose Build:

Figure 1.6: Building the VS 2022 CMake project
If the compilation succeeds, start the program using the green arrow:

Figure 1.7: The program starting without debugging in VS 2022
Installing a C++ compiler on your Windows PC
If you don’t use Visual Studio, you will need a C++ compiler first. You can use the MSYS2 tools and libs here: https://www.msys2.org.
Download the installation package, install MSYS2 in the default location but do not start MSYS2 at the end of the installation. Instead, start the MSYS2 MINWG64 environment from the start menu and update the MSYS2 system:
pacman -Syu
The MSYS2 system will request to close the current console after the update. This is the normal behaviour.
Open the MINGW64 environment again and install the gcc compiler suite, the glwf3 library, and the basic development tools in the MSYS2 console:
pacman –S mingw-x64-x86_64-gcc mingw-w64-x86_64-glfw base-devel
The preceding command installs the compilation tools you need for the book. We use the glfw3 library included in MSYS2 because it is compiled with the same compiler and version we will use in Eclipse.
You also need to include CMake and the installed compiler within the Windows PATH environment variable:

Figure 1.8: The Windows PATH settings when using MSYS2 on Windows
Eclipse for Windows uses Ninja to build CMake packages, so you need to install Ninja too. The easiest way to do this is by using the Windows package manager named Scoop, which you can access at https://scoop.sh.
Install Scoop in PowerShell Window:
> Set-ExecutionPolicy RemoteSigned -Scope CurrentUser
> irm get.scoop.sh | iex
The preceding code will download and install Scoop on your computer. Now use it to install Ninja:
scoop install ninja
Installing a C++ compiler in Linux
Linux users can install g++ or clang with the package manager. For Ubuntu-based distributions, enter the following command in a Terminal window to install the compiler and the required libraries and tools for the book:
sudo apt install gcc build-essential ninja-build glslang-tools libglm-dev
Using the example code with Eclipse on Windows or Linux
If you prefer Eclipse instead of Visual Studio, follow these steps:
- Download and install Eclipse IDE for C/C++ Developers from https://www.eclipse.org/downloads/packages/.
- After installing Eclipse, head to the marketplace under Help:

Figure 1.9: Accessing the Eclipse marketplace
- Install the cmake4eclipse and CMake Editor packages. The first one enables CMake support in Eclipse, with all the features we need, and the second one adds syntax coloring to the CMake files. This makes it more convenient to edit the files:
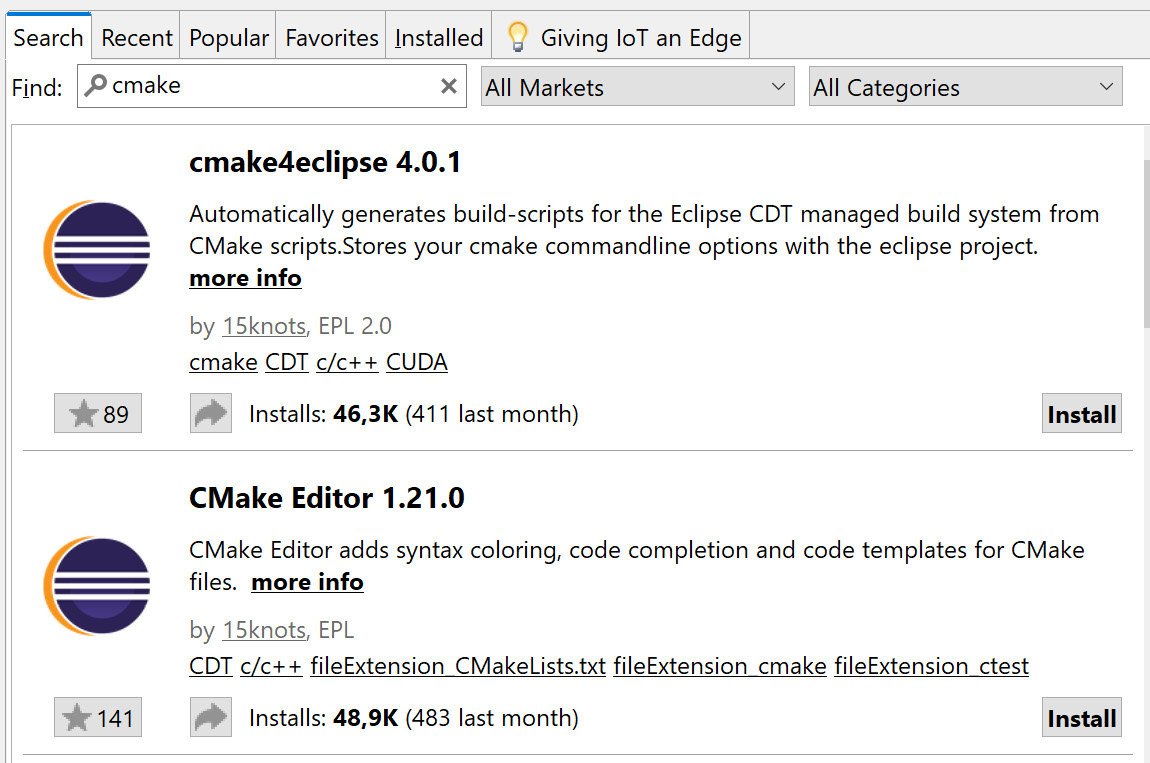
Figure 1.10: Installing the Eclipse CMake solutions
Compiling and starting the example code can be done in the following steps:
- First, open a project from the filesystem:

Figure 1.11: Opening a project in Eclipse
- Choose Directory... and navigate to the folder with the source code:
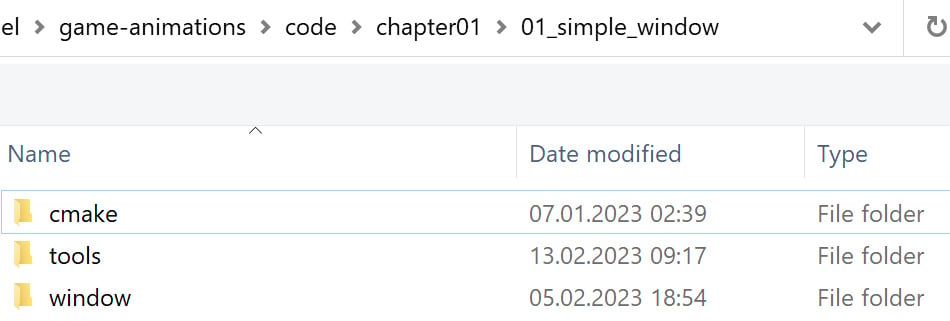
Figure 1.12: Navigating to the folder with the Eclipse project
- Click on Finish to open the project. Next, choose Build Project from the context menu. You can do this by clicking on the right mouse button while hovering over the project folder:
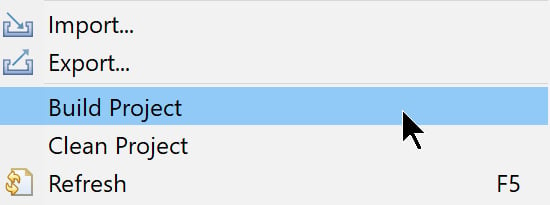
Figure 1.13: Building the project in Eclipse
- Sometimes, Eclipse does not automatically refresh the content of the project. You must force this via the context menu. Select Refresh or press F5:

Figure 1.14: Refreshing the Eclipse project
- Now the executable is visible and can be run. Choose Run As, and select the second option, Local C/C++ Application:

Figure 1.15: Starting the executable generated by Eclipse
- In the following dialog, choose the
Main.exe(Windows) orMain(Linux) binary file from the list:
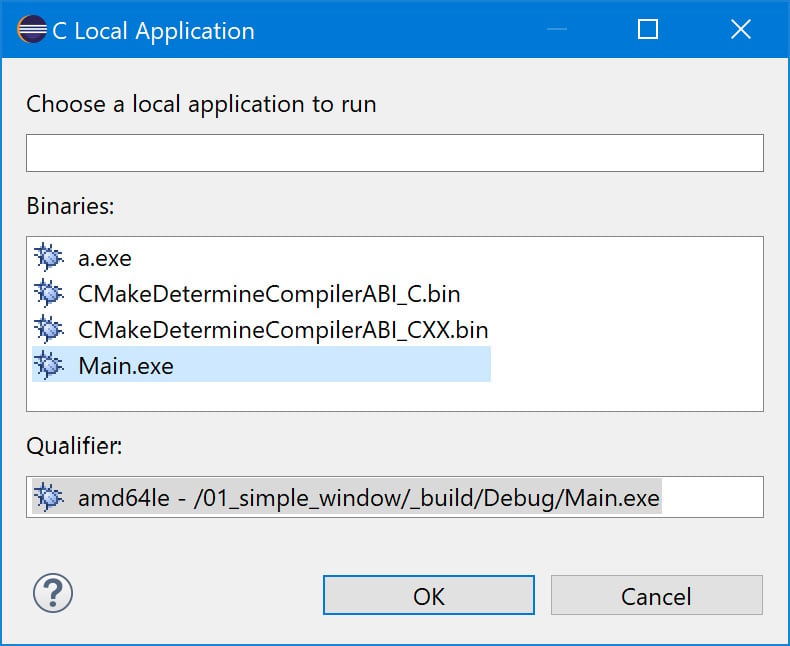
Figure 1.16: Selecting the generated executable in Eclipse
The Vulkan SDK
For Vulkan support, you also need to have the Vulkan SDK installed. Get it here: https://vulkan.lunarg.com/sdk/home. Then, do a default installation, and make sure to add GLM and Vulkan Memory Allocator, as we will need both of them later in the book:
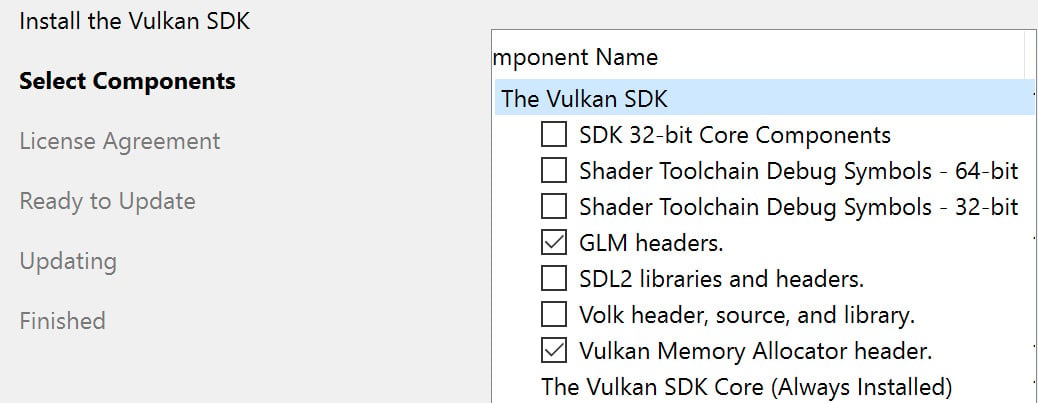
Figure 1.17: Adding GLM and VMA during the Vulkan SDK installation
Code organization in this book
The code for every chapter is stored in the GitHub repository, in a separate folder with the relevant chapter number. The number uses two digits to get the ordering right. Inside each folder, one or more subfolders can be found. These subfolders contain the code of the chapter, depending on the progress of that specific chapter:
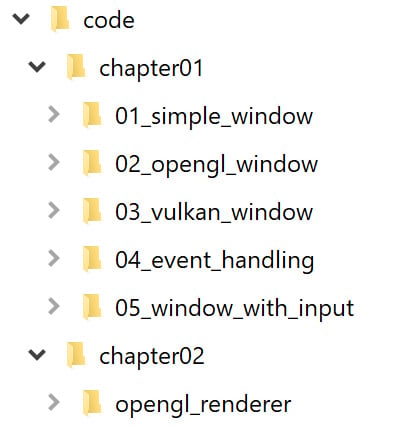
Figure 1.18: Folder organization with the chapters in the example code
For all chapters, we put the Main.cpp class and the CMake configuration file, CMakeLists.txt, into the project root folder. Inside the cmake folder, helper files for CMake are stored. These files are required to find additional header and library files. All C++ classes are located inside folders, collecting the classes of the objects we create. The Window class will be stored in the window subfolder to hold all files related to the class itself, and the same applies to the logger:
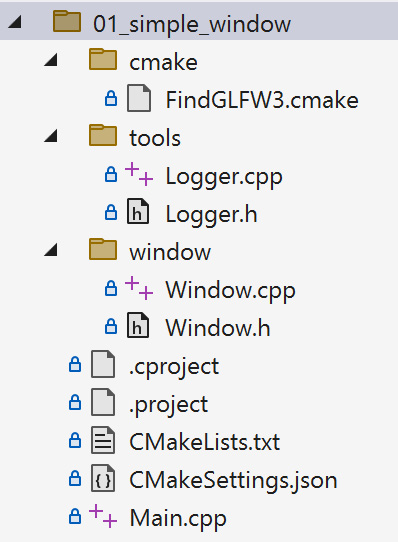
Figure 1.19: Folders and files in one example code project
In the other chapters, more folders will be created.
The basic code for our application
Our future character rendering application needs some additional code to work.
A program can’t be started without an initial function called by the operating system. On Windows and Linux, this initial function in the code must be named main(). Inside this function, the application window will be created, and the control is moved over to the window.
As long as a graphical output is unavailable, we must have the capability to print text within the application to update the user on its status. Instead of the std::cout call, we will use a simple logging function in a separate class. This extra output will be kept for debugging purposes even after we have completed the rendering, as this makes a programmer’s life much easier.
The main entry point
The main() function is embedded in a C++ class file, but as it has no class definition, it just contains the code to open and close the application window and call the main loop of our Window class.
This is the content of the Main.cpp file, located in the project root:
#include <memory>
#include "Window.h"
#include "Logger.h"
int main(int argc, char *argv[]) {
  std::unique_ptr<Window> w = std::make_unique<Window>();
  if (!w->init(640, 480, "Test Window")) {
    Logger::log(1, "%s error: Window init error\n",
       __FUNCTION__);
    return -1;
  }
  w->mainLoop();
  w->cleanup();
  return 0;
}
The preceding class includes the memory header, as we will use a unique smart pointer here. Additionally, it includes the headers for the Window and Logger classes. Inside the main() function, we create the smart pointer with the w object of the Window class. Next, we try to initialize the window using the width, height, and title text. If this initialization fails, we print out a log message and exit the program with a value of -1 to tell the OS we ran into an error. The log() call has the same verbosity level as the first parameter, followed by a C-style printf string. The __FUNCTION__ macro is recommended to print out the function where the logging call was issued.
If the init() call was successful, we enter the mainLoop() function of the Windows class. This handles all the window events, drawings, and more. Closing the window ends the main loop. After this, we clean up the window and return the value of 0 to signal a successful termination.
The Logger class
Additionally, I added a small and simple Logger class to simplify the debugging process. This allows you to add logging messages with different logging levels, enabling you to control the number of logs being shown. If you encounter problems with the code, you can use the Logger class to print out the content of the variables and success/error messages. In the case of a crash, you will see which part of the code has been reached before the termination of the program.
The following is the content of the Logger.h file:
#pragma once
#include <cstdio>
class Logger {
  public:
    /* log if input log level is equal or smaller to log level set */
    template <typename... Args>
    static void log(unsigned int logLevel, Args ... args) {
      if (logLevel <= mLogLevel) {
        std::printf(args ...);
        /* force output, i.e. for Eclipse */
        std::fflush(stdout);
      }
    }
    static void setLogLevel(unsigned int inLogLevel) {
      inLogLevel <= 9 ? mLogLevel = inLogLevel :
          mLogLevel = 9;
    }
  private:
    static unsigned int mLogLevel;
};
The preceding file starts with the #pragma once directive, which is called a header guard. The header guard line is used to prevent multiple inclusions of the same header file during the compilation. Then, we include the cstdio C++ headers so that the std::printf() and std::fflush() functions are available. Here, I use the old C-style of printing as it is both easy to implement and use. The log() function is implemented as a C++ template to enable us to use a varying number of arguments to print to the screen. Inside the function, the current log level of the call is compared with the stored log level, suppressing all messages with higher log levels. If the log level fits, we use printf to output the arguments to the terminal. Forced flushing with std::fflush() is required for Eclipse; without the line, the output will be displayed after the termination of the program. The setLogLevel() function enables you to change the desired verbosity at runtime. That means you could also add UI elements to set the logging level using mGui controls, which are explained in Chapter 5. The only data member is the global log level.
The Logger.cpp file is only two lines long:
#include "Logger.h"
unsigned int Logger::mLogLevel = 1;
The first line includes the class header, while the second line is responsible for initializing the member variable holding the current log level. This initialization has to be done in the .cpp file, or else we will get a linker error during compilation.
We will come back to debugging in Chapter 4, which discusses different ways in which to show what’s going on in your code.
NULL versus nullptr
As GLFW is a C library, you will see a lot of NULL values in the examples and function calls. Modern C++ has redefined NULL to nullptr, which is still compatible with the pointer type in C code. From the technical perspective, the values of NULL for a pointer and 0 as a number are the same in C, and nullptr helps to avoid ambiguous cases where a pointer was intended but a number was used (and vice versa). I will only use nullptr as there is no reason to stick with ancient definitions in 2023.
Now that you’ve worked through the source code, let’s move on and create our first window!


