Now that we have added a remote platform, we will be writing a very simple little Java application to check that it works and have the output from the application executed on the Raspberry Pi and output its information in the editor. We start with a simple Hello World Java application and run it on the Raspberry Pi. The following steps will be needed every time we start a new project.
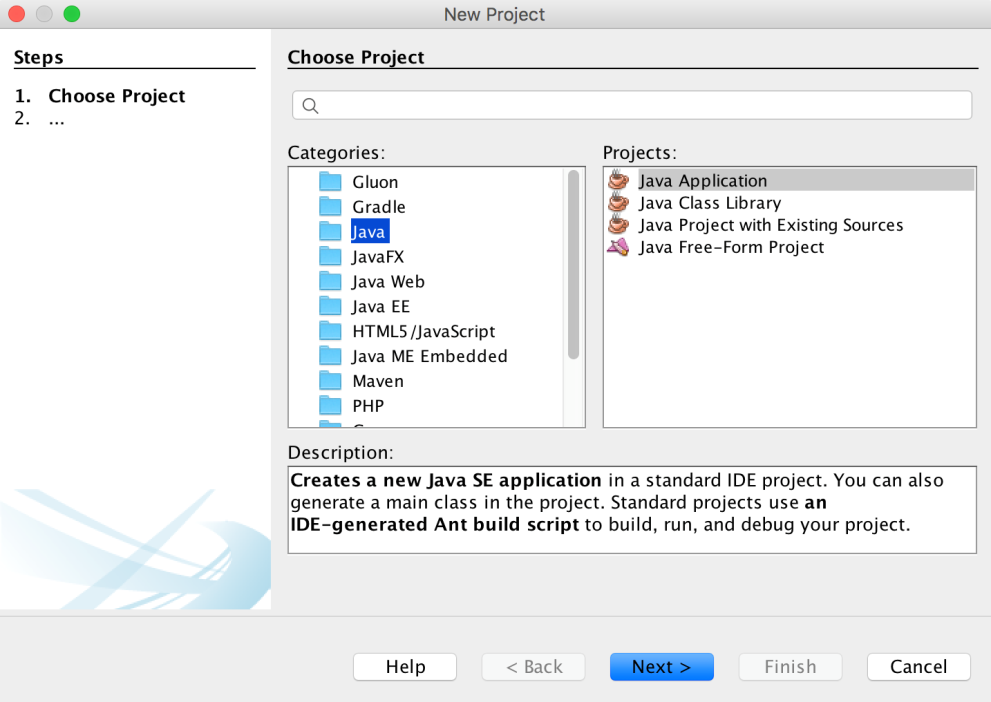
Click File in the menu bar and click New Project. You will be presented with the New Project wizard, as shown in the following screenshot:

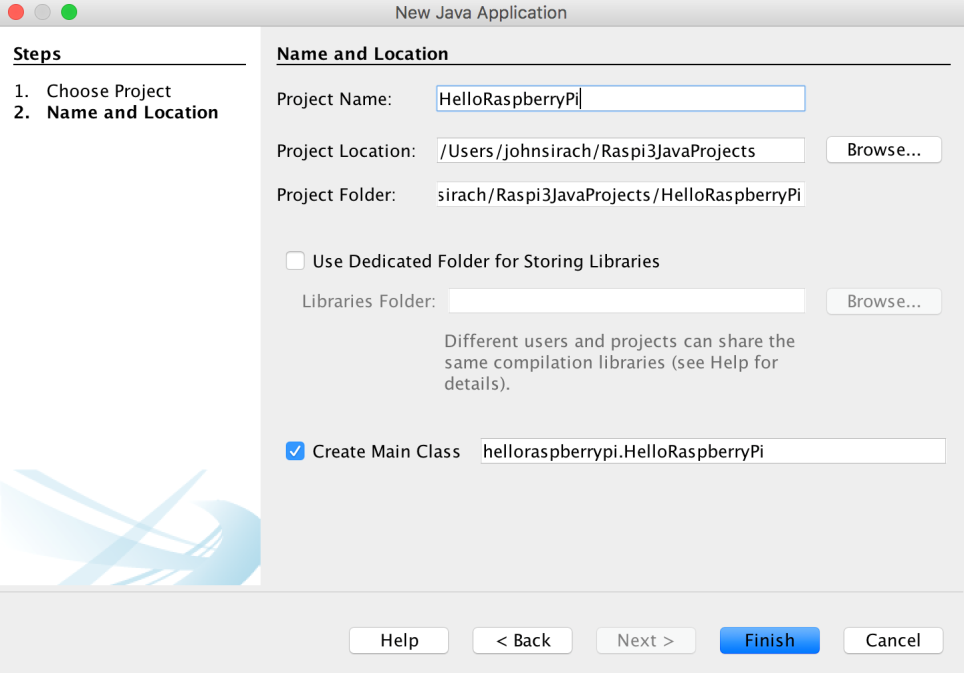
On the left side are the project categories. Here we click on Java, and on the right side we select the Java Application option and press Next to create a Java application. To be able to start with a Java application we need to enter some details so we can begin with our development. The following screenshot shows the details we need to enter to begin:

In this screen we give the project the name, HelloRaspberryPi, and browse to the local directory where we will be putting our project. Make sure you put no spaces in the name of the project! We supply a base path where this project is being placed. In my case, I will place my project in my home directory with the subdirector Raspi3JavaProjects. Other projects that we will be creating later on will also be placed in this directory. NetBeans will automatically create a directory based on the project name in this base directory. Click Finish and the project will be created.
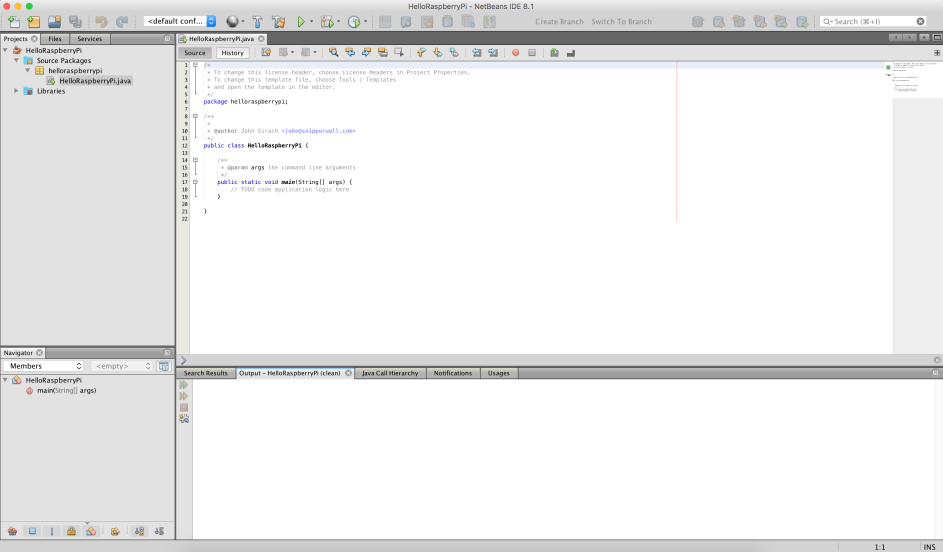
On the left side we have our project structure tree where all our Java packages are, and on the left side we have the editor. This window will be our main projects screen throughout the book, as shown in the following screenshot. This window is the same on all platforms, such as Windows, Linux, and Mac:

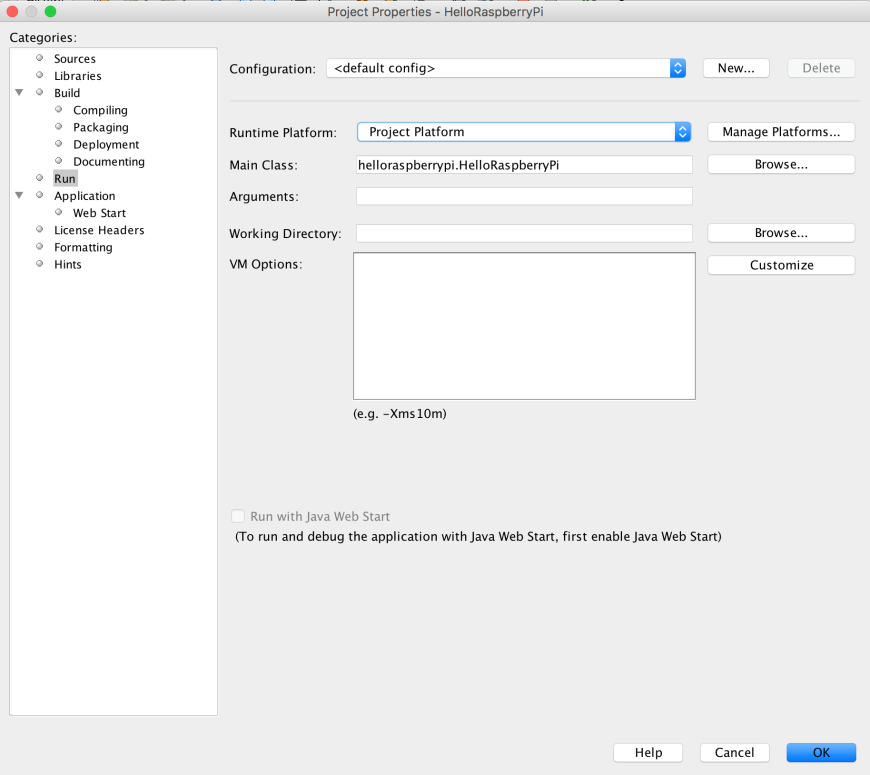
Now that we have a new project, we will configure it to run on the remote Raspberry Pi platform. To do this we open the project properties by clicking on the project name in the left side of the window. This opens up a context menu where the bottom option is Properties. When clicked, it opens the Properties window, as shown in the following screenshot:

We click on the Run configuration in the left option tree. We now see the possible run options. We want to run our Java application on the Raspberry Pi, so we change the Runtime Platform to RASPI3JAVA remote or the name you have set in the remote platform configuration. We are asked to save this as a configuration, and we enter a name such as remote Raspberry Pi configuration. Press OK to save our run configuration.


