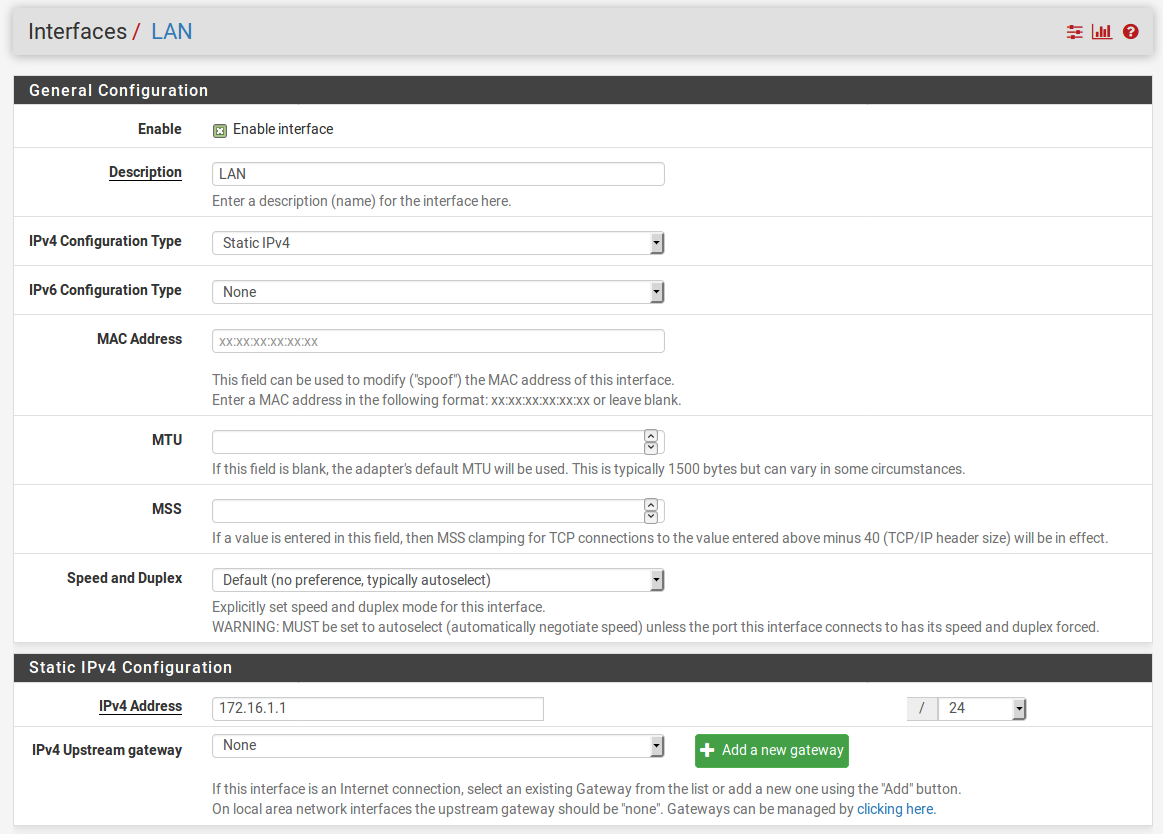
This recipe describes how to configure the Local Area Network (LAN) internal interface of our pfSense firewall.
Configuring a LAN interface
Getting ready
The LAN interface is the interface to the internal network through which our nodes will be able to securely connect to other internal nodes and to the internet. An assigned LAN interface is required.
How to do it...
- Navigate to Interfaces | LAN.
- Check the Enable Interface checkbox:

- Choose an IPv4 Configuration Type (usually Static IPv4).
- Choose an IPv6 Configuration Type (or leave it set to None).
- Enter an IPv4 Address in the appropriate field, and the correct CIDR in the adjacent drop-down box. Leave IPv4 Upstream gateway set to None.
- If you enabled IPv6 by setting the IPv6 Configuration Type, enter an IPv4 Address in the appropriate field and the correct CIDR in the adjacent drop-down box.
- Leave Block private networks and Block bogon networks unchecked (they should be unchecked by default).
- When you are done making changes, click on the Save button. When the page reloads, click on the Apply Changes button.
How it works...
You have just defined your first internal network. If you have been following these recipes in order, you now have met the minimal requirements for a fully functional network. You can now either continue adding networks, or start configuring the rules to regulate traffic between the networks.
There's more...
You can now connect a switch to the LAN port of your pfSense system, and connect nodes to the LAN network.
See also
- The Identifying and assigning interfaces recipe in this chapter
- The Configuring a WAN interface recipe in this chapter
- The Configuring optional interfaces from the console recipe in this chapter


