As stated earlier, you can think of Portal for ArcGIS as being like an on-premise version of ArcGIS Online. Portal for ArcGIS is a website hosted on your network that serves as a repository for and gateway to your GIS data and content.
Installing Portal for ArcGIS
System and hardware requirements
Before diving into installation, let's first talk about system requirements. These have changed since earlier versions, so refer to the online documentation carefully for details and ensure that your hardware meets the minimum requirements.
Operating systems
Portal for ArcGIS is supported on Windows Server 2016 Standard and Datacenter 64-bit; Windows Server 2012 R2 Standard and Datacenter 64-bit; Windows Server 2012 Standard and Datacenter 64-bit; Windows Server 2008 R2 Standard, Enterprise, and Datacenter 64 bit; and Windows Server 2008 Standard, Enterprise, and Datacenter 64 bit. Windows 10, 8.1, and 7 64-bit are also supported for basic testing and application development only, not for production environments.
Hardware
Portal for ArcGIS 10.5 requires one four-core processor for every 100 concurrent users, 8 GB of RAM, and 10 GB of disk space minimum for installation.
Ports
Like ArcGIS Server, Portal communicates through several predetermined ports. You must ensure that your firewall allows traffic through these ports:
- HTTP port 7080: This is the main HTTP communication port for Portal for ArcGIS
- HTTPS port 7443: This is the default port used to send encrypted information, such as user credentials
- Intermachine communication ports: 5701, 7005, 7099, 7199, 7654, 7120, and 7220 are used by Portal for ArcGIS for intermachine communications and must be allowed by your firewall
SSL
Again, much like ArcGIS Server, Portal for ArcGIS comes preconfigured with a self-signed server certificate suitable for installations and initial testing. However, Portal for ArcGIS requires that you must request a SSL certificate from a trusted certificate authority and configure your Portal to use it. This is especially important if you will be federating your ArcGIS Server with your Portal.
ArcGIS Web Adaptor
The ArcGIS Web Adaptor is a required component of Portal for ArcGIS; Portal for ArcGIS cannot be deployed without the Web Adaptor, unless you are implementing Portal in a highly available configuration with a load balancer.
Portal for ArcGIS installation
Much like with ArcGIS Server, the Portal for ArcGIS installation process is a simple and straightforward one. Double-clicking on the installation executable launches the installation process:
- Choose a well-known temporary location to extract the installation files to. After the extraction is complete, select Launch the setup program.
- Accept the license agreement.
- Change the installation destination folder, if necessary.
- Change the Portal configuration store location, if necessary.
- Specify the Portal for the ArcGIS service account. This is the Windows account that the Portal for ArcGIS Windows service runs under. This can be either a local account or a domain account. For production systems, it is recommended to use a Windows domain account.
- Optionally, save an installation configuration file.
- Install the Portal for the ArcGIS software.
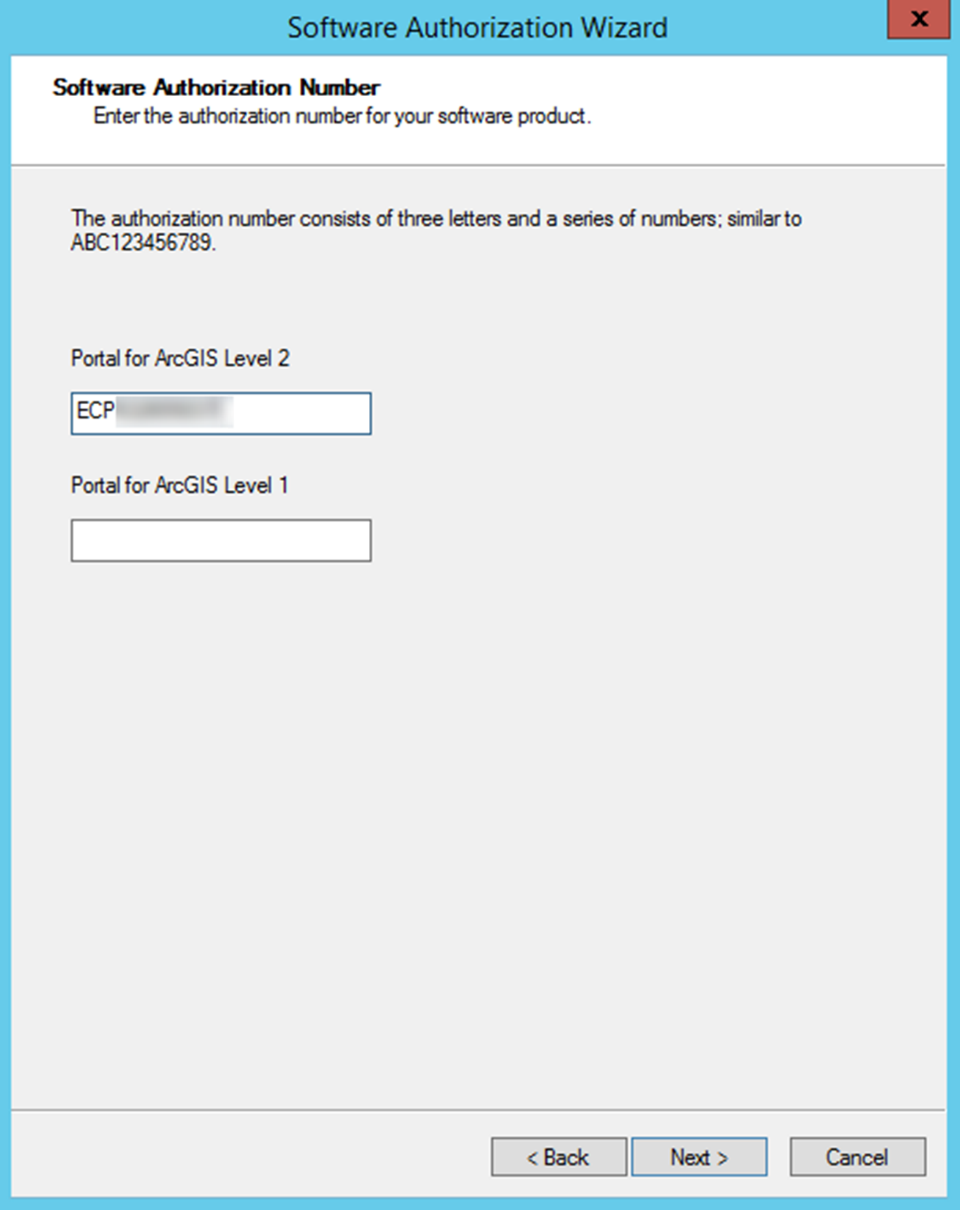
After installation of the Portal for the ArcGIS software is complete, it must be authorized for use. The Software Authorization Wizard launches automatically after the installation is complete, but can also be launched from the Start menu as Software Authorization for Portal for ArcGIS. As with the authorization of ArcGIS Server, there are several ways to complete the authorization, but, for Portal for ArcGIS, a common method is to enter ECP numbers for your Level 1 and Level 2 Portal for ArcGIS entitlements. In the Software Authorization Wizard, do the following:
- For the authorization option, select I have installed my software and need to authorize it.
- Select Authorize with Esri now using the Internet.
- Enter in pertinent organizational information related to licensing.
- Enter in your ECP numbers for Level 1 and 2 users:

Your Portal for the ArcGIS software is now installed and authorized.
Portal for ArcGIS initial configuration
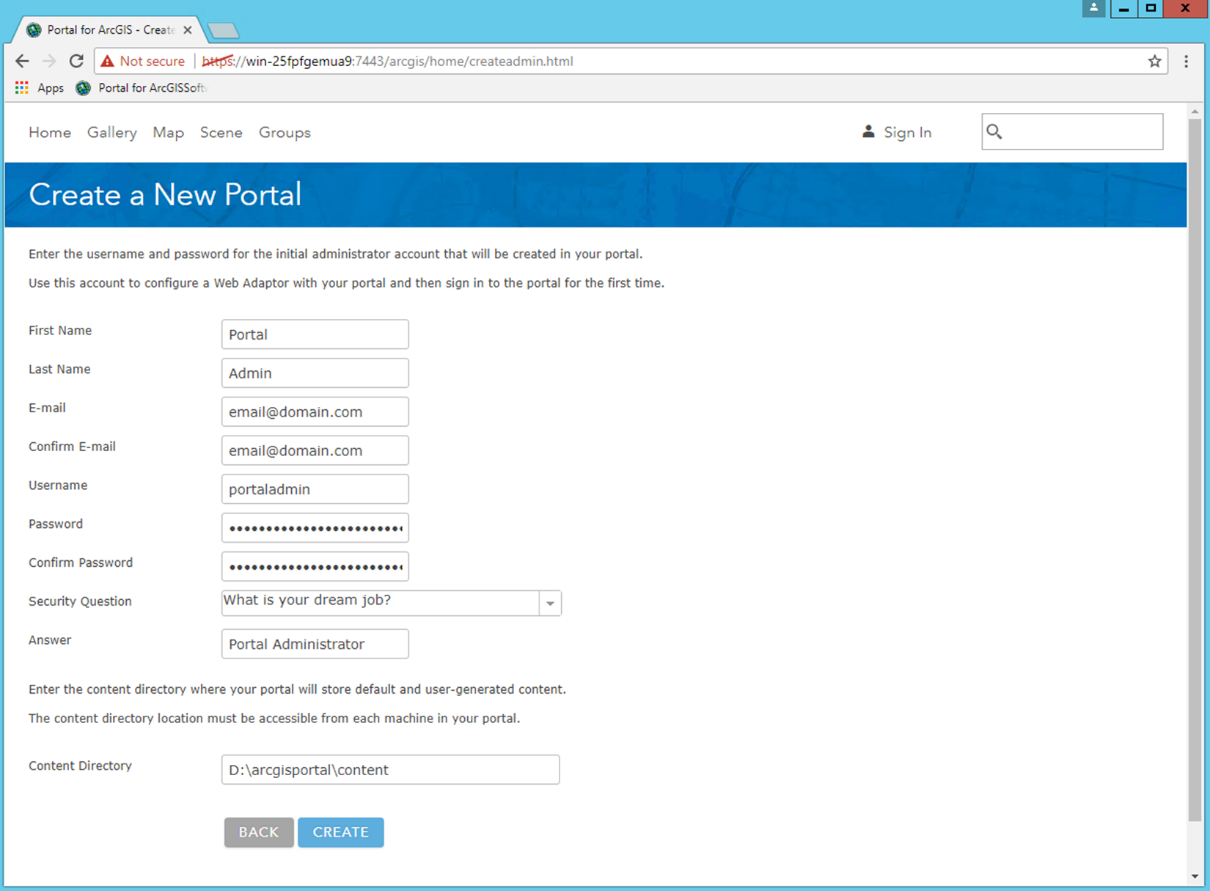
The final step in the Portal for the ArcGIS installation process is to create your Portal. Once your Portal for ArcGIS software authorization completes, your default web browser will launch and prompt you to create or join a Portal. The URL will be in the form of https://<machine name>:7443/arcgis/home/createadmin.html. Perform the following steps to initially configure your portal:
- If you are creating a new Portal instance, select Create New Portal.
- Create the Portal for the ArcGIS primary site administrator (PSA) account. This account will be the first administrator account created for your Portal. You can add additional administrator accounts later, but this account will be used to initially log on to your Portal. Common practice is to name this account portaladmin. Your Portal content directory is automatically chosen for you based on your installation location:

- Click on Create. It may take several minutes to create your Portal and PSA account, after which you will be informed that you must install and configure the ArcGIS Web Adaptor for your Portal.
ArcGIS Web Adaptor for Portal for ArcGIS
Much like with the Web Adaptor for ArcGIS Server, a Web Adaptor is needed with Portal for ArcGIS to forward incoming traffic over port 443 to 7443, the port which Portal listens on.
Installing the ArcGIS Web Adaptor for Portal for ArcGIS
The ArcGIS Web Adaptor comes as a separate installer you can download from http://my.esri.com. A completely additional, separate installation of the ArcGIS Web Adaptor is required for Portal for ArcGIS, in addition to any you already have installed for ArcGIS Server.
Requirements
For the requirements for the ArcGIS Web Adaptor, see the earlier section under ArcGIS Web Adaptor for ArcGIS Server.
Web Adaptor for Portal for ArcGIS installation
Installation of the Web Adaptor for Portal is identical to the installation done previously for ArcGIS Server (see the preceding section, Web Adaptor for ArcGIS Server installation), except for one step. Your Portal Web Adaptor must have a different name from your ArcGIS Server Web Adaptor (we named our arcgis earlier--standard practice). Standard practice is to name your Portal for ArcGIS Web Adaptor portal.
Portal for ArcGIS Web Adaptor configuration
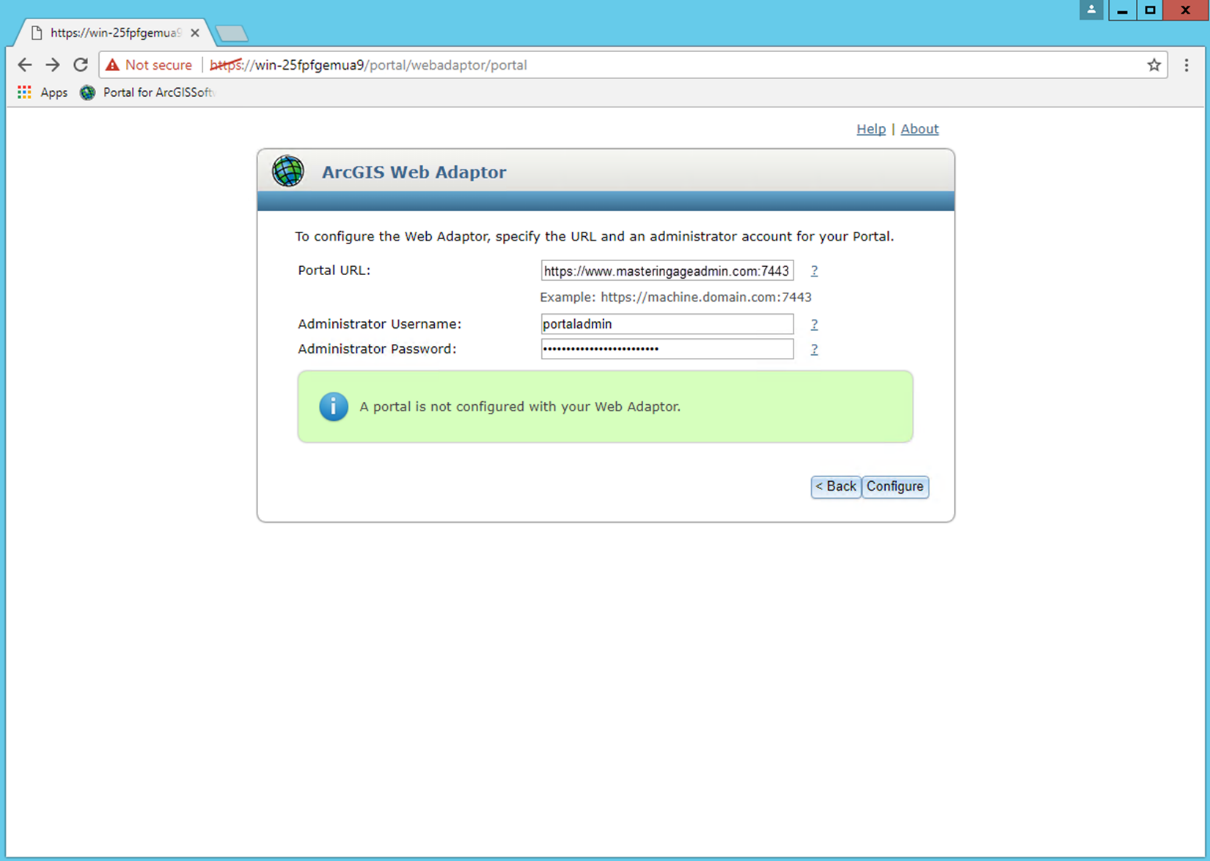
See the earlier section, Web Adaptor for ArcGIS Server configuration, for more details on the Web Adaptor configuration parameters. To configure the Portal for ArcGIS Web Adaptor, do the following:
- Select the Portal for ArcGIS radio box.
- Your Portal URL must be the fully qualified domain name and port to your Portal. This URL must be reachable from the server you are installing your Portal Web Adaptor to. This means that all required ports for Portal must be open inbound on your Portal server. In our case here, our Portal URL is https://www.masteringageadmin.com:7443. The administrator username and password are your Portal PSA--typically, portaladmin:

- Upon successful configuration, you will be informed of the machine that has been configured with your Web Adaptor.
With the configuration of the ArcGIS Web Adaptor, your Portal for ArcGIS installation and initial configuration is now complete. You can proceed to your Portal from your Portal server at https://<machine name>:7443/arcgis/home or, externally, at your fully qualified URL, such as https://www.masteringageadmin.com/portal, and log in as your Portal PSA.


