Search icon CANCEL
Arrow left icon
Explore Products
Best Sellers
New Releases
Books
Videos
Audiobooks
Learning Hub
Conferences
Free Learning
Arrow right icon
Arrow up icon
GO TO TOP
Learn Blender Simulations the Right Way

You're reading from   Learn Blender Simulations the Right Way Create attractive and realistic animations with Mantaflow, rigid and soft bodies, and Dynamic Paint

Arrow left icon
Product type Paperback
Published in Nov 2022
Publisher Packt
ISBN-13 9781803234151
Length 368 pages
Edition 1st Edition
Tools
Concepts
Arrow right icon
Author (1):
Arrow left icon
Stephen Pearson Stephen Pearson
Author Profile Icon Stephen Pearson
Stephen Pearson
Arrow right icon
View More author details
Toc

Table of Contents (21) Chapters Close

Preface 1. Part 1: Using Mantaflow for Fire, Smoke, and Fluids
2. Chapter 1: An Introduction to Mantaflow FREE CHAPTER 3. Chapter 2: Understanding Domains, Flows, and Effectors 4. Chapter 3: Creating a Realistic Campfire Simulation 5. Chapter 4: Creating a Waterfall Using Mantaflow 6. Chapter 5: Creating a Realistic Explosion 7. Part 2: Simulating Physics with Soft Bodies and Cloth
8. Chapter 6: Getting Started with Soft Bodies 9. Chapter 7: Creating a Soft Body Obstacle Course 10. Chapter 8: Introduction to Cloth Simulations 11. Chapter 9: Creating a Realistic Flag 12. Part 3: Diving into Rigid Bodies
13. Chapter 10: An Introduction to Rigid Bodies 14. Chapter 11: Creating a Rigid Body Physics Course 15. Part 4: Understanding Dynamic Paint in Blender
16. Chapter 12: Introduction to Dynamic Paint 17. Chapter 13: Creating a Paintbrush Effect 18. Chapter 14: Creating a Raindrop Effect 19. Index 20. Other Books You May Enjoy

Adding Foam particles

Now that the simulation is done baking, we can now set up the Foam particles. At the moment the particles are just halos, which means they are just points in three-dimensional (3D) space and won’t show up in the render. You can see an example of this here:
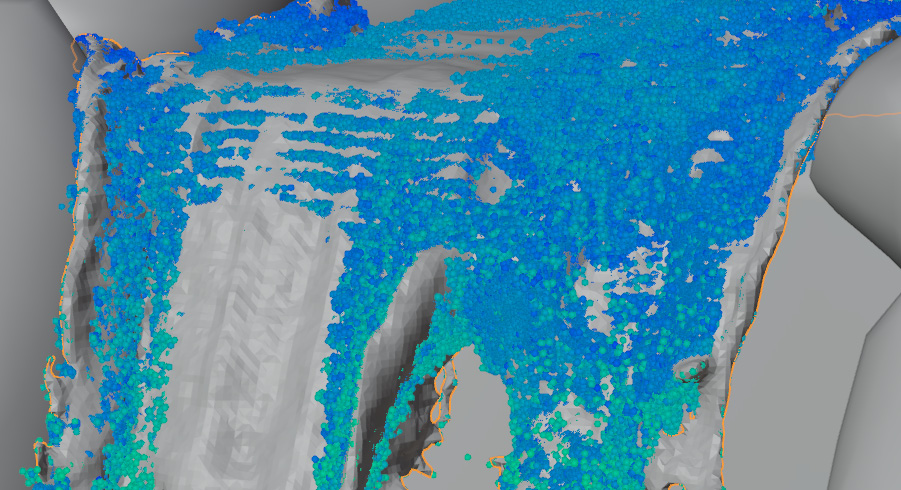
Figure 4.11 – Halo example

Figure 4.11 – Halo example

However, we need an actual object to be the particles. We also want to make sure whichever object we choose has as little geometry as possible, or it will slow down Blender by a lot. A UV sphere has a lot of geometry on it, so that will not work. Instead, let’s use a cone with a very low subdivision. Here’s how we can achieve that:

  1. First, select your domain object, right-click, and select Shade Smooth. This will shade the surface of the mesh in a smooth way so that we don’t see individual faces.
  2. Add a Cone object, then open the menu on the bottom left and set Vertices to 3, as illustrated in the following...
lock icon The rest of the chapter is locked
Register for a free Packt account to unlock a world of extra content!
A free Packt account unlocks extra newsletters, articles, discounted offers, and much more. Start advancing your knowledge today.
Unlock this book and the full library FREE for 7 days
Get unlimited access to 7000+ expert-authored eBooks and videos courses covering every tech area you can think of
Renews at €18.99/month. Cancel anytime