Exercise 1: Creating an App Service Plan
In this exercise, you will explore the Azure portal by creating an App Service plan. This will make it easier to understand the configuration options:
- Either navigate from https://portal.azure.com to Create a resource and select App Service plan or use the following URL to jump straight to it: https://portal.azure.com/#create/Microsoft.AppServicePlanCreate.
- Select your subscription from the Subscription dropdown and select an existing resource group from the Resource Group dropdown, if you have one that you’d like to use. Alternatively, select the option to create a new one.
- Enter the desired name for your App Service plan, select Windows for the Operating System option, and select your region, as shown in the following screenshot:

Figure 2.2: App Service plan details within the Azure portal
- Click on the Explore pricing plans link to be taken to a different kind of specification picker than you might be used to from other resource types. You’ll be able to see the different pricing tiers available and their respective VM compute resources using Hardware view, as shown in Figure 2.3:

Figure 2.3: App Service plan hardware view
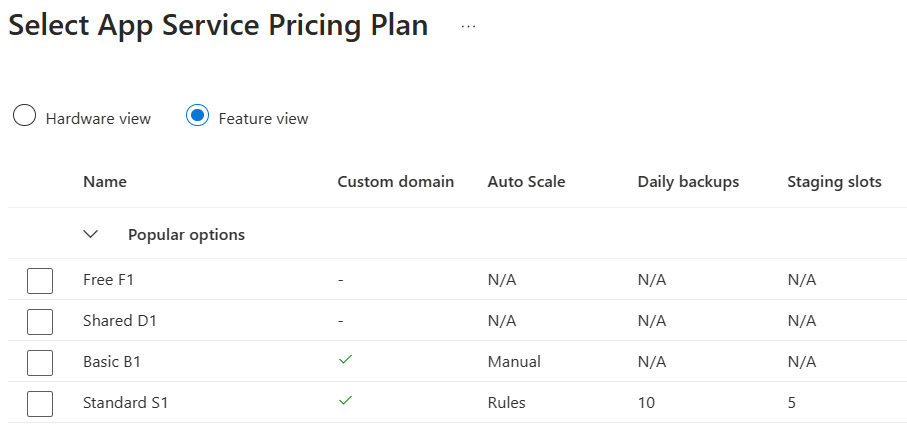
From within Feature view, you can see the different features that are available for the various tiers, as shown in Figure 2.4:

Figure 2.4: App Service plan feature view
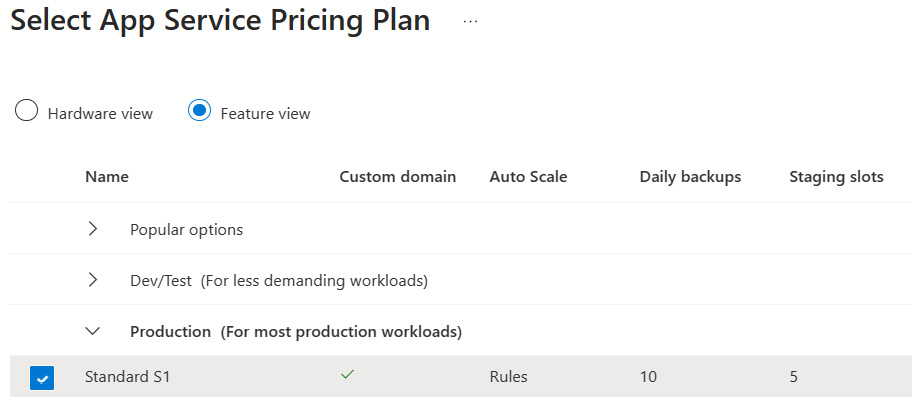
- You are going to be making use of deployment slots, also known as staging slots, and autoscale in this chapter, so select the least expensive Production tier that provides these features. For this example, that’s Standard S1, as shown in the following figure:

Figure 2.5: Standard S1 production tier App Service plan feature view
- After selecting an appropriate App Service plan tier that includes staging slots and autoscale, click on Select.
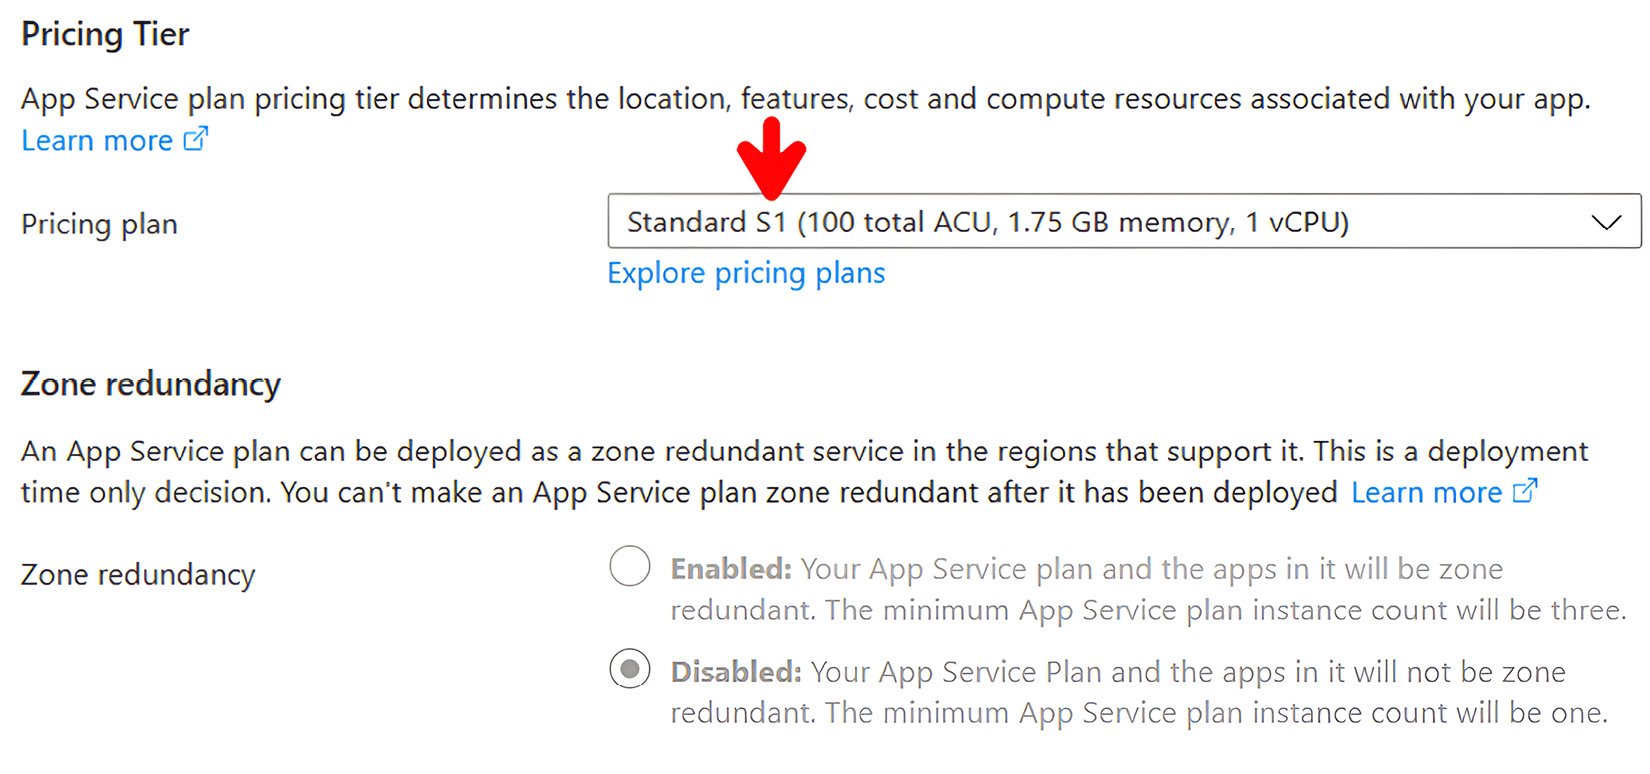
- Notice that, depending on which tier you selected, the option to enable Zone redundancy is disabled. This is because that’s only available in higher tiers. Make a note of the SKU code, not the name. In this example, the SKU code is S1, not just Standard:

Figure 2.6: Pricing tier SKU code and zone redundancy options
- Click on Review + Create and select Create to provision the new App Service plan. Once completed, go into your new App Service plan and look through the available settings. You will be able to see any apps running within the plan, storage use, networking settings, as well as horizontal and vertical scaling options.
- Open a session of your preferred terminal, make sure you’re logged in, and set it to the right subscription.
- Create a Linux App Service plan using the following CLI command:
az appservice plan create -n "<plan name>" -g "<resource group>" --sku "<SKU code>" --is-linux
Alternatively, use the following PowerShell command:
New-AzAppServicePlan -Name "<plan name>" -ResourceGroupName "<resource group>" -Tier "<SKU code>" -Location "<region>" -Linux
While the CLI accepts but doesn’t require a location, because it will inherit from the resource group, PowerShell requires the location to be specified.
Now that you have explored the App Service plans that provide the underlying compute resources for your apps, you can move on to App Service web apps and put these App Service plans to good use.
App Service Web Apps
Originally, App Service was only able to host web apps on Windows, but since 2017, App Service has been able to natively host web apps on Linux for supported application stacks. You can get a list of the available runtimes for Linux by using the following CLI command:
az webapp list-runtimes --os-type linux -o tsv
The versions you see relate to the built-in container images that App Service uses behind the scenes when you use a Linux App Service plan. If your application requires a runtime that isn’t supported, you can deploy the web app with a custom container image. If you want to use your own custom containers, you can specify the image source from various container image repository sources. As you won’t see any container examples in this chapter, you are not required to do that here.


