Terminator – the ultimate terminal
The first thing you need to do in order to become productive is to have a good terminal. Throughout the book, we will be working mostly with the command line, which means that the primary piece of software we will be using is our terminal. A great terminal that we recommend is Terminator, which can be installed from the software center.
Let's go to our launcher and click on the software center icon. After it opens, click on the search input and write terminator, as shown in the following screenshot. It will probably be first in the list of results. Click on Install.

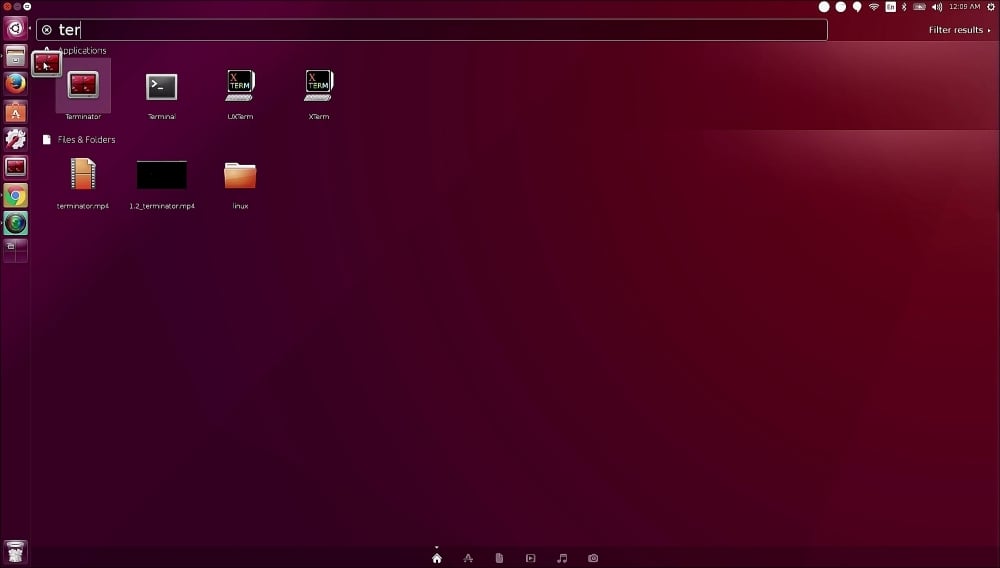
After installing Terminator, it's a good idea to drag its icon to the Launcher. For this, you just open the dash by hitting the Windows key, write terminator and drag and drop its icon into the Launcher:

Alright, now let's click on the icon to get started. You can maximize the window to have more space to play around.
Preferences menu
It's an customizing terminal, where good surprises can be found in form of fonts styles and other tools. What you see right now are the default settings. Let's go into the preferences menu and see what we can update. First of all, let's hide the title bar because it doesn't give us that much information and it's always a good idea to have as much free screen space as possible (and as few distractions as possible).
Now let's look at some other preferences:
- Let's change the font. We will make it a bit larger than usual so that it is easy to read. Let's go with Monospace 16, as shown in the following screenshot:

- We also want to have good contrast so that it's easy to distinguish the letters. And for this, we will choose a black on white color theme.

- It's also a good idea to enable infinite scroll, because you don't want your terminal output to be trimmed after
500lines. A lot of the time, you just want to scroll and see the previous output. Also, while scrolling, if there is a lot of text, you probably don't want to be brought back to the bottom of the page, so uncheck the Scroll on output option.
And voila! This is our newly configured terminal. And now it's time to check what we can do with this new terminal. Here comes the Features section!
Features
Now it's time to look at some of Terminator's useful features and their keyboard shortcuts. This is what the normal Terminator interface looks like:

Let's play around with it now:
- Split screen: Ctrl + Shift + O for a horizontal split:

- Ctrl + Shift + E for a vertical split:

This is probably the coolest feature of Terminator and the one we will be using the most as it is really helpful to see multiple panes and easily switch between them. You can split the screen any number of times, in any combination you want.
Resize screen: Ctrl + Shift + Arrow or just drag and drop:

- Easily move between Windows with Ctrl + Shift + Arrow.
- Close screen using Ctrl + Shift + W or Ctrl + D.
- Create tabs with Ctrl + Shift + T. This is for when you don't have any more space to split the screen:

- Text zoom: Ctrl + + and Ctrl + - — useful for when you need to present or when you have a person with a bad eyesight:

Being able to divide the screen in order to arrange the terminal in a grid, and being able to split, switch, and resize panes with keyboard shortcuts are the biggest advantages of Terminator. One big productivity killer that a lot of people don't realize is switching between using the mouse and using the keyboard. And although most people prefer using the mouse, we suggest using the keyboard as much as possible and learning the keyboard shortcuts of your most commonly used computer programs.
Being productive ultimately means having more time to focus on the things that are really important, instead of wasting time struggling to use the computer.
Hasta la vista terminal! Welcome Terminator!


