Deploying a test app to Meteor
As you've come to expect, Meteor makes just about everything easier to do. Testing your application on a server is no exception. This recipe will show you how to deploy your application to Meteor servers, where you can test (and show off!) your new application.
Getting ready
The only requirement for this recipe is that you have a working application.
Your app doesn't need to be fancy or complete, but it should at least render something on the screen so that you can verify it is running on Meteor servers.
For this recipe, we will use the default leaderboard example, which is created using the following command in a terminal window:
$ meteor create --example leaderboard
How to do it…
To deploy a test app to Meteor, proceed with the following steps:
- First, you need to pick an application name.
The application name will appear on Meteor servers as a subdomain of the URL where your app is being served, such as
http://myproject.meteor.com.However, there are a lot of people testing applications on Meteor servers. Chances are pretty good that a generic name, such as "myproject" or "leaderboard", is already taken. So, we need to pick something unique.
For this recipe, I will use this application name
packtrecipe. You will obviously need to pick something else. I got here first!Tip
Your project and application name do not need to match. The application name is only an identifier so that Meteor servers know how to route to your application.
- Now that we've selected an application name, we will open a terminal window and navigate to the root directory of our project:
$ cd leaderboard - Once we're in the correct folder, we will issue the
deploycommand as follows:$ meteor deploy packtrecipe - Meteor will bundle and deploy your application. Upon completion, you should see something similar to the following in the terminal window:
Deploying to packtrecipe.meteor.com.  Bundling...
Uploading...
Now serving at packtrecipe.meteor.com
- Navigate to the URL Meteor gave you (in this case,
http://packtrecipe.meteor.com) in a browser and you will see your newly deployed application, as follows:
How it works…
It's magic! The folks at Meteor are sorcerers!
Actually, the core development team has worked very hard to make deployment as easy as possible. Under the hood, your local Meteor installation is packaging the correct files, compiling package lists and dependencies, and then sending a request to the Meteor servers. Once the Meteor servers receive the request, all the necessary error checking is done, and the packages, database, and application are created and initialized. A virtual host address is added, and voila! Your app is up and running.
There's a lot more detail (and code) involved, but this should give you a general idea of what goes into deploying to the Meteor test servers. Aren't you glad you didn't have to write all of that code?
There's more…
You probably noticed that you had to create a Meteor developer account in order to deploy. This is as it should be, because if there were no login/security details, someone could come along and override your deployment with one of their own.
This requirement, however, is quite flexible, allowing you to add other users or even organizations so that multiple people can deploy or update your app.
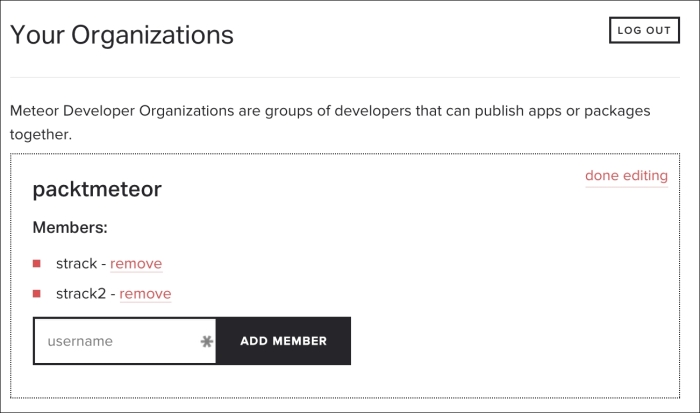
To set up an organization, navigate to https://www.meteor.com/account-settings/organizations and click on the button labeled NEW ORGANIZATION at the bottom of the screen. You can then add individual users to the organization, similar to the following screenshot:

Once you've deployed your application, you can authorize the changes made by an individual or an organization through the meteor authorized command. Use the following syntax to add authorized accounts:
$ meteor authorized [your-url.meteor.com] --add [user/organization]
So, for example, we would use the following to add the packtmeteor organization to our deployed app:
$ meteor authorized packt.meteor.com --add packtmeteor
Likewise, if we wanted to remove authorization (for example, let's remove the strack2 account), we would enter something like this:
$ meteor authorized packt.meteor.com --remove strack2
Tip
Meteor developer accounts have other useful functions as well. To explore what you can do with your account, please visit https://www.meteor.com/account-settings.
See also
- The Building a custom package recipe in Chapter 2, Customizing with Packages


