Search icon CANCEL
Subscription
0
Cart icon
Your Cart (0 item)
Close icon
You have no products in your basket yet
Save more on your purchases! discount-offer-chevron-icon
Savings automatically calculated. No voucher code required.
Arrow left icon
Explore Products
Best Sellers
New Releases
Books
Videos
Audiobooks
Learning Hub
Free Learning
Arrow right icon
Arrow up icon
GO TO TOP
Mastering Ubuntu Server

You're reading from   Mastering Ubuntu Server Master the art of deploying, configuring, managing, and troubleshooting Ubuntu Server 18.04

Arrow left icon
Product type Paperback
Published in May 2018
Publisher Packt
ISBN-13 9781788997560
Length 552 pages
Edition 2nd Edition
Concepts
Arrow right icon
Author (1):
Arrow left icon
Jay LaCroix Jay LaCroix
Author Profile Icon Jay LaCroix
Jay LaCroix
Arrow right icon
View More author details
Toc

Table of Contents (21) Chapters Close

Preface 1. Deploying Ubuntu Server 2. Managing Users FREE CHAPTER 3. Managing Storage Volumes 4. Connecting to Networks 5. Managing Software Packages 6. Controlling and Monitoring Processes 7. Setting Up Network Services 8. Sharing and Transferring Files 9. Managing Databases 10. Serving Web Content 11. Learning Advanced Shell Techniques 12. Virtualization 13. Running Containers 14. Automating Server Configuration with Ansible 15. Securing Your Server 16. Troubleshooting Ubuntu Servers 17. Preventing and Recovering from Disasters 18. Using the Alternate Installer 19. Assessments 20. Other Books You May Enjoy

Creating a bootable Ubuntu Server flash drive

The process of creating a bootable USB flash drive with which to install Ubuntu used to vary greatly between platforms. The steps were very different depending on whether your workstation or laptop was currently running Linux, Windows, or macOS. In the first edition, I outlined the process on all three major platforms. Thankfully, a much simpler method has come about since the publication of the first edition. Nowadays, I recommend the use of Etcher to create your bootable media. Etcher is fantastic in that it abstracts the method such that it is the same regardless of which OS you use, and it distills the process to its most simple form. Another feature I like is that Etcher is safe; it prevents you from destroying your current operating system in the process of mastering your bootable media. In the past, you'd use tools like the dd command on Linux to write an ISO file to a flash drive. However, if you set up the dd command incorrectly, you could effectively write the ISO file over your current operating system and wipe out everything. Etcher doesn't let you do that.

Before continuing, you'll need a USB flash drive that is either empty, or one you don't mind wiping. This process will completely erase it, so make sure the device doesn't have information on it that you'd rather not lose. The flash drive should be at least 1 GB, preferably 2 GB or larger. Considering it's difficult to find a flash drive for sale with less than 4 GB of space nowadays, this should be relatively easy to obtain.

To get started, head on over to https://etcher.io, download the latest version of the application from their site, and open it up. The window will look similar to the following screenshot once it launches:
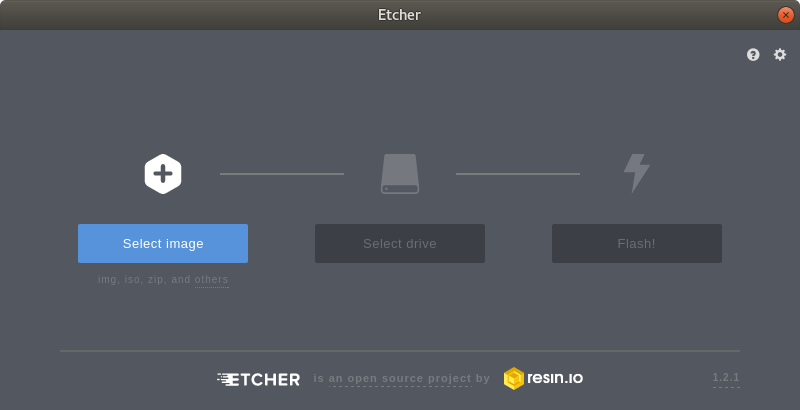
Utilizing Etcher to create a bootable flash drive

At this point, you'll click Select image, which will open up a new window that will allow you to select the ISO file you downloaded earlier. Once you select the ISO, click on Open:
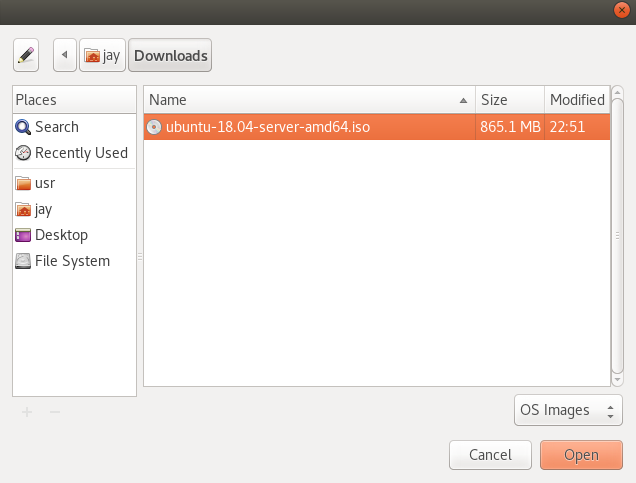
Selecting an ISO image with Etcher

If your flash drive is already inserted into the computer, Etcher should automatically detect it:
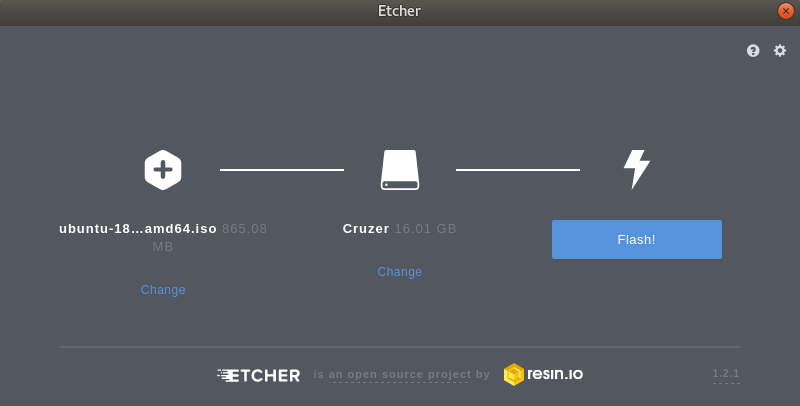
Etcher with a selected ISO image and flash drive

In the event you have more than one flash drive attached, or Etcher selects the wrong one, you can click Change and select the flash drive you wish to use:
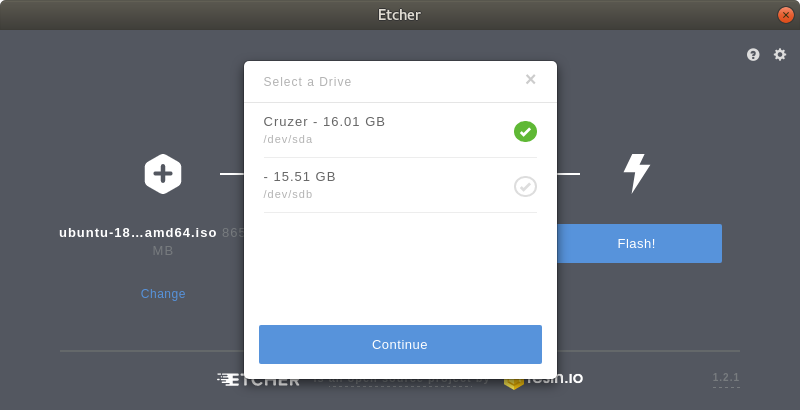
Selecting a different flash drive with Etcher

Finally, you can click Flash! to get the process started. At this point, the flash drive will be converted into Ubuntu Server installation media that can then be used to start the installation process:
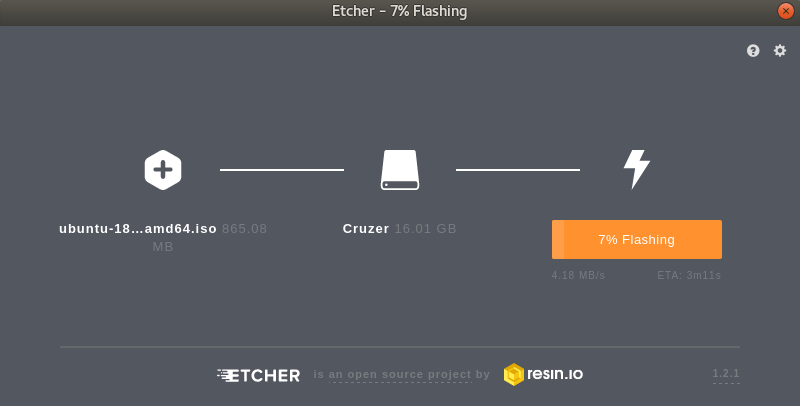
Selecting a different flash drive with Etcher

After a few minutes (the length of time varies depending on your hardware), the flashing process will complete, and you'll be able to continue and get some installations going. Before we get into that, though, we should have a quick discussion regarding partitioning.

lock icon The rest of the chapter is locked
Register for a free Packt account to unlock a world of extra content!
A free Packt account unlocks extra newsletters, articles, discounted offers, and much more. Start advancing your knowledge today.
Unlock this book and the full library FREE for 7 days
Get unlimited access to 7000+ expert-authored eBooks and videos courses covering every tech area you can think of
Renews at $19.99/month. Cancel anytime
Banner background image