Installing the Scala kernel
The steps for macOS are as follows (taken from https://developer.ibm.com/hadoop/2016/05/04/install-jupyter-notebook-spark):
Note
I could not get the steps for using the Scala kernel to work on a Windows 10 machine.
- Install
gitusing the following command:
yum install git- Copy the
scalapackage locally:
git clone https://github.com/alexarchambault/jupyter-scala.git- Install the
sbtbuild tool by running:
sudo yum install sbt- Move the
jupyter-scaladirectory to thescalapackage:
cd jupyter-scala- Build the package:
sbt cli/packArchive- To launch Scala shell, use the following command:
./jupyter-scala- Check the kernels installed by running this command (you should now see Scala in the list):
jupyter kernelspec list- Launch the Jupyter Notebook:
jupyter notebook- You can now choose to use a Scala 2.11 shell.
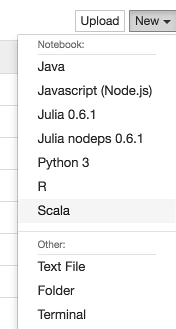
At this point, if you start Jupyter, you will see Scala listed:

If we create a Scala Notebook, we end up with the familiar layout with an icon displaying that we are running Scala...


