In this section, we are going to set up Cloudera VM on both Windows and macOS. We are going to use this VM for most of the exercises in this book.
Setting up big data modeling platforms
Getting started on Windows
We are going to install Cloudera virtual machine (VM) in our system to get started with big data modeling. Follow these instructions to download and install the Cloudera Quickstart VM with VirtualBox on Windows:
- Download the software from https://www.virtualbox.org/wiki/Downloads. Once the download is complete, install the downloaded VirtualBox software on your computer.
- Download the Cloudera VM from https://downloads.cloudera.com/demo_vm/virtualbox/cloudera-quickstart-vm-5.4.2-0-virtualbox.zip. The VM is over 4 GB. It will take some time to download the software.
- Right-click Cloudera-quickstart-vm-5.4.2-0-virtualbox.zip and choose Extract All….
- Start the VirtualBox.
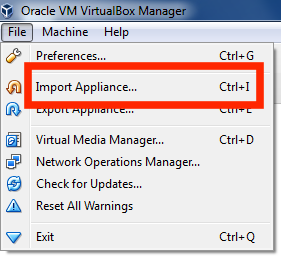
- Import the VM by going to File | Import Appliance...:
- Click the folder icon, select cloudera-quickstart-vm-5.4.2-0-virtualbox.ovf from the folder where you unzipped the VirtualBox VM, and click Open. The following screenshot is provided for assistance:
- Click Next to proceed, and then click Import, as shown in the following screenshot:
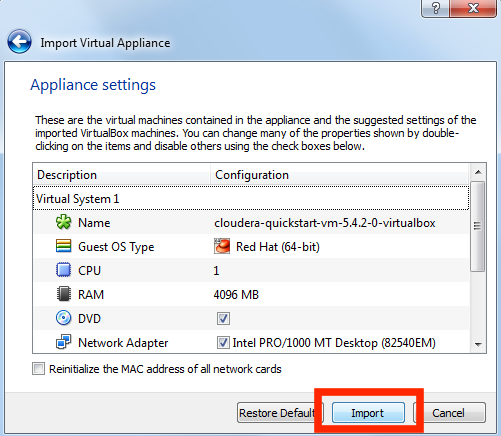
- The VM image will be imported. As this is a big file, it can take some time:

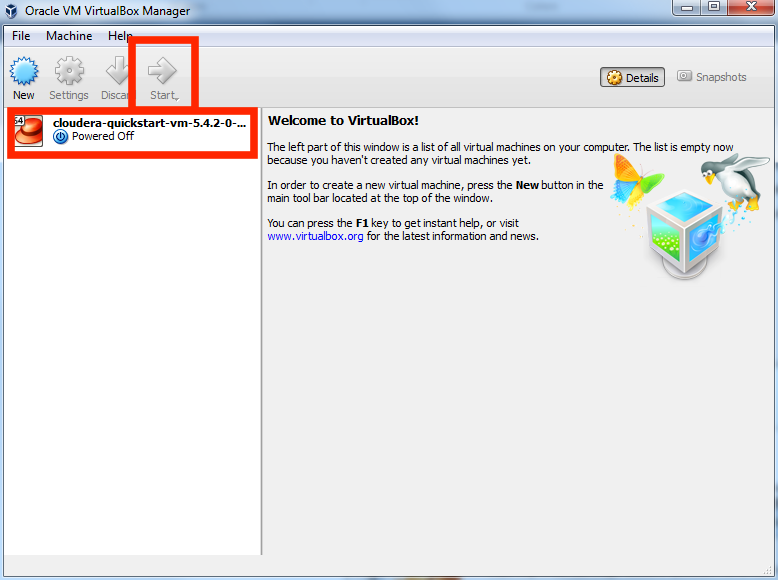
- When the import is finished, launch the Cloudera VM. cloudera-quickstart-vm-5.4.2-0 VM will appear on the left in the VirtualBox window. Select the machine and click the Start button to initiate the VM:
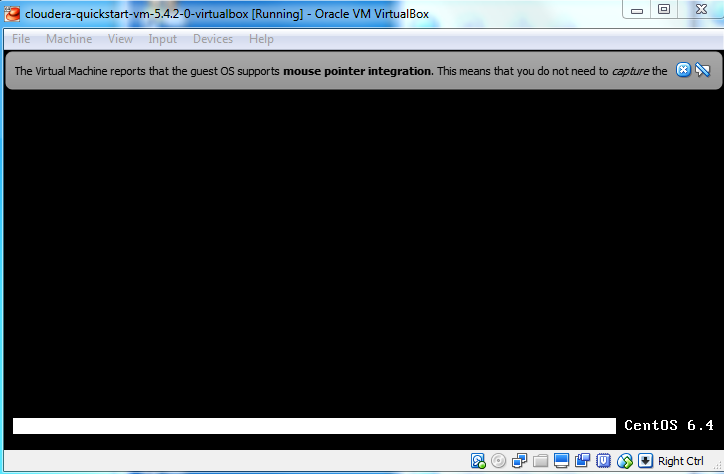
- It takes several minutes for Cloudera VM booting to start up initially. It takes a long time, since many Hadoop tools are loaded and started at this booting process:
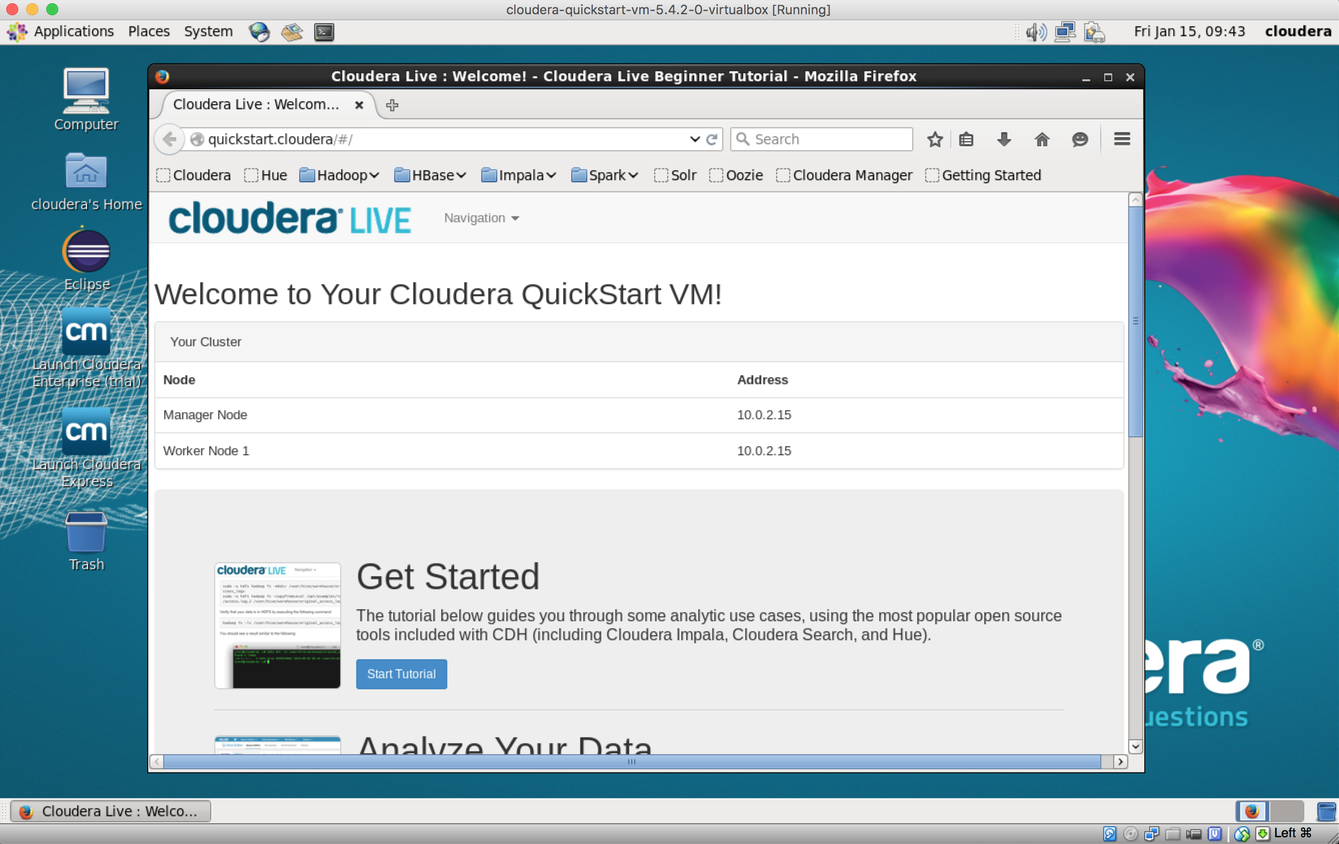
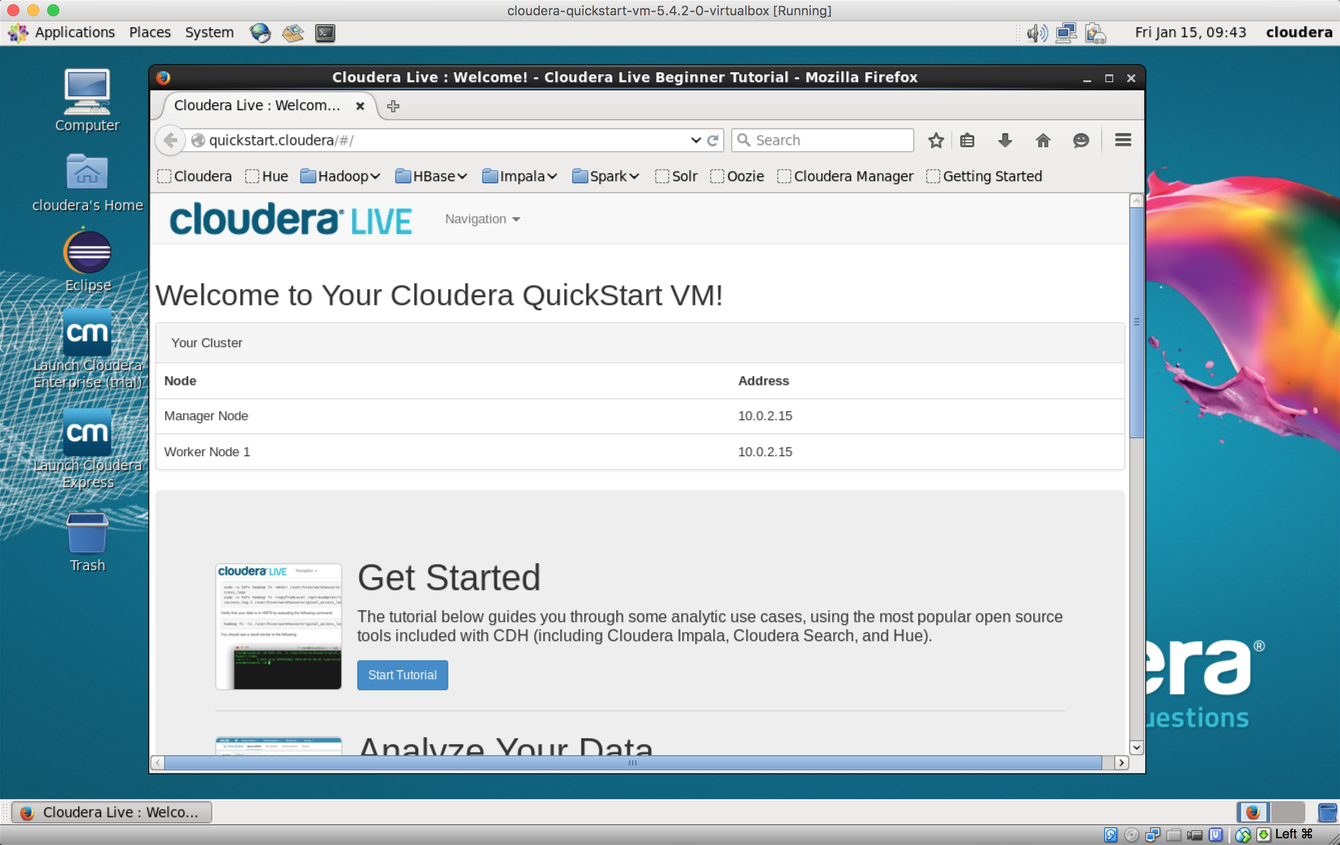
- Once the booting process is finished, you will see the Cloudera VM desktop on the screen:
Getting started on macOS
Setting up the Cloudera VM on a Mac is very similar to setting it up on Windows. If you have macOS, we can set up the Cloudera Quickstart VM with VirtualBox on macOS. Perform the following steps:
- Go to https://www.virtualbox.org/wiki/Downloads and download the virtual box. Once downloaded, install VirtualBox in macOS.
- Download the Cloudera VM from https://downloads.cloudera.com/demo_vm/virtualbox/cloudera-quickstart-vm-5.4.2-0-virtualbox.zip. The VM is over 4 GB, so it will take some time to download.
- Unzip the Cloudera VM. You can do this by double-clicking on the cloudera-quickstart-vm-5.4.2-0-virtualbox.zip folder.
- Start the VirtualBox and begin importing. We can import the VM by going to File | Import Appliance.
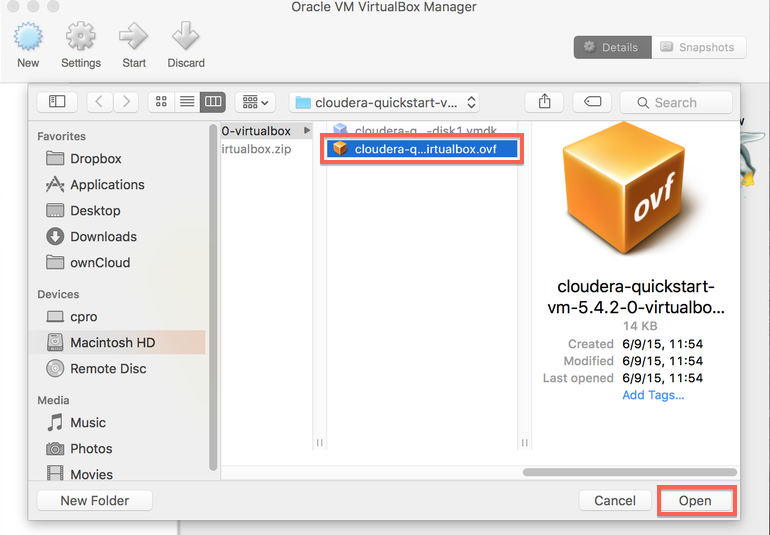
- Click the Folder icon, select cloudera-quickstart-vm-5.4.2-0-virtualbox.ovf from the folder where you unzipped the VirtualBox VM, and click Open:
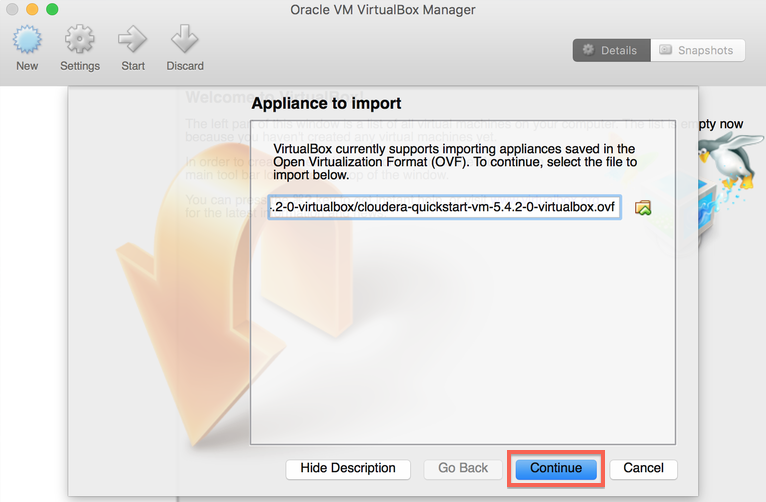
- Click Continue to proceed:
- Click Import:
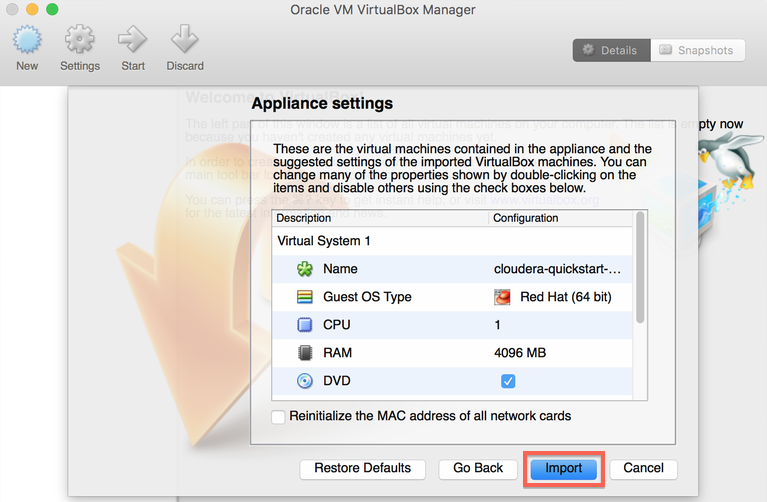
- The VM image will be imported. As this is a big file, it can take some time:

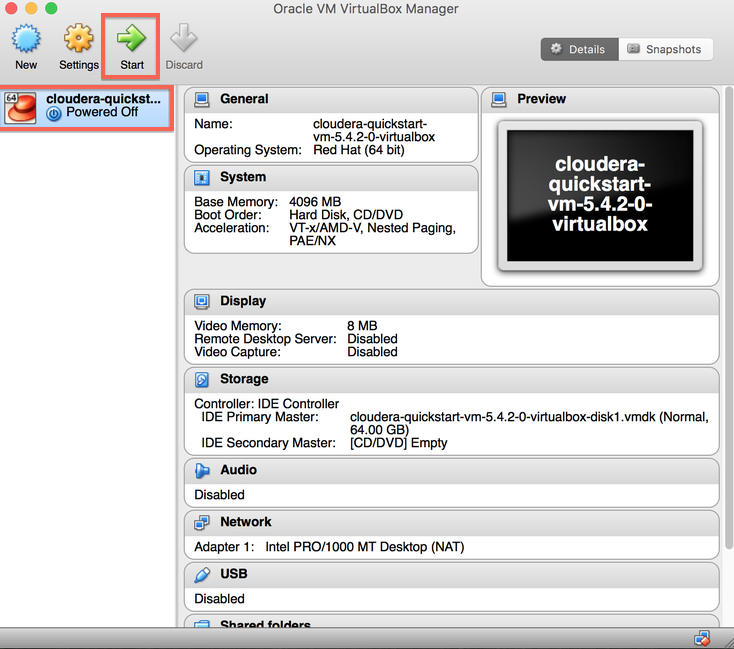
- When the import is finished, launch the Cloudera VM. cloudera-quickstart-vm-5.4.2-0 VM will appear on the left in the VirtualBox window. Select the machine and click the Start button to initiate the VM:
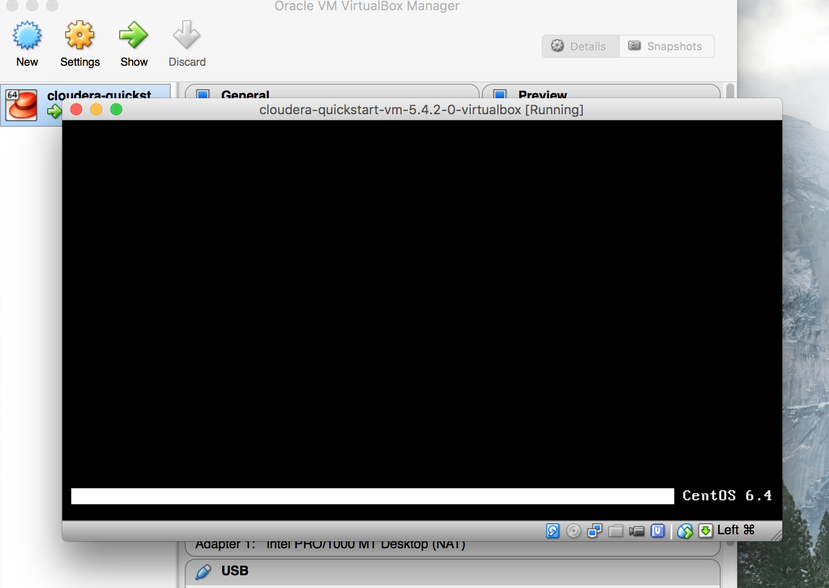
- It takes several minutes for Cloudera VM booting to start up initially. It takes a long time, since many Hadoop tools are loaded and started during this booting process:
- Once the booting process is finished, you will see the Cloudera VM desktop on the screen:
