In this section, we'll go through the required steps to set up the complete Qt SDK (Software Development Kit) on your computer. We'll start by setting up Qt on Windows OS and make a note for Linux (Ubuntu in our case, but it's almost the same for all Linux distributions), and macOS operating system, wherever required. So, let's start.
Installing Qt
Preparing for Qt installation
To be able to install and use Qt, we need to first create a Qt account. Although it is not mandatory to do this, it still is highly recommended since you can get access to everything Qt related to this single, unified and free account. For any recent version of Qt that you want to install, you will need your Qt Account credentials, which you will only have if you have created a Qt account. To do this, first, you need to go to the Qt website using your favorite browser. Here is the link:
Here is the screenshot of it:
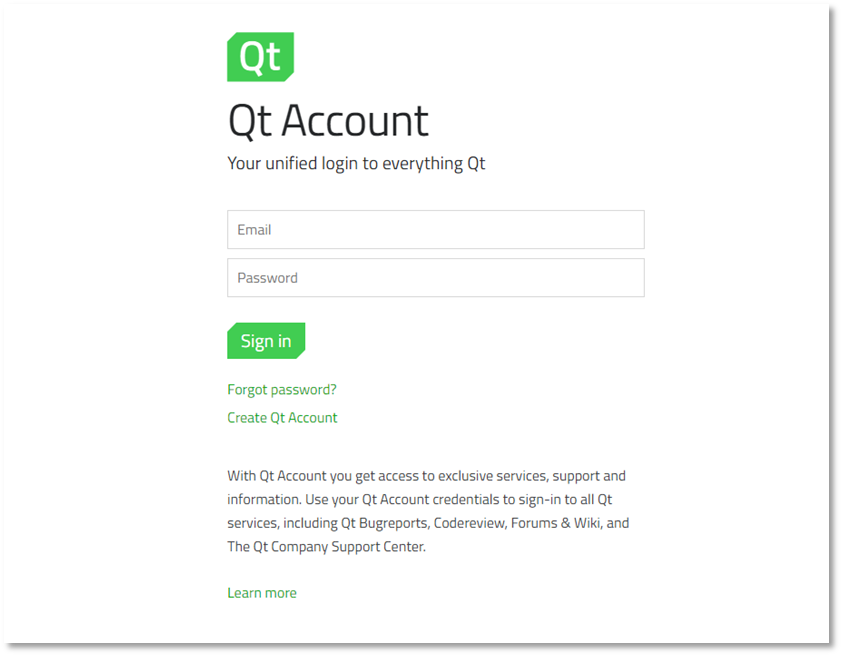
Here, you have to use your email address using the Create Qt Account page just under the Sign in button. The process is almost identical to any similar account creation on the web. You might be asked to enter captcha images to prove you are not a robot or click on an activation link in your email. After going through the procedures required by Qt, you'll have your very own Qt Account user, which is your email, and password. Make a note of that since you'll be needing it later on. We'll refer to it as your Qt Account Credentials from here on.
Where to get it?
This is the point where we start downloading the required tools for Qt development. However, where to start? Qt maintains all officially released versions through the Qt Downloads web page. Here's a link: https://download.qt.io/official_releases/.
If you open your browser and navigate to the preceding webpage, you'll be presented with a very simple web page (similar to your file explorer program), and from there, you need to choose the right file yourself:
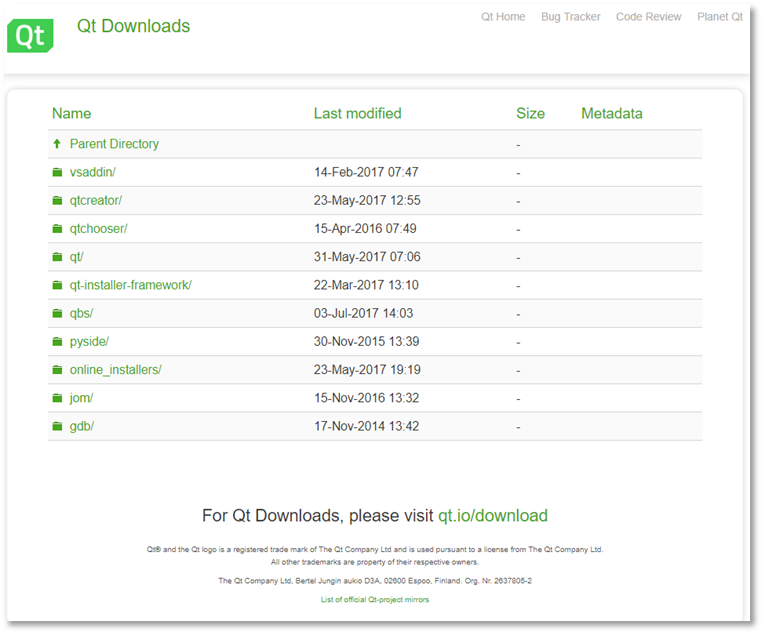
Qt releases all its official tools in here and, as you'll see, the Last modified column will be changing all the time. Some entries not so often, some more often. For now, we will not go into details of what each of these folders contains and what they are used for, but as you'll see later in this book, almost all of the tools required by us are in a single installer file and it's under the qt folder. So, by clicking on each entry, navigate to the following folder: qt/5.9/5.9.1/
You'll notice the same is added to the web address in your browser: https://download.qt.io/official_releases/qt/5.9/5.9.1/
You should note that there might be a newer version at the time when you visit this page, or this version may simply not be available anymore, so you need to start from the Qt Download page mentioned before, and work your way into the latest Qt version folder. Or, you can use the archive link in the Qt Downloads main page (https://download.qt.io/archive/) to always access previous versions of Qt.
For Windows: qt-opensource-windows-x86-5.9.1.exe
For macOS: qt-opensource-mac-x64-5.9.1.dmg
For Linux: qt-opensource-linux-x64-5.9.1.run
These are pre-built Qt libraries and contain the complete Qt SDK for each of the mentioned operating systems. This means you don't need to build Qt libraries by yourself to be able to use them. Here's what these installation files include in general and the tools we'll use:
- Qt Creator (version 4.3.1)
- Pre-Built libraries for all compilers and architecture supported on each OS:
- Windows Desktop, Windows Mobile (on Windows)
- Desktop (on Linux)
- Desktop and iOS (on macOS)
- Android (on all platforms)
How to install?
You need to start the installation by executing the installation files you downloaded. If you are on a Windows or macOS operating system, then you just need to run the downloaded file. However, if you are using Linux, then you may need to make your downloaded .run file executable first before being able to actually run it. The following command can be executed on Linux to make your installer file executable:
chmod +x qt-opensource-linux-x64-5.9.1.run
Or, you can simply right-click on the .run file and make it executable using the properties dialog:
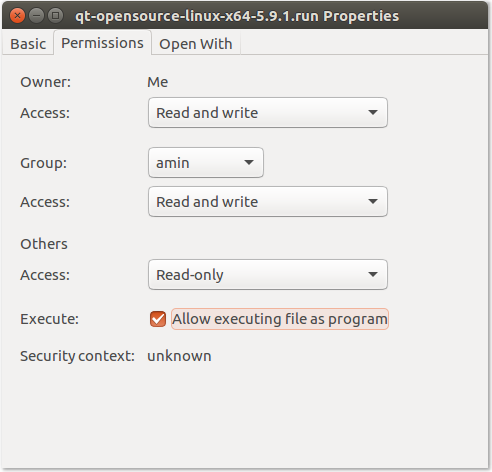
Note that you still need a working internet connection even though nothing will be downloaded and it's just to confirm your Qt Account Credentials. Running the installer will present you with the following series of dialogs that you need to get through. Wherever instructions on the dialog boxes are enough, just make sure you read them and provide what is required and press Next, Agree, or similar buttons to proceed forward. As you see in the following screenshots, you need to provide your Qt Account Credentials in order to proceed with the installation. These dialogs are identical on all operating systems:
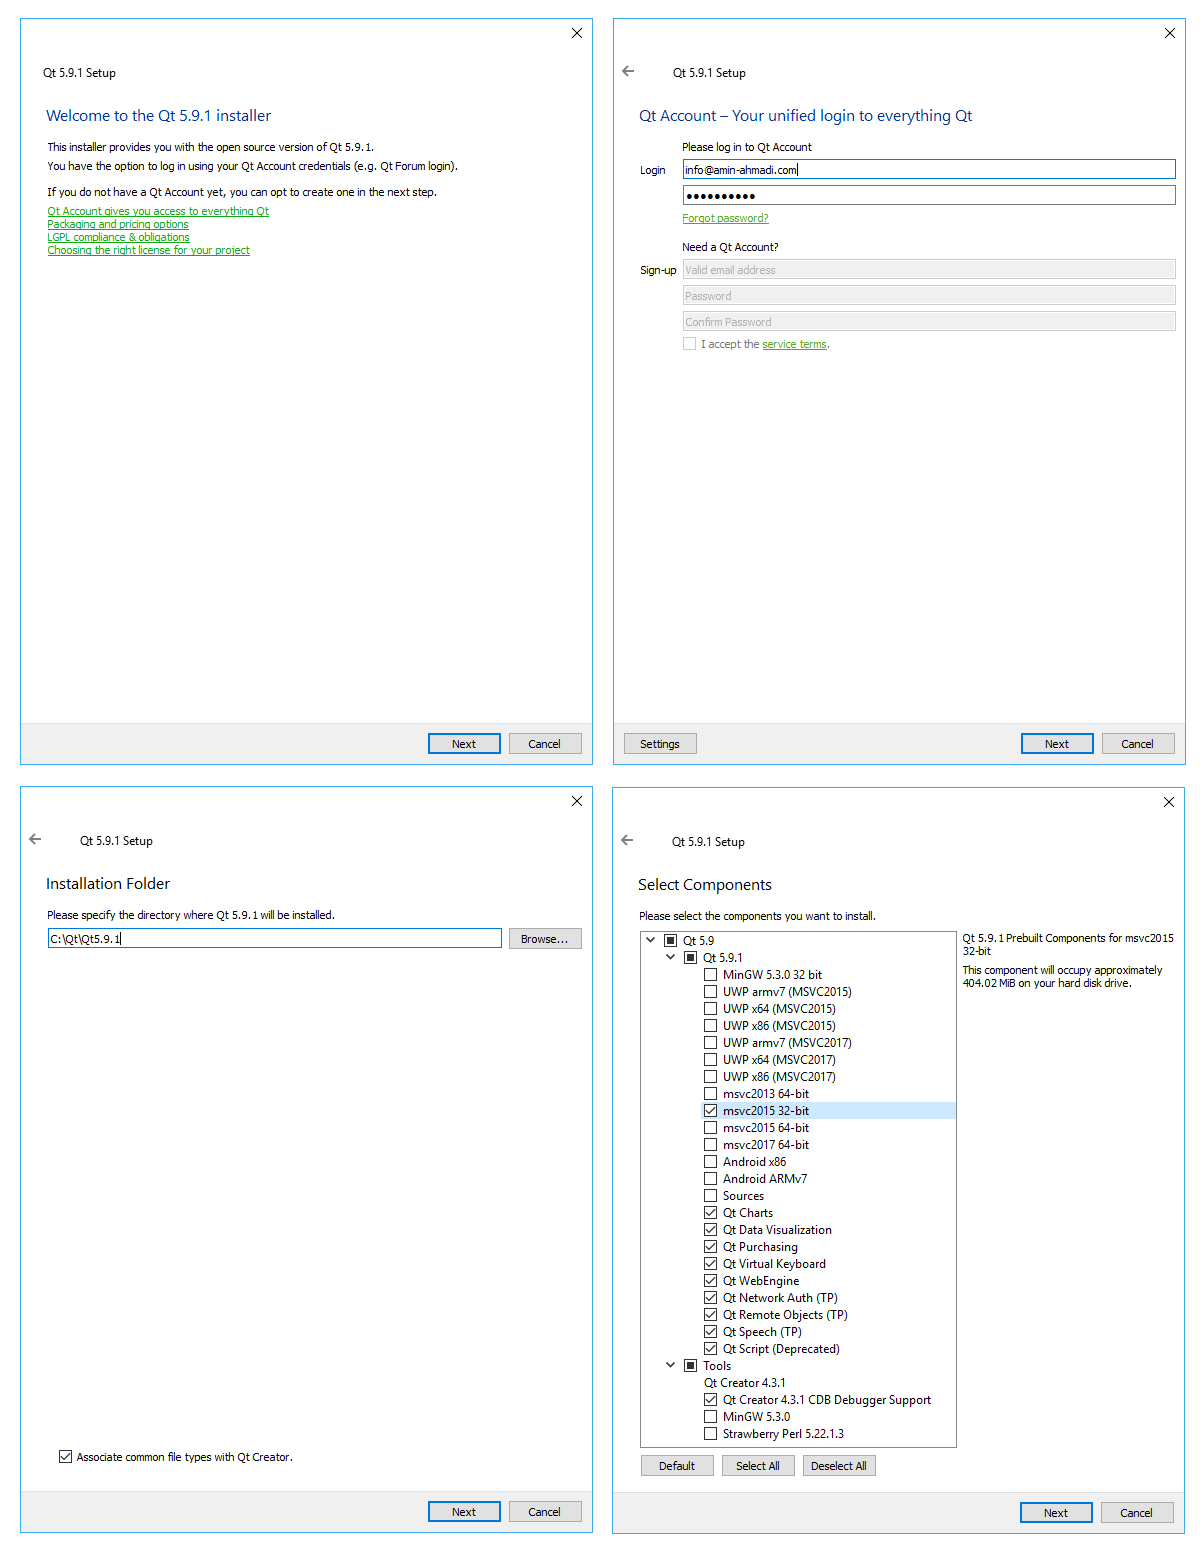
The rest of the dialog boxes are not shown here, but they are pretty much self-explanatory, and if you have ever installed any app on any computer, then you have definitely seen similar dialogs and they need no introduction in general.
Windows users
When installing Qt for Windows, on the Select Components dialog, make sure you check the checkbox next to the msvc2015 32-bit option. The rest is optional, but it's worth noting that installing all platforms (or Kits as they are called in Qt) usually requires too much space and can affect the Qt Creator performance in some cases. So, just make sure to select anything that you will really use. For the purpose of this book, it's just the msvc2015 32-bit option that you absolutely require.
macOS users
When installing Qt for macOS, you will be faced with the following dialog (or a quite similar one depending on the version of macOS you are using) box if you don't have XCode installed on your Mac:
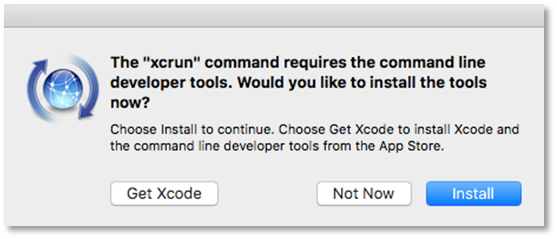
Unfortunately, it's not enough to follow the Install button, which takes a lot less time than installing Xcode, even though it might look like the obvious choice. You still need to make sure you get Xcode installed on your Mac either by pressing the Get Xcode button, directly getting it from App Store, or you'll face the following while installing Qt:
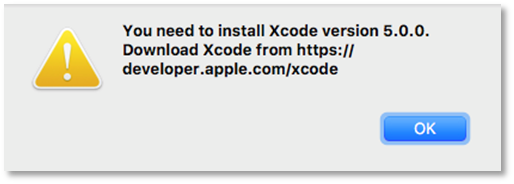
Use App Store to install the latest version of Xcode (at the moment of writing this book, Xcode 8.3.3 is available) then continue with Qt installation.
On the Select Components dialog, make sure you select at least macOS version. You won't need the rest of the components but installing them won't harm, other than the fact that it might take a lot of space on your computer.
Linux users
When installing Qt for Linux, on the Select Components dialog, make sure you select (at least) Desktop GCC (32 bit or 64 bit, depending on your OS). You'll notice that the Qt Creator will be installed by default, and you don't need to check any options for that.
When the installation is completed, you'll have the following applications installed on your computer:
- Qt Creator: This is the main IDE that we'll be using throughout the book to build applications.
- Qt Assistant: This application is used to view Qt help files. It provides useful functionality to view Qt documentation. Nevertheless, the Qt Creator also provides a context-sensitive help, and it also has its own built-in and very handy help viewer.
- Qt Designer: This is used to design GUIs using Qt Widgets. Again, Qt Creator also has this designer built-in, but in case you prefer using other IDEs rather than the Qt Creator, then you can still use the Designer to help with the GUI design process.
- Qt Linguist: This is an excellent aid if you will be building multilingual applications. Qt Linguist helps with easier translation and integration of translated files into your build.
For Windows and macOS users, this is the end of the story for Qt installation, but Linux users still need to take care of a few more things, namely installing the application development, building tools, and some required runtime libraries for Linux. Qt always uses the compiler and build tools provided by the operating system. Linux distributions usually do not, by default, include those tools since they're only used by developers and not used by regular users. So, to install them (if they're not installed already) you can run the following command from a terminal:
sudo apt-get install build-essential libgl1-mesa-dev
You can always refer to the Qt documentation pages for required commands by all Linux distributions, but, in this book, we'll assume the distribution to be Ubuntu/Debian; however, note that usually, the commands are very similar in the pattern for all Linux distros.
For more information on this, you can refer to http://doc.qt.io/qt-5/linux.html.
Testing Qt installation
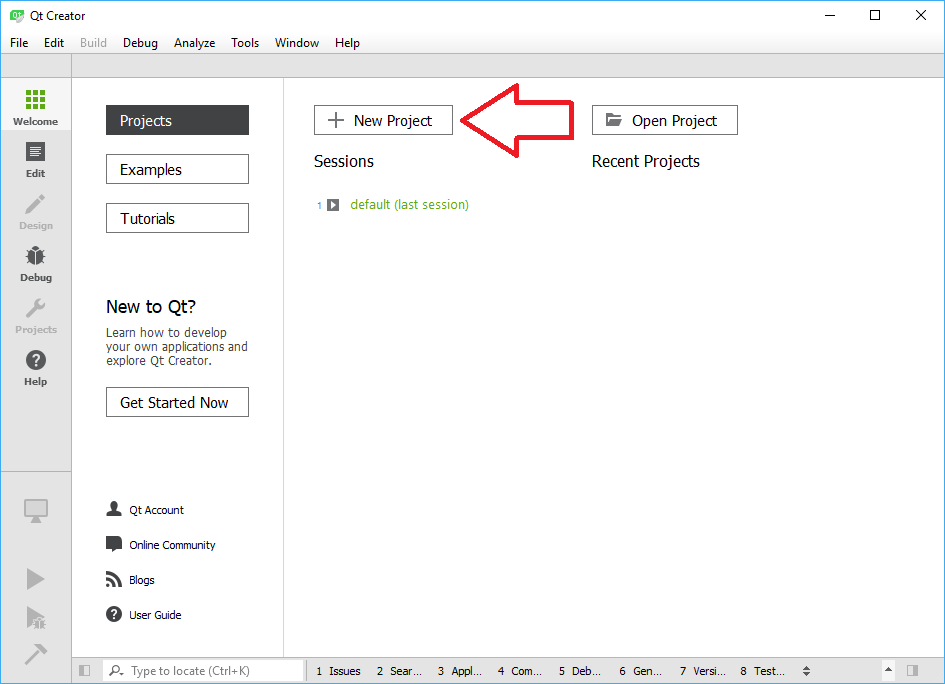
You can now safely run Qt Creator and create wonderful applications with it. For now, let's just make sure our Qt installation is working correctly. Don't bother with the details now, since we'll be covering it all during the course of the book, and especially don't worry if you think you don't understand what's really going on behind the scenes. Just run Qt Creator and press the big New Project button seen, as follows:
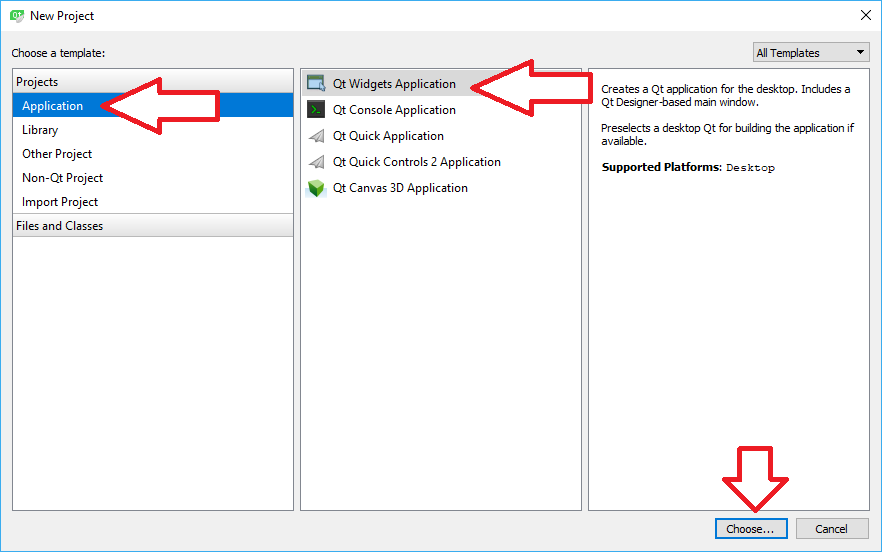
In the window that appears next, choose Application, Qt Widgets Application, and then click on Choose, as shown in the following screenshot:
In the next window, you need to provide a name and folder (where your test project will be created) and then click Next to proceed forward. Make sure to check the Use as default project location checkbox if you want to have a dedicated folder for your Qt projects. You only need to do this once and afterward all of your projects will be created in that folder. For now, let's just put a name and path since we're only going to test our Qt installation, and click Next. You will see something similar to what is shown in the following screenshot:
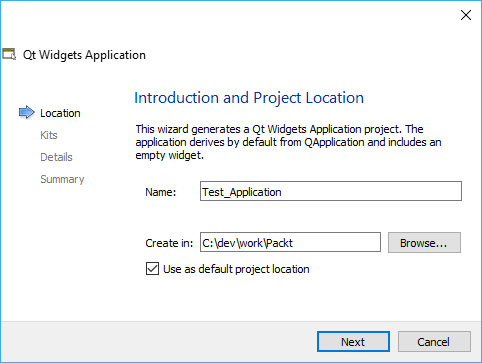
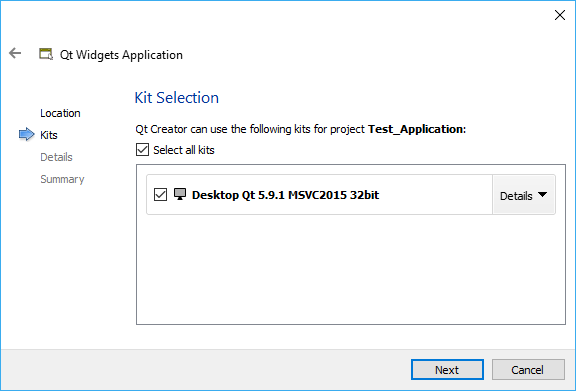
In the next window, you need to select a so-called Kit to build your application with. Choose the one that has a name starting with Desktop Qt 5.9.1 and click Next. Depending on what components you selected during the installation of Qt, you may have more than one choice here, and depending on the operating system and compilers installed on your system, you may have more than one Kit with a name that starts with Desktop, so make sure you select the compilers we'll use in this book, which would be the following:
- msvc2015 32-bit on Windows
- Clang on macOS
- GCC on Linux
After you have selected the correct Kit according to the ones mentioned earlier, you can click on Next to proceed forward:
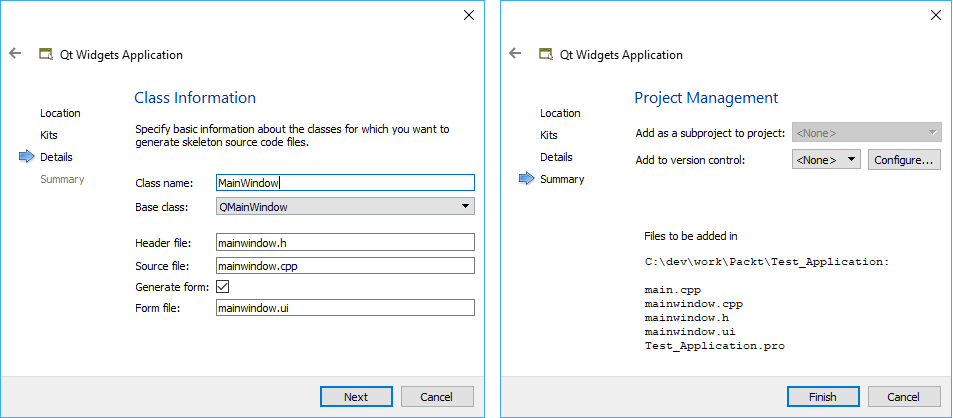
You don't really need to bother with the next two windows that appear and just clicking on Next should be enough for our test of Qt installation. The first window makes it easier to create a new class and the second one allows you to select a version control tool and track changes in your code:
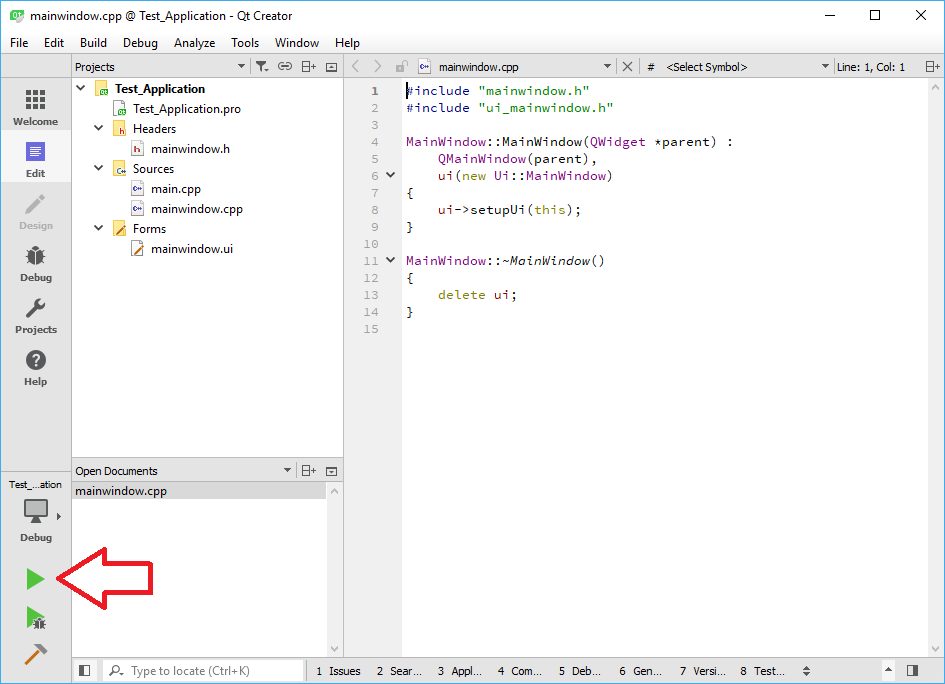
After you click on the Finish button on the last window, you will be taken to the Edit mode within Qt Creator. We'll cover different aspects of the Qt Creator in the next chapter, so for now, just click on the Run button (or press Ctrl +60;R) to start compiling your test (and empty) application, as shown here:
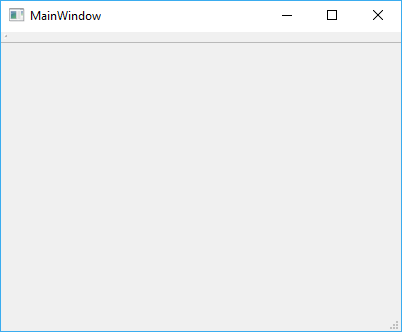
Depending on the speed of your computer, it will take some time for the build process to be finished. After a few moments, you should see your test (and first) Qt application running. It's just an empty application similar to what is seen in the following screenshot, and the purpose of doing this was to make sure our Qt installation is working as we want it to. Obviously, your empty Qt application may look a little different than this on different operating systems, and different visual options may affect the whole coloring or the way windows are displayed. Nevertheless, your newly built application should look exactly the same (or quite similar) to the window seen here:
In case your application doesn't show up, make sure to go over the instructions once again. Also, make sure you don't have any conflicting installations of Qt or other settings that may interfere with Qt installation. Always refer to documentation pages and the Qt community for answers to unexpected behavior of Qt Creator or other Qt tools. Being an open source project for such a long time, Qt has grown a huge and loyal set of users who are eager to share their knowledge on the internet and answer issues faced by fellow Qt users. So, it's a good idea to keep an eye on the Qt community since you already have a unified Qt account that you can use to access Qt forums. This is the same user and password that you created to proceed with the Qt installation process.


