Inserting Mesh workflows for STL, OBJ, and 3MF files
Even though we can upload mesh files to Fusion Team and simply open them in Fusion after the upload is complete, my personal preference when opening mesh files is the Insert Mesh command located within the DESIGN workspace | the Mesh tab | the CREATE panel. Using the Insert Mesh command, you can insert one or multiple mesh bodies into an active Fusion design. You do not need to save the design as a Fusion document before inserting the mesh files. This is an important distinction, as a similar workflow to insert all Fusion bodies/components, which rely on the Insert Derive function (as shown in Figure 1.10) located within DESIGN | Solid, Surface, Mesh, Sheet Metal, and Plastic | Insert Derive, require a Fusion design to be saved before inserting externally referenced Fusion designs into an active design:
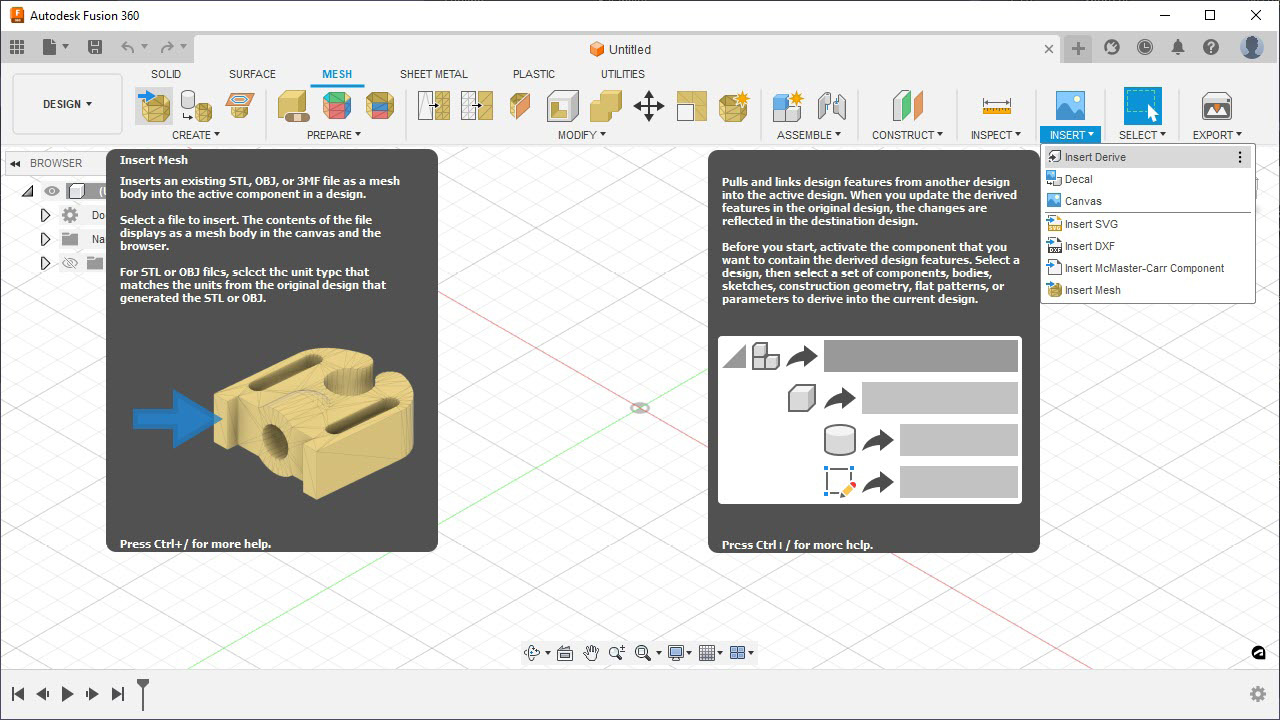
Figure 1.10 – Insert Mesh versus Insert Derive
If you are inserting a single mesh (STL or OBJ) file, you will have the ability to edit the location and units for that mesh file at the time of insertion. If you import multiple mesh (STL or OBJ) files, the location and unit data you edit during the insert operation apply to all the files you insert simultaneously. Because of this, my preferred method is to insert the mesh files individually so that I can visually inspect them and edit their location and units one at a time, especially if I insert mesh files created by different designers, as they may have used different unit systems and coordinate systems.
Now, let’s focus on the Insert Mesh command and some of its options. For this first exercise, we will insert the CLIP.STL file. After initiating the Insert Mesh command and selecting the STL file, you will see the INSERT MESH dialog, with options to change the units and reposition the part. The Flip Up Direction button rotates the part around the X axis by 90 degrees. The Center button moves the inserted mesh by referencing the center of its bounding box to the origin of the active component. The Move To Ground button translates the mesh body so that its lowest point touches the ground plane. In Figure 1.11, the ground plane is the XY plane:
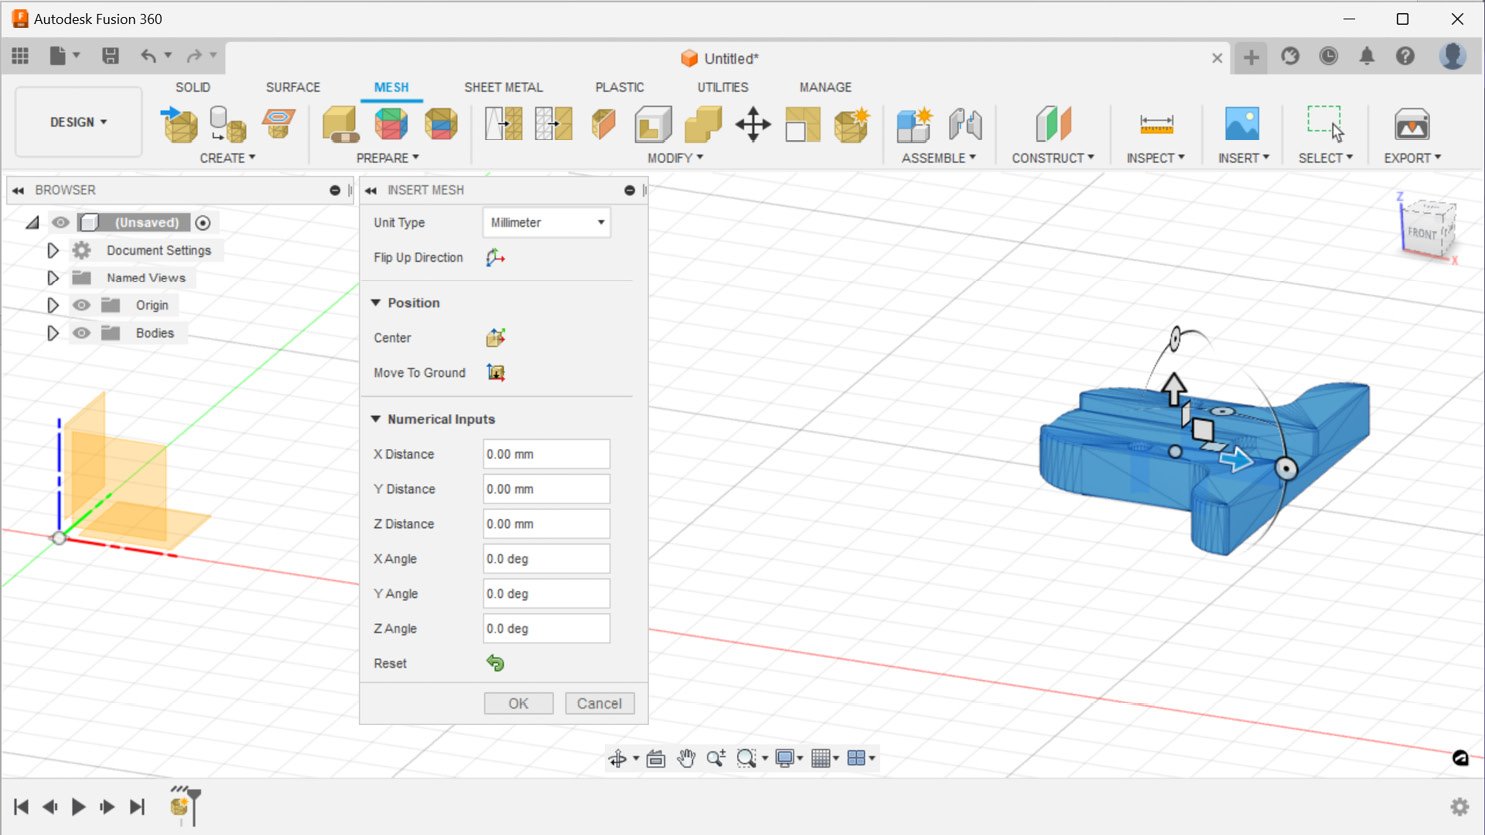
Figure 1.11 – The INSERT MESH dialog
In addition to centering and grounding a mesh body, we can also use the in-canvas manipulators (arrows and rotation tools) or the numerical inputs section within the INSERT MESH dialog to reposition the mesh body until we are satisfied. We can always revert our actions with the Reset button.
In this example, let’s first use the Center command, then the Move To Ground command, and press OK.
Important note
The default model orientation can be set in Fusion's Preferences dialog in the General section. This book will rely on the Z up orientation for all examples.
The default units for every new design can be set in Fusion's Preferences dialog in the Default Units section’s Design subsection. This book will rely on millimeters as default units for all new designs.
The default state of design history can be set in Fusion's Preferences dialog in the General section’s Design subsection. This book will rely on Capture Design History (parametric modeling) for all new designs.
All these preferences can be seen in Figure 1.12:
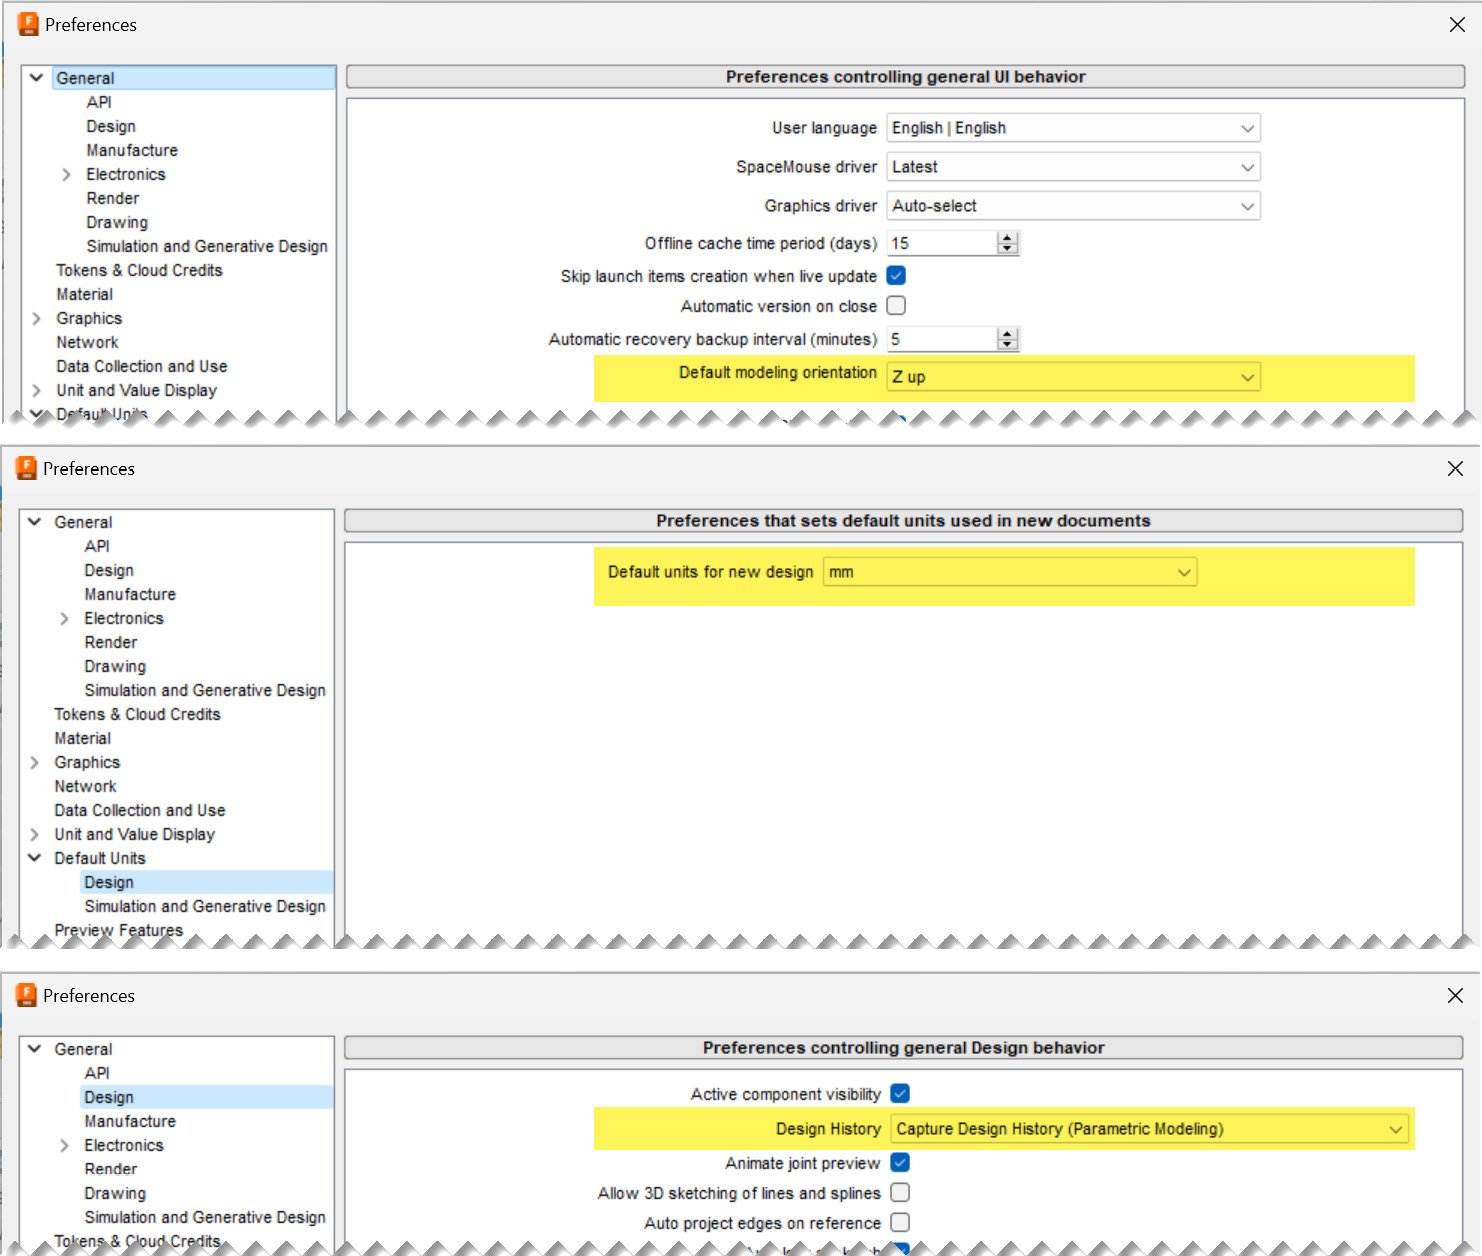
Figure 1.12 – Various sections within Fusion's Preferences dialog
After we finish inserting this STL file, we will be left with a base mesh feature added to the timeline, and the mesh body located on the XY plane will be centered around the origin, as you can see in Figure 1.13:
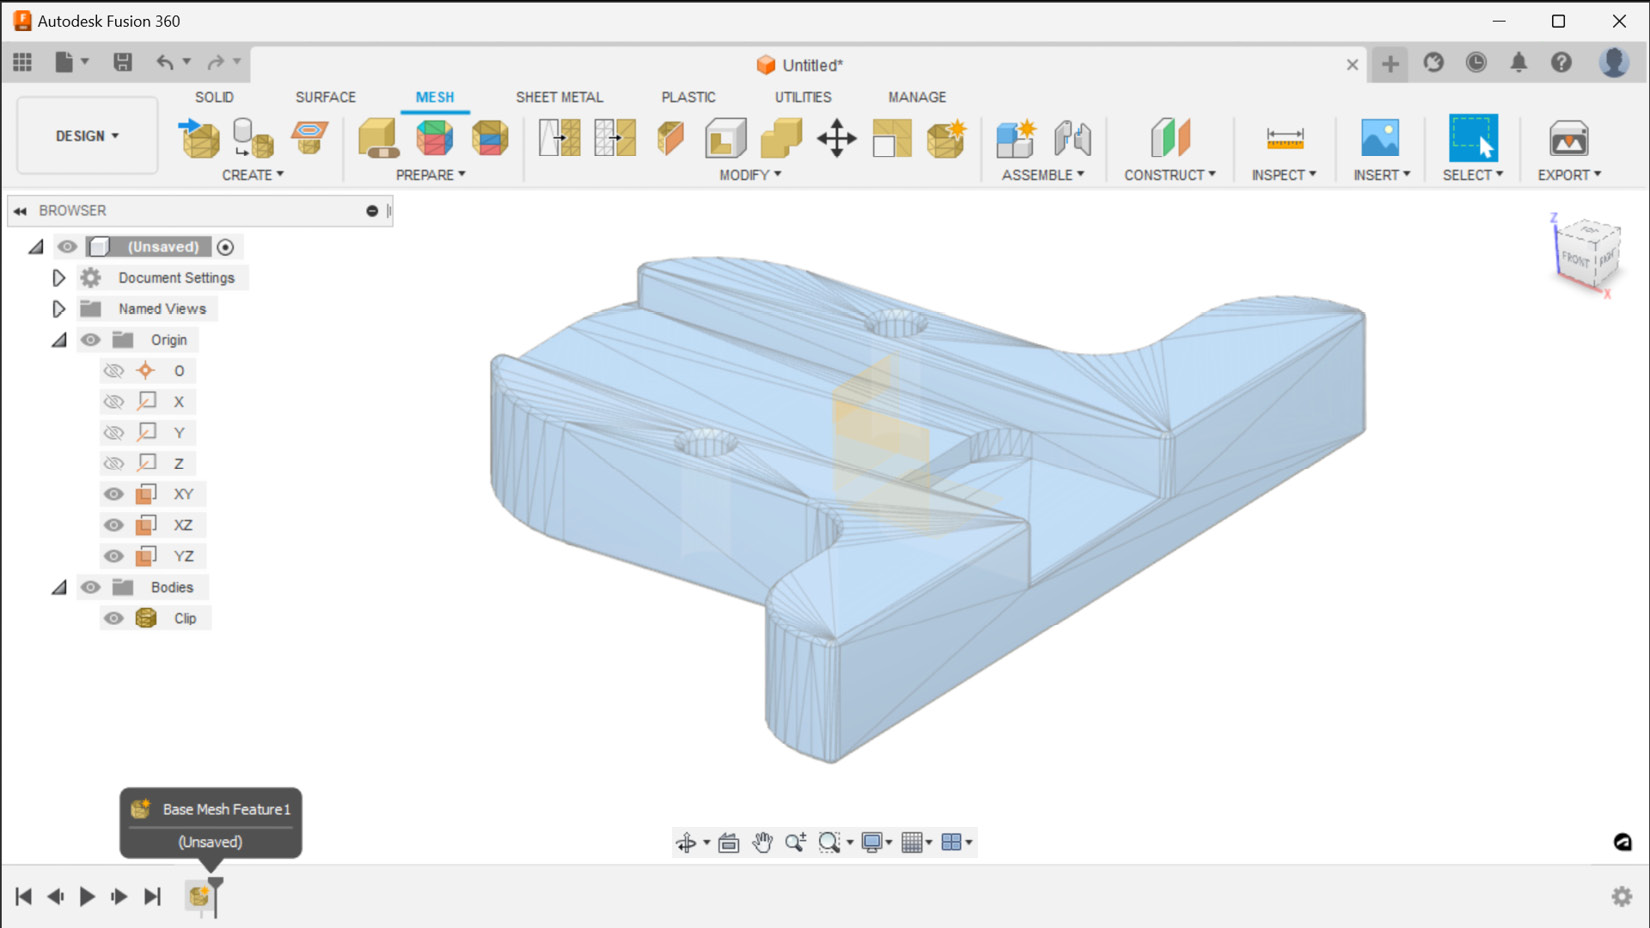
Figure 1.13 – The Insert Mesh command completed
Unlike STL files, 3MF and OBJ files can also contain color information. Now, let’s insert the CLIP.3MF file using the same Insert Mesh command into a new design file. In Fusion, we can create a new design file by selecting the + icon to the right of our list of open Fusion design documents. After inserting a 3MF file, Fusion shows the mesh body with a unique color for each face group. A face group is a collection of faces that typically represent a feature or a region on a mesh body. This 3MF file is made of a single face group. Therefore, we will see a single color on all the faces after inserting this file into Fusion. We can visualize the color information contained within the 3MF and OBJ files by toggling face group visualization, using the Display Mesh Face Groups command in the INSPECT panel, as shown in Figure 1.14:
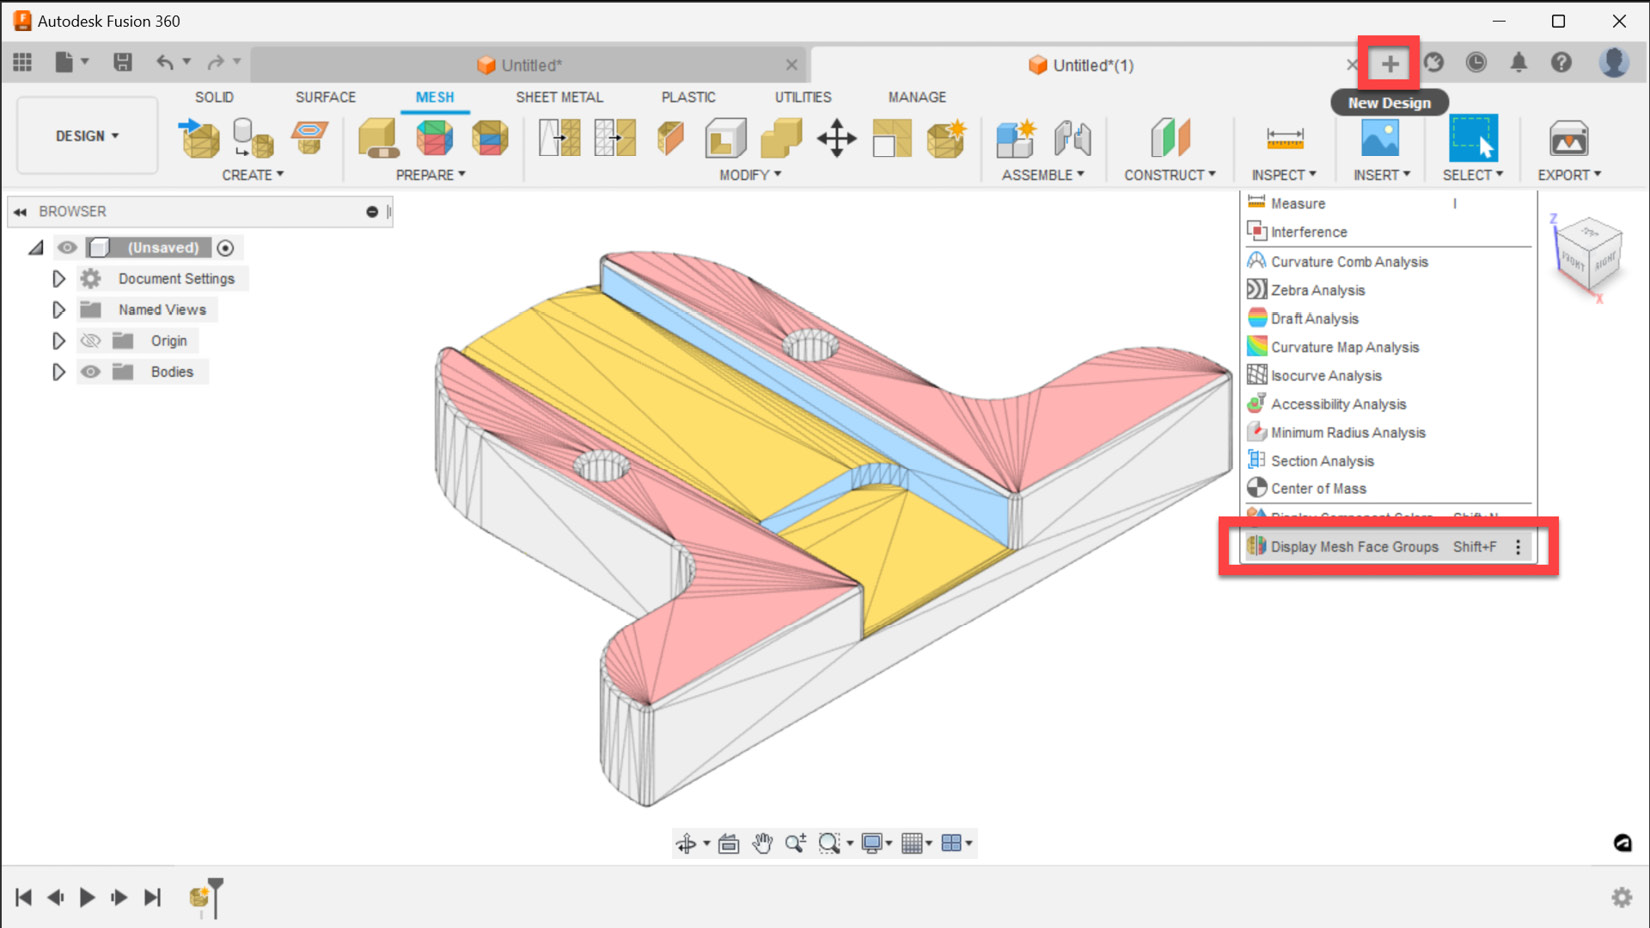
Figure 1.14 – 3MF and OBJ files can contain color
Important note
As shown in Figure 1.15, the Apply a different appearance checkbox must be unchecked in Fusion’s Preferences dialog | General section | Material subsection, in order to display color information contained within a 3MF or OBJ file opened in Fusion, using the Insert Mesh workflow previously described.

Figure 1.15 – The Material subsection in Fusion's Preferences dialog
In this section, we learned about the various methods we can use to insert mesh files such as STL, OBJ, and 3MF. We also covered how to set units and relocate mesh bodies during the insert workflow. In addition, we went over how to visualize the color/texture data for those files.
Now, it is time to start focusing on workflows specific to inspecting mesh bodies we insert for potential problems and repairing them. In the next section, we will learn how to utilize the automatic inspection and repair functionality within the Mesh tab and start exploring how to manually repair Mesh bodies when the automatic repair is not enough.


