All the recipes will be implemented using Spring Tool Suite (STS) Eclipse 3.8 which has the latest features that support JDK 1.8.
Installing STS Eclipse 3.8 IDE
Getting started
Visit the site https://spring.io/tools/sts/all and download the STS 3.8 release for Windows, Linux, or macOS. In our case, we will be opting for the Windows version. It is also available in 32-bit or 64-bit operating systems.
How to do it...
To get STS Eclipse 3.8, perform the following steps:
- After the download, unzip the file using WinZip or 7ZIP to your filesystem.
- Update its VM usage to enhance performance through making the heap grow to a larger amount by adding the -vmargs command to the eclipse.ini file inside the installation folder, or by appending to the Eclipse shortcut's target property. Following the command are the following Java heap memory configurations:
-Xms512m
-Xmx1024m
- Go to the installation folder <installation_folder>\sts-bundle\sts-3.8.3.RELEASE and run STS.exe.
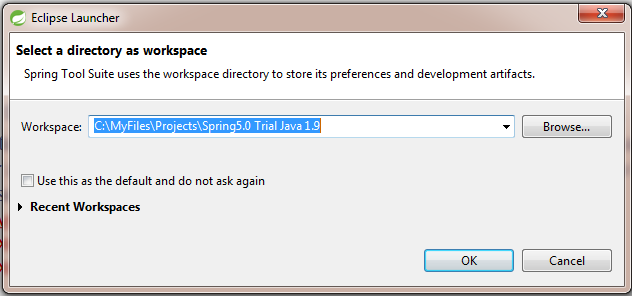
- Running STS.exe will result in launching your workspace launcher. Create an Eclipse workspace as shown as follows:

- Then, you are now ready to create code snippets.
How it works...
STS Eclipse 3.8 is a customized all-in-one Eclipse-based distribution that provides support for Spring technologies such as Pivotal Cloud Foundry, Gradle, and Pivotal Server. Moreover, it is plugin-ready and contains language support, framework support, and runtime support for Java JDK 1.8 and Java EE 7.
The IDE has the following parts: views, perspectives, and the option menus. The view is the IDE's way of projecting its metadata or components graphically. Some views are console, debug, and task list, and data management views. The styling and the presence of the needed views depend on the type of perspective required for a particular project. A perspective is the logical arrangement of all these views. In our case, we have to choose a JEE perspective from the Window | Perspective | Open Perspective menu option to proceed with our programming.
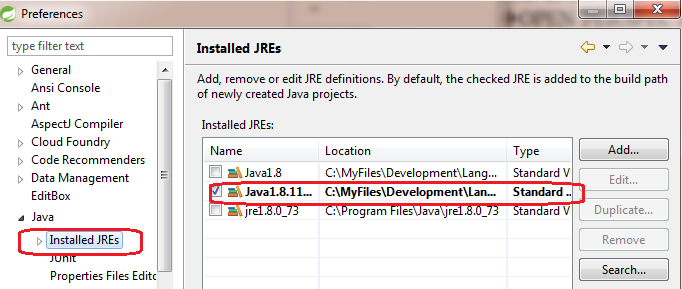
But before we create our first project, always set the Java Runtime Environment to JDK's JRE. The JRE setting is located at Windows | Preferences and you need to Add... and choose the JDK's JRE as shown as follows:

You are now ready to create your Maven and Gradle project for our recipes in the next chapters.


