


Creating a tempo map based on hit points
In this section, we will create a tempo map working only with the hit points from the spotting list.
The first step is to view all the hit points, taken from the spotting notes list:
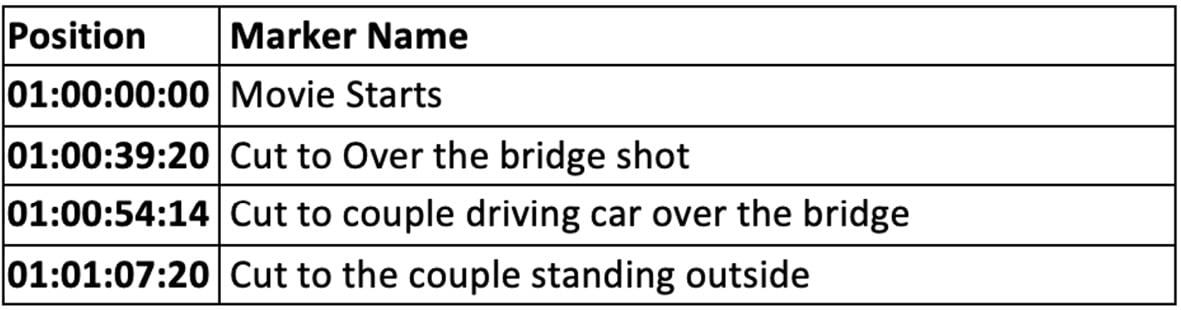
Figure 7.28: Spotting notes list excerpt
The next step in the same Logic Pro session that we previously used is to create a new tempo. In the Tempo track, create a new tempo set by selecting New Set from the Tempo Sets drop-down menu.
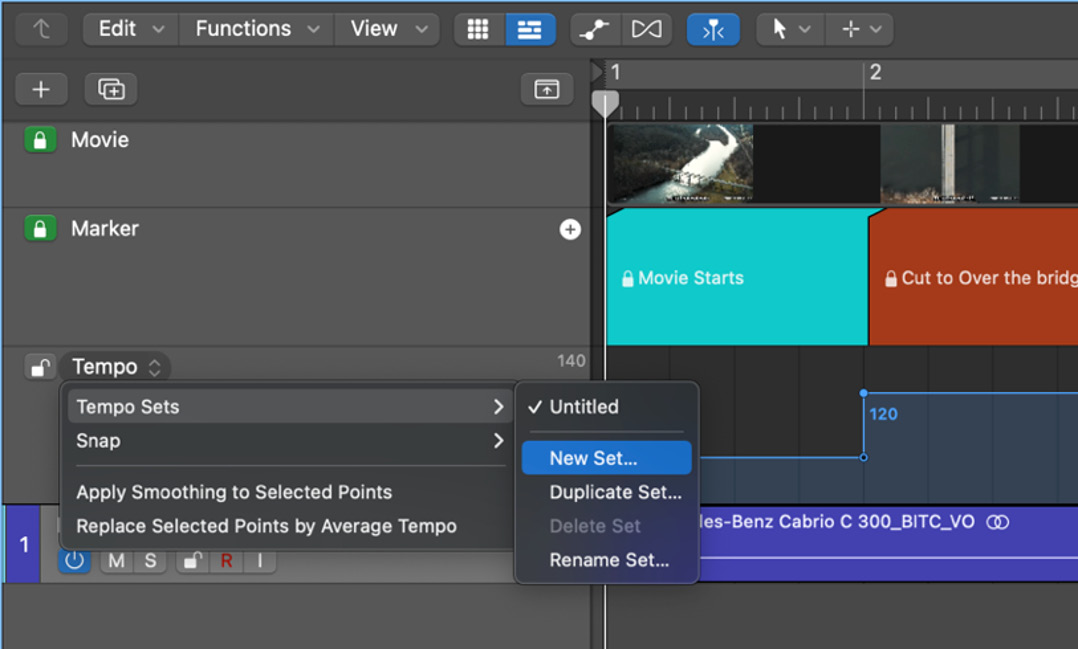
Figure 7.29: Tempo Sets drop-down menu
After creating a new tempo set on the tempo track, rename it to Tempo II.
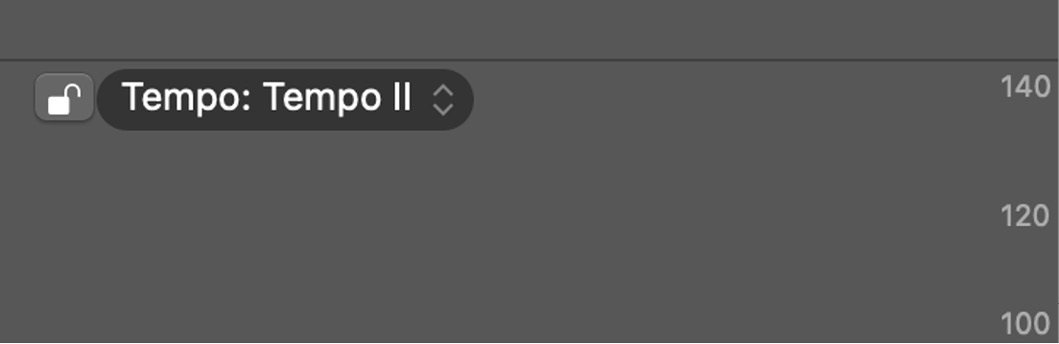
Figure 7.30: Tempo track
As a result of creating a new tempo set, Logic Pro created a new default tempo of 120 bpm.
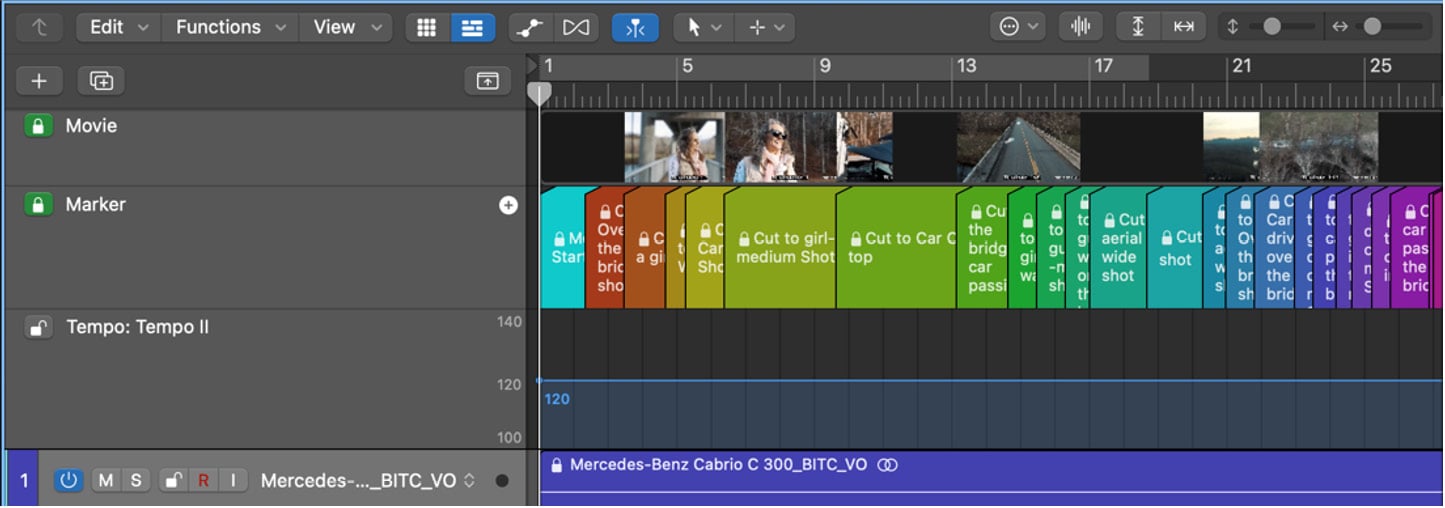
Figure 7.31: Arrange window with default tempo
Next, open the floating Marker window and analyze the first hit point location. Here, we can see the timecode of the first hit point, Cut...


