Using secrets and variables
You can set variables and secrets in a repository that you can access in workflows. In this recipe, we’ll add both and access them in the workflow.
Getting ready
In this recipe, we will use the web UI to set variables and secrets. You can also use the GitHub CLI (https://cli.github.com/) for that. If you want to try that, then you have to install it. But it is not necessary for following the recipe.
How to do it…
- In your repository, navigate to Settings | Secrets and Variables | Actions. You can see all existing secrets in the repository, and you can toggle the tabs between Secrets (
settings/secrets/actions) and Variables (settings/variables/actions; see Figure 1.20):
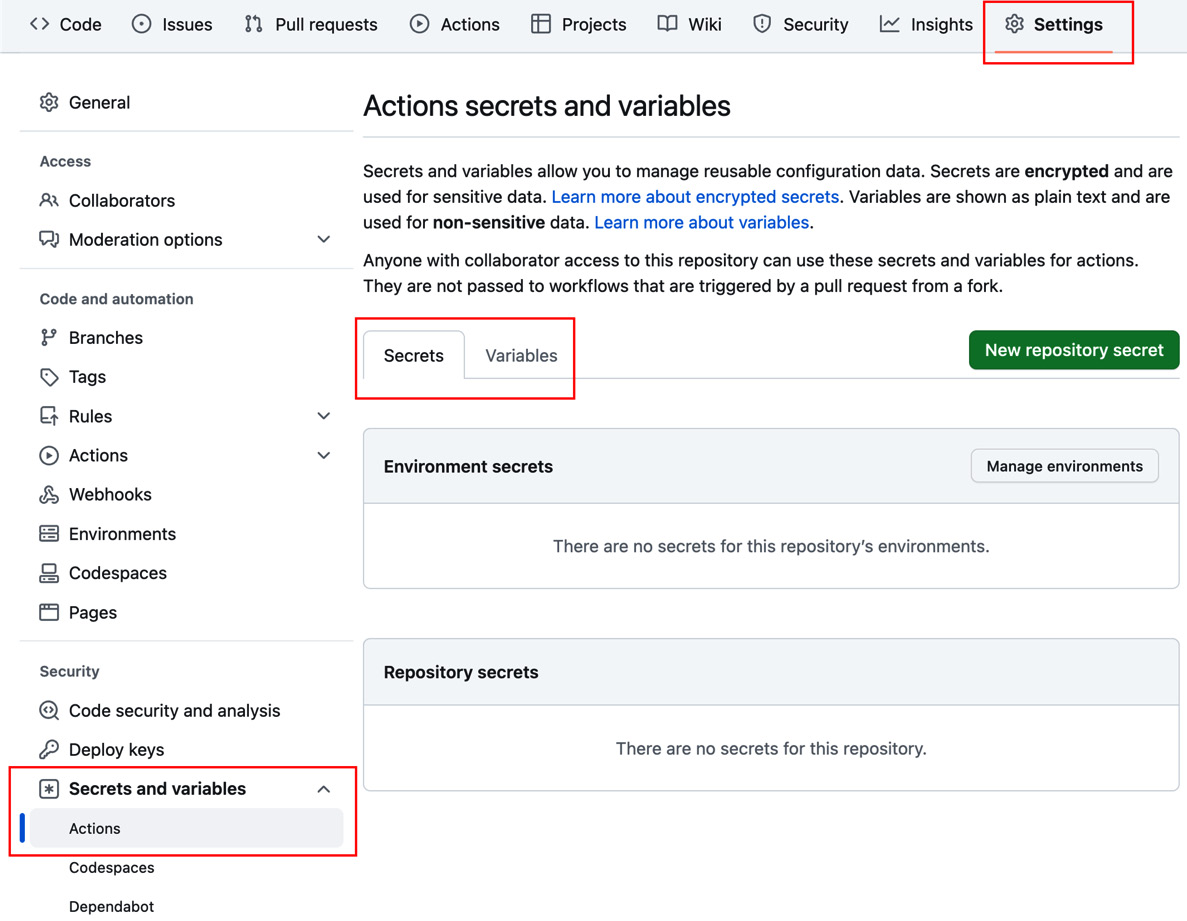
Figure 1.20 – Configuring secrets and variables for a repository
- Clicking New repository secret will open the New secret dialog (
settings/secrets/actions/new; see Figure 1.21):
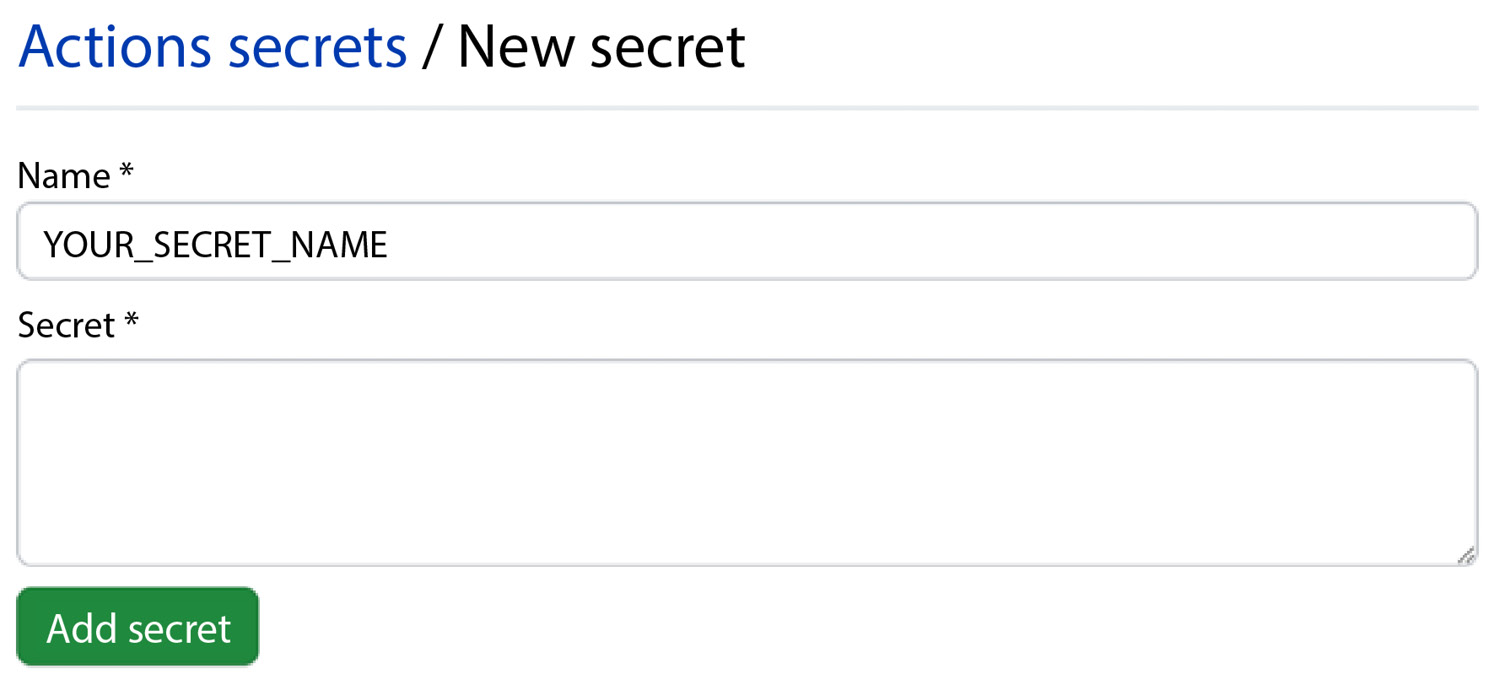
Figure 1.21 – Adding a new secret
Add MY_SECRET as the secret name and a random word such as Abracadabra as the secret, and click Add secret. The secret will be masked in the logs! So, don’t use a common word that could occur in other outputs of random jobs or steps.
Naming conventions for secrets and variables
Secret names are not case-sensitive, and they can only contain normal characters ([a-z] and [A-Z]), numbers ([0-9]), and an underscore (_). They must not start with GITHUB_ or a number.
The best practice is to name secrets with uppercase words separated by the underscore character.
- Repeat the process for New repository variable (
settings/variables/actions/new) and create aWHO_TO_GREETvariable with the valueWorld. - Open the
.github/workflows/MyFirstWorkflow.ymlfile from the previous recipe and click the edit icon (see Figure 1.22):
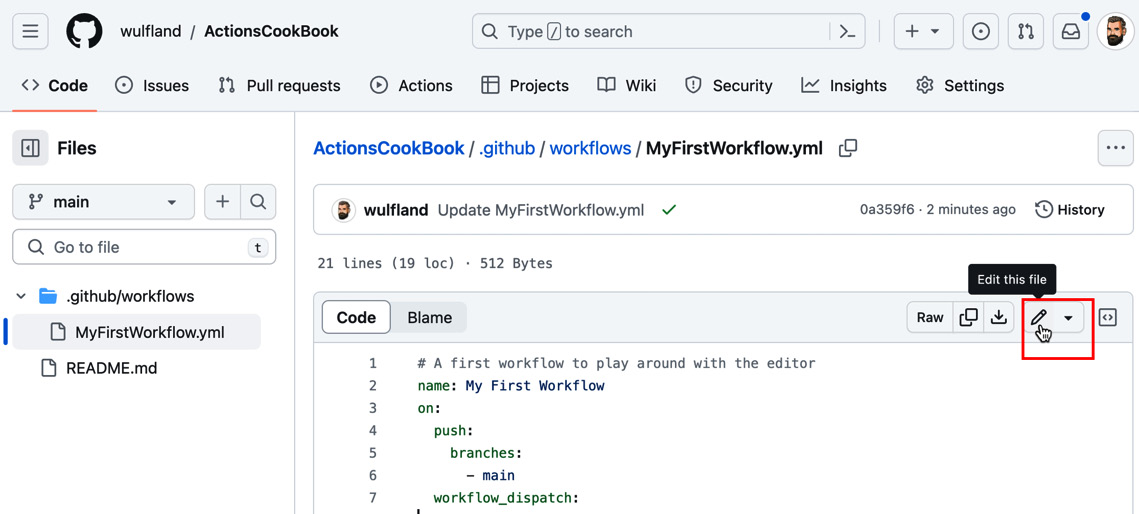
Figure 1.22 – Editing MyFirstWorkflow.yml
Change the word World to the ${{ vars.WHO_TO_GREET }} expression and add a new line using the ${{ secrets.MY_SECRET }} secret:
- run: |
    echo "Hello ${{ vars.WHO_TO_GREET }}  from ${{ github.actor }}."
    echo "My secret is  ${{ secrets.MY_SECRET }}."
 - Commit the changes. The workflow will run automatically. Inspect the output in the workflow log. It should look like Figure 1.23:
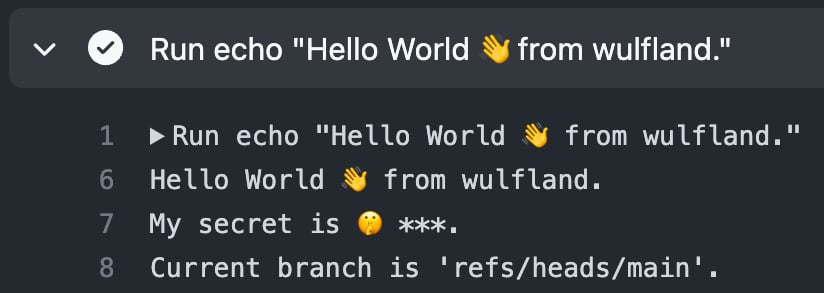
Figure 1.23 – Output of a secret and variable in the log
There’s more…
You can create configuration variables for use across multiple workflows by defining them on one of the following levels:
- Organization level
- Repository level
- Environment level
The three levels work like a hierarchy: you can override a variable or secret on a lower level by providing a new value to the same key. Figure 1.24 illustrates the hierarchy:
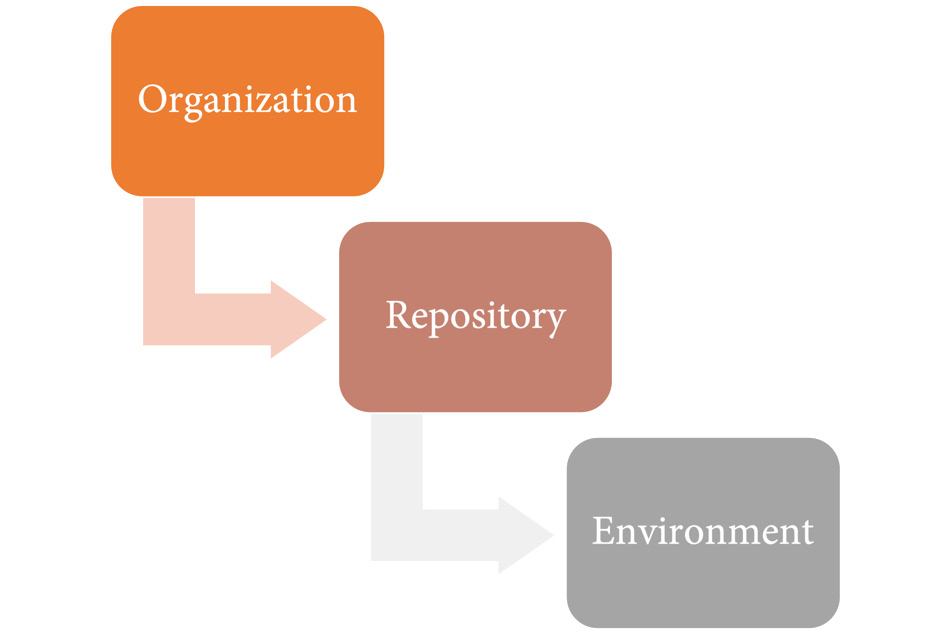
Figure 1.24 – The hierarchy for configuration variables and secrets
Secrets and variables for organizations work the same way as for repositories. You can create a secret or variable under Settings | Secrets and variables | Actions. New organization secrets or variables can have an access policy for the following:
- All repositories
- Private repositories
- Selected repositories
When choosing Selected repositories, you can grant access to individual repositories.
In addition to setting these values through the UI, it is also possible to use the GitHub CLI.
You can use gh secret or gh variable to create new entries:
$ gh secret set secret-name
$ gh variable set var-name
You will be prompted for the secret or variable values, or you can read the value from a file, pipe it to the command, or specify it as the body (-b or --body):
$ gh secret set secret-name < secret.txt
$ gh variable set var-name --body config-value


