Installing Unreal Engine 5 and preparing your development environment
Unreal Engine can be downloaded either via the Epic Games Launcher (available from https://unrealengine.com, which will install the engine for you) or as source code from GitHub (www.github.com/EpicGames), allowing users to compile the engine and modify it to fit their projects.
To engage with the activities in this book, you won’t need to compile the engine from source unless you really want to. The benefits of compiling from source will likely come much later into your journey of working with Unreal Engine and C++. You will, however, need to install version 5.0.3 (or above) of the engine and have an IDE installed. This section covers the download, installation, and setup of the engine from scratch using the Unreal Launcher and installation of Visual Studio 2022 Community. If you already have the engine and Visual Studio installed, you can skip over this section.
Firstly, you will need to download the Launcher from https://unrealengine.com by clicking the Download button in the top-right corner of the page and clicking the Download Launcher button on the following page.
Once downloaded, you will need to install the Launcher from the .msi installer.
The Launcher is home to the Epic Games Store, your library of purchased and downloaded games as well as versions of Unreal Engine (4 and above). You will need to navigate to Unreal Engine and then Library, then click the yellow plus icon and select your engine version from the resulting engine slot:
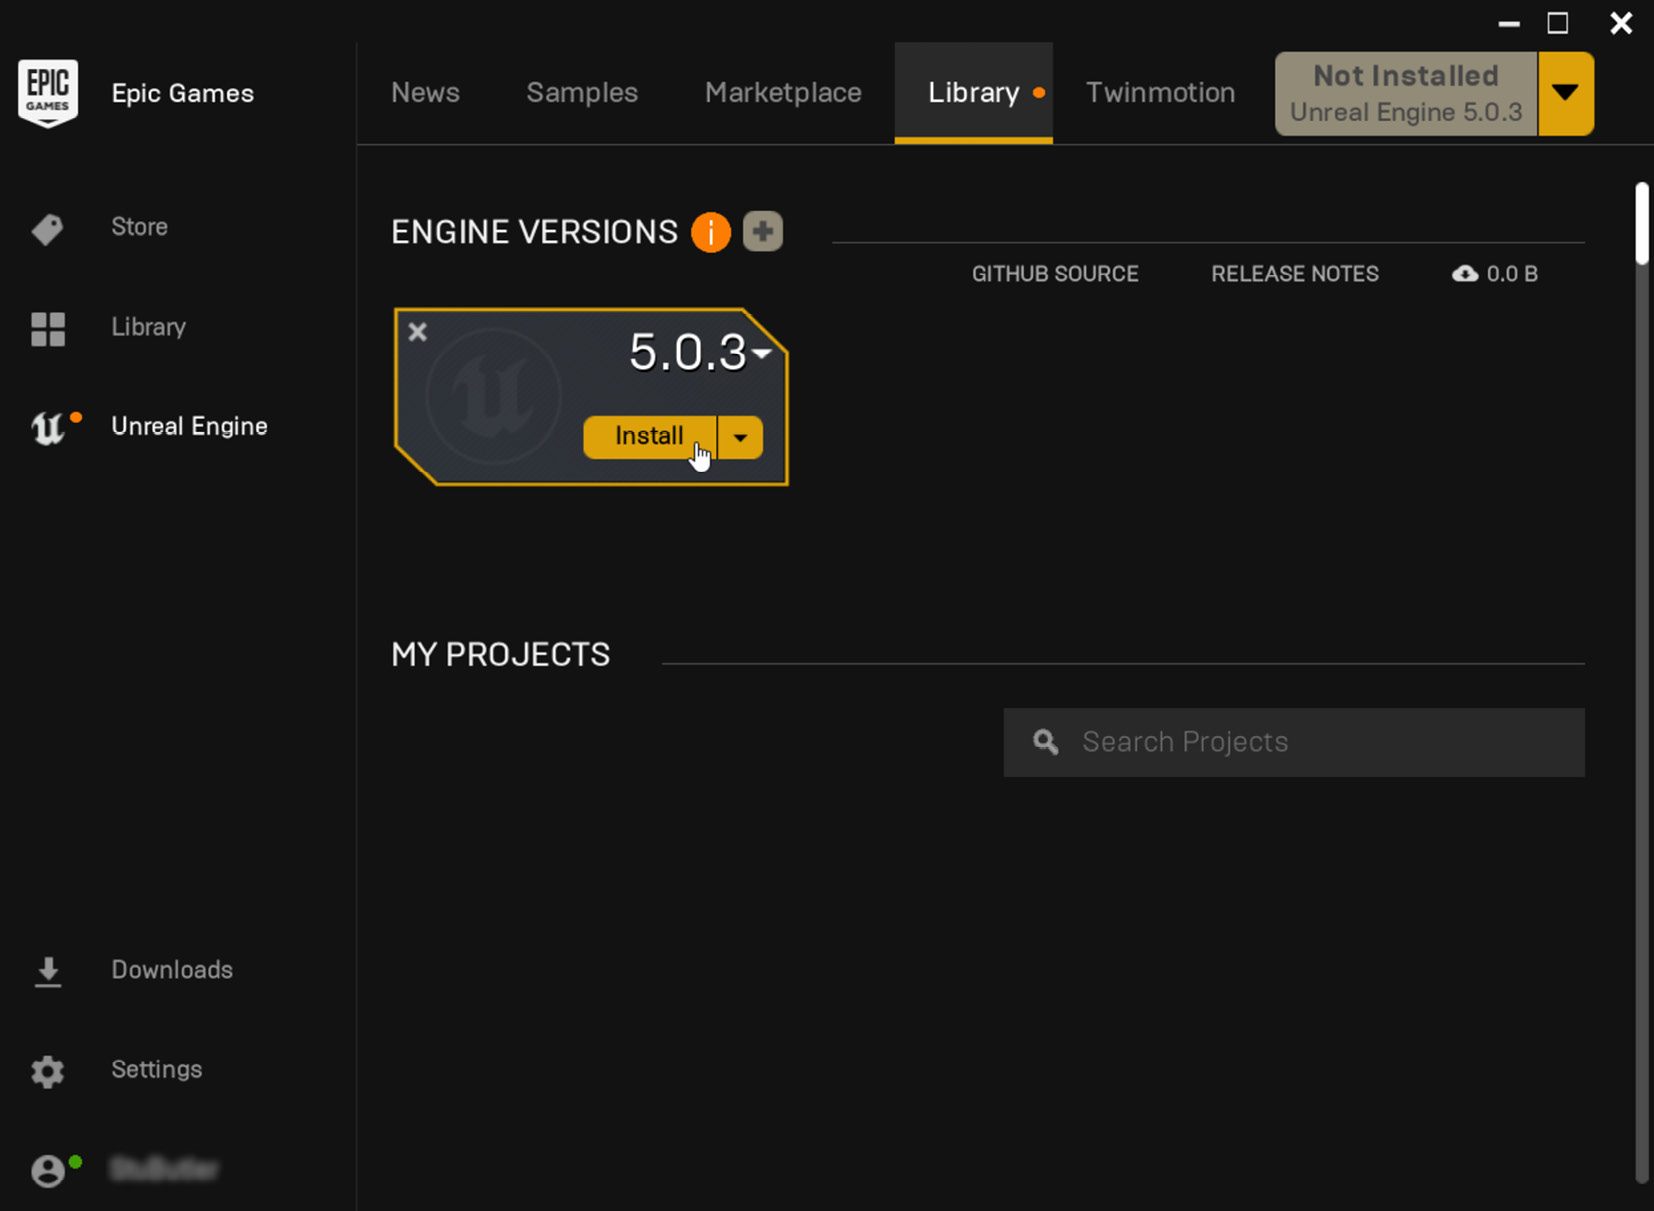
Figure 1.1 – The default Epic Games Launcher with no versions of the engine installed
Alternatively, if you don’t have any versions of the engine installed, you can click the yellow drop-down button in the top right of the Launcher application.
Both approaches will present you with the option of where you would like to install the engine. It is advisable to install the engine on an SSD if possible as the engine will load significantly quicker than from an HDD:
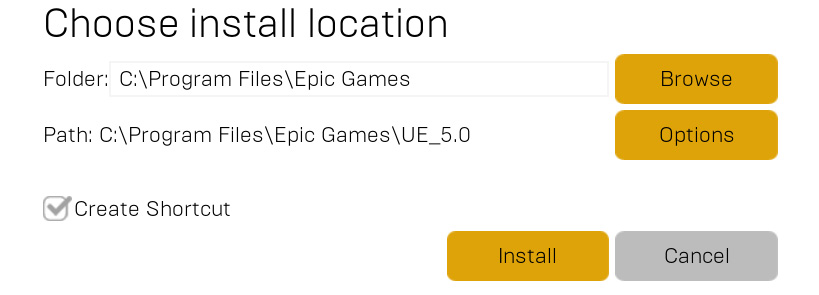
Figure 1.2 – Install location options
Clicking the Options button will present you with a series of optional elements for installing the engine:
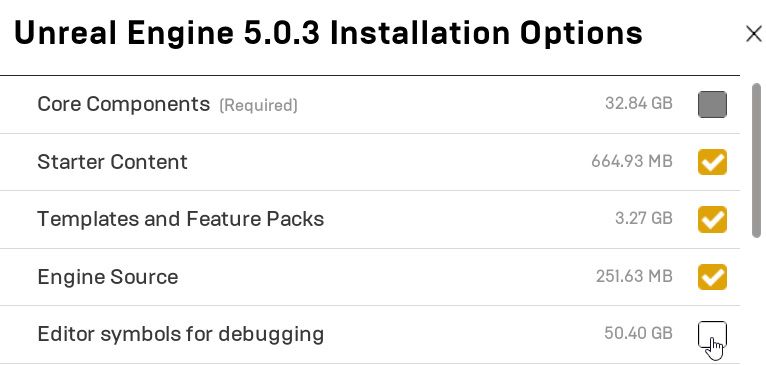
Figure 1.3 – Installation options for Unreal Engine 5.0.3
We advise installing Starter Content, Templates and Feature Packs, and Engine Source.
Engine Source will make browsing and debugging code easier but does not allow you to rebuild the engine; for that functionality, you will need to download the source from GitHub, as mentioned earlier.
Editor symbols for debugging allows the debugging of C++ in the Editor. This is not required but will prove useful to facilitate jumping from the Editor to engine code and allow you to explore the code behind Blueprint nodes.
If you decide you want to add/remove elements later, you can modify these choices by clicking the down arrow next to Launch on the engine slot and selecting Options:
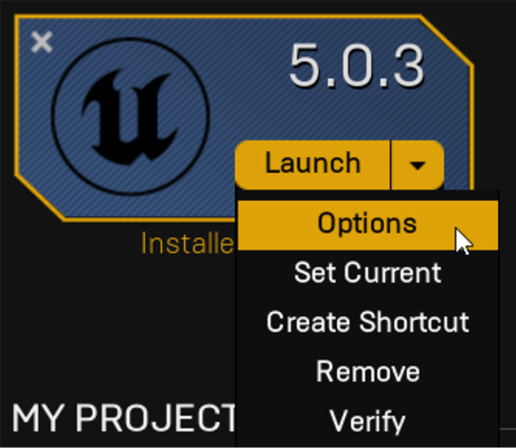
Figure 1.4 – Location of the Options menu on an engine slot
Enable the checkbox next to Editor symbols for debugging and click Apply.
Once you have the engine installed, you can move on to installing Visual Studio.
You will need to download the Visual Studio installer from https://visualstudio.microsoft.com/downloads/.
When you run the installer, select the Game Development with C++ preset in the Workloads tab and select optional components, as shown in Figure 1.5:
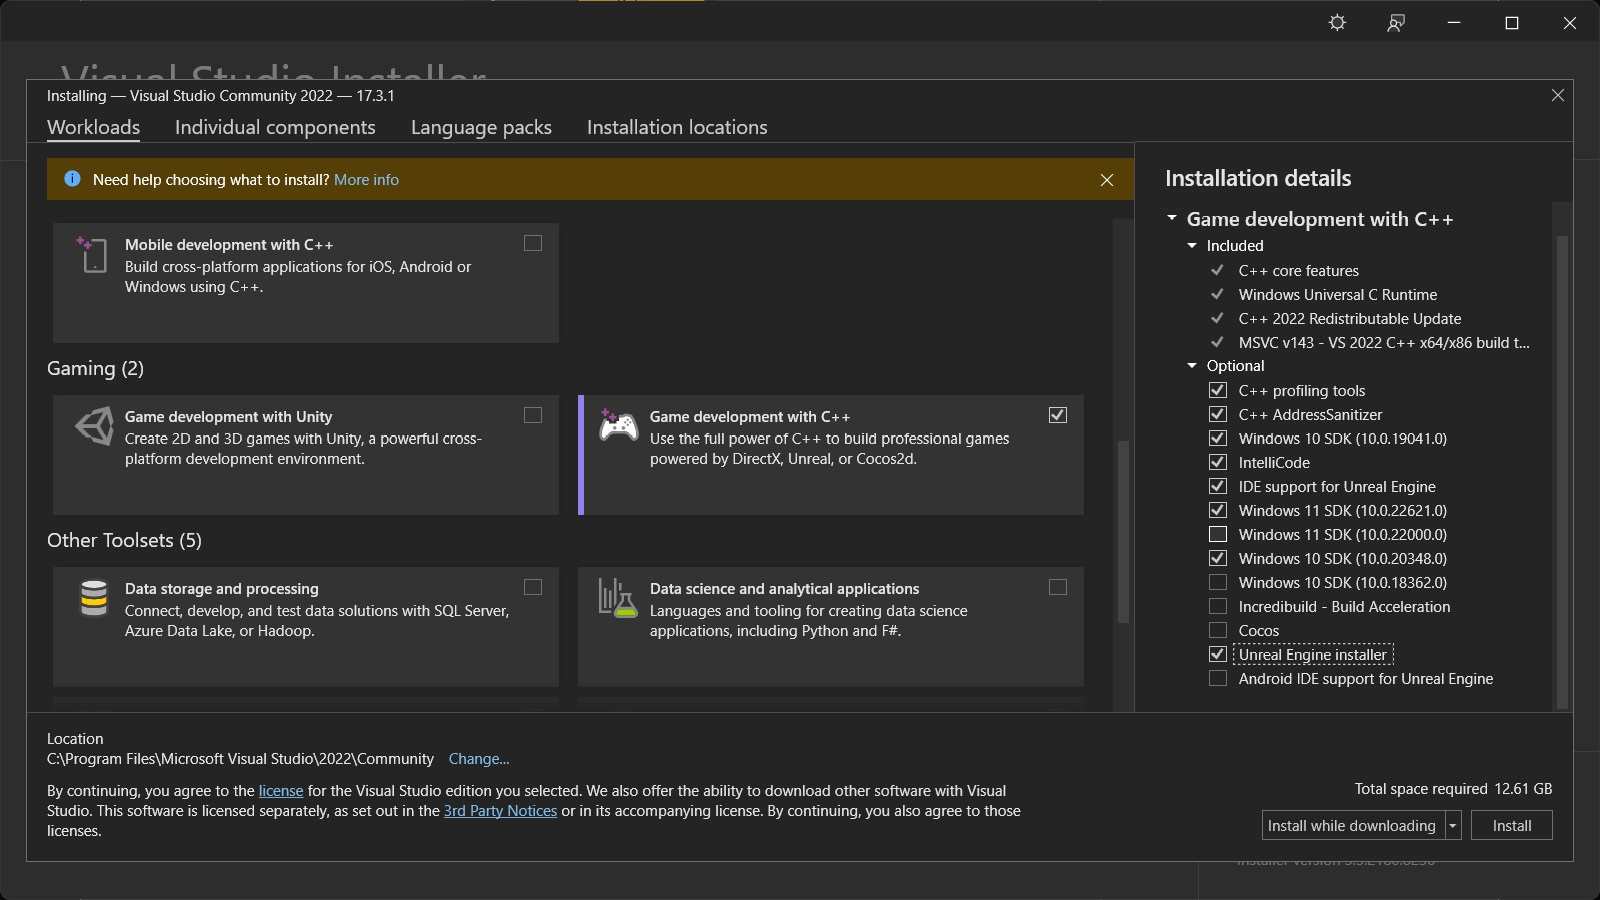
Figure 1.5 – Suggested installation options for Visual Studio Community 2022
Once you have Visual Studio installed, you should be ready to go. If you want to further improve your experience of working in Visual Studio with Unreal Engine 5.0.X, you can find some additional guidance from Epic at https://docs.unrealengine.com/5.0/en-US/setting-up-visual-studio-development-environment-for-cplusplus-projects-in-unreal-engine/.
Now that we’ve installed the engine and set up our IDE, we can start exploring the link between C++ code and Blueprint.


