Search icon CANCEL
Subscription
0
Cart icon
Your Cart (0 item)
Close icon
You have no products in your basket yet
Save more on your purchases! discount-offer-chevron-icon
Savings automatically calculated. No voucher code required.
Arrow left icon
Explore Products
Best Sellers
New Releases
Books
Videos
Audiobooks
Learning Hub
Free Learning
Arrow right icon
Arrow up icon
GO TO TOP
Dynamics 365 Application Development

You're reading from   Dynamics 365 Application Development Master professional-level CRM application development for Microsoft Dynamics 365

Arrow left icon
Product type Paperback
Published in Jan 2018
Publisher
ISBN-13 9781788399784
Length 418 pages
Edition 1st Edition
Arrow right icon
Authors (2):
Arrow left icon
Deepesh Somani Deepesh Somani
Author Profile Icon Deepesh Somani
Deepesh Somani
Nishant Rana Nishant Rana
Author Profile Icon Nishant Rana
Nishant Rana
Arrow right icon
View More author details
Toc

Table of Contents (14) Chapters Close

Preface 1. Customize Application Navigation FREE CHAPTER 2. Design Apps Using App Module Designer 3. Define Processes Using Visual Process Designer 4. Define Business Rules Using Business Rule Designer 5. Creating Custom Business Apps 6. Automate Business Processes Using Microsoft Flow 7. Develop Apps using Web API 8. Leverage Azure Extensions in Dynamics 365 9. Using Editable Grids in Apps 10. Configure Microsoft Cognitive services 11. Train the Users through Learning Path 12. Other New Features in Dynamics 365 13. Other Books You May Enjoy

Overview of the site map

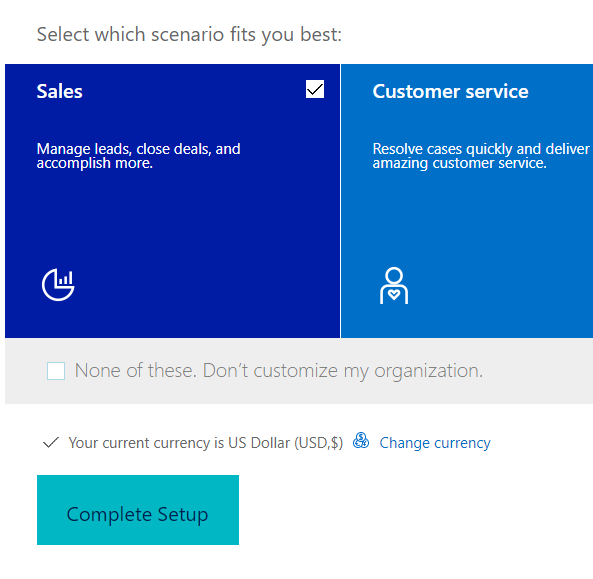
For every app that is configured, we will have a separate site map defined for it. By default, we will have a Dynamics 365 custom app configured during the set up of the Dynamics 365. We can also have other apps configured while provisioning the Dynamics 365 instance such as Sales, Field service, Project service automation, or Customer service, if we have opted for them while provisioning Dynamics 365. For now, let's try to understand the basics of using the Site Map Designer using Dynamics 365 for a Sales app. Suppose we have selected Sales while provisioning Microsoft Dynamics 365, shown as follows:
The link for the Dynamics 365 Trial with Enterprise Plan 1 can be found here: https://signup.microsoft.com/Signup?OfferId=bd569279-37f5-4f5c-99d0-425873bb9a4b&dl=DYN365_ENTERPRISE_PLAN1.

This will provision Dynamics 365 with a Sales app. This is how the navigation will look for the Sales app:

Now, as we have covered the basics of site map, let us look at the Site Map Designer interface and what components it has and how we can use it to update our site map for sales.

Overview of Site Map Designer

To access the Site Map Designer for our Sales app, perform the following steps:

  1. Log in to the Dynamics 365 Sales app with a user having System Customizer, System Administrator, or any appropriate security role to customize the site map.
  2. Go to SettingsSolutions.
  3. Create a new solution with the appropriate details. For example, we have created a solution with the name of Site Map Solution, the publisher as default publisher, and the version as 1.0.0.0.
We can also log in to the default Dynamics 365 - custom app and create a new solution and add the Sales App Site Map in it.
  1. Click on Client Extensions and add Sales App Site Map in it, shown as follows:
We can go to Settings | Customizations and update the site map in the default solution as well. However, as a best practice, we should create a separate solution and add the required components that need to be customized in it.

Double-clicking on it will open the Sales App Site Map on the Site Map Designer for us to edit. The Site Map Designer canvas allows us to work with Area, Group, and Subarea components:

Within the designer canvas, we can Add, Cut, Copy, Paste, Clone, and Delete.

Let us look at these components in detail.

Understanding components in the site map

Site map consists of three main components:

  • Area: Area can be defined as the main node or area inside the navigation pane that consists of groups and their corresponding subarea. A new area can be added or the existing area can be updated or deleted. If an area doesn't consist of any visible subarea, the area will be hidden.
  • Group: Groups can be defined as a collection or group of subareas. Just like an area, a new group can be added or an existing group can be updated or deleted.
  • Subarea: A subarea can be defined as a navigation link within the area that defines what should load inside CRM's main pane when clicked. The subarea can point to a dashboard, an entity, a URL, or a web resource. Just like area and group, a new subarea can be added and an existing subarea can be updated or deleted.

Referring to our Sales app interface:

  • Sales, Marketing, Settings, and Training are termed as areas
  • My Work, Customers, Sales, Collateral, Marketing, Goals, and Tools are groups within the Sales area
  • Dashboards, What's New, and Activities are subareas inside the My Work group.

The Sales area would have subareas specific to Sales, arranged inside what are termed as groups. Similarly, the Marketing, Settings and Training Area will have corresponding subareas inside the corresponding group. As shown in the following screenshot, the Marketing Area has Dashboards, Activities, Accounts, Contacts, Leads, Marketing Lists, Campaigns, Quick Campaigns, and so on. It also has subareas specific to the marketing module. These subareas are arranged inside the My Work, Customers, Marketing, Collateral, and Tools groups:

Now, as we have got the overview of the site map components, let us look at the different properties of each of these components in the next section.

Getting to know the area, group, and subarea properties

Let us look at the different properties of these components before we start customizing our Sales app navigation.

  • The area component comprises of following properties:
  • Group component shares most of the same properties as Area:
Set as Profile property of Group might not be relevant for Dynamics 365, as the Workplace area has been discontinued starting CRM 2013.

Subarea has few more properties compared to Area and Group:


  • As we know that the site map is basically an XML file, any changes that we are doing through Site Map Designer are basically updating the site map's XML behind the scenes:
  • To get the Sales App Site Map definition, export the solution containing the Sales App Site Map client extension and unzip it. Then, open the customizations.xml file and search for the SiteMap tag.
  • The following is the sample XML for the My Work group of the Sales area inside the Sales App Site Map. We can see the Area, Group, and SubArea tags along with their corresponding attributes:
  • As mentioned earlier, instead of using the Site Map Designer, we can manually update the site map's XML using any text editor, and can import back the solution (and publish it) to see the changes.

In this section, we looked at the properties of the area, group, and subarea components of Site Map Designer. In the next section, we will learn how to perform some basic operations such as updating, adding, deleting, and so on, on these components through Site Map Designer.

You have been reading a chapter from
Dynamics 365 Application Development
Published in: Jan 2018
Publisher:
ISBN-13: 9781788399784
Register for a free Packt account to unlock a world of extra content!
A free Packt account unlocks extra newsletters, articles, discounted offers, and much more. Start advancing your knowledge today.
Unlock this book and the full library FREE for 7 days
Get unlimited access to 7000+ expert-authored eBooks and videos courses covering every tech area you can think of
Renews at $19.99/month. Cancel anytime
Banner background image